Jones2ByrneJones
Hour of Pessimism
- Jul 27, 2012
- 15,816
- 27,971
- AFL Club
- Port Adelaide
How to make something like this:

What you'll need:
- Photoshop
- This tutorial
- An image that you want to make look realistic
Step One:
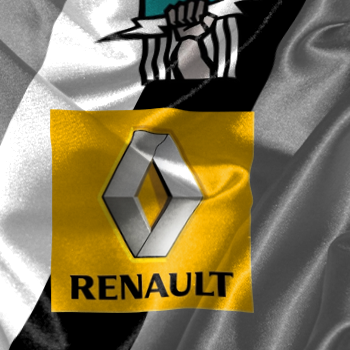
Open up a photoshop document of the image you want to make look realistic. For this tutorial, we'll use this image. Keep this document open. Try to keep the image 600 pixels wide or less, and 420 pixels high or less, because the overlay you will be using is only this big.
Step Two:
Open up ANOTHER document using the EXACT SAME dimensions as the image you want to make realistic. Copy and paste the following image onto the document.
This is the overlay we'll be using. Feel free to resize or move it around, but it is not necessary.
PROTIP: You can make your own overlay! I'll make a tutorial on how to do that later.
Notice how it is the same dimensions as the image that I want to make look realistic.
Step Three:
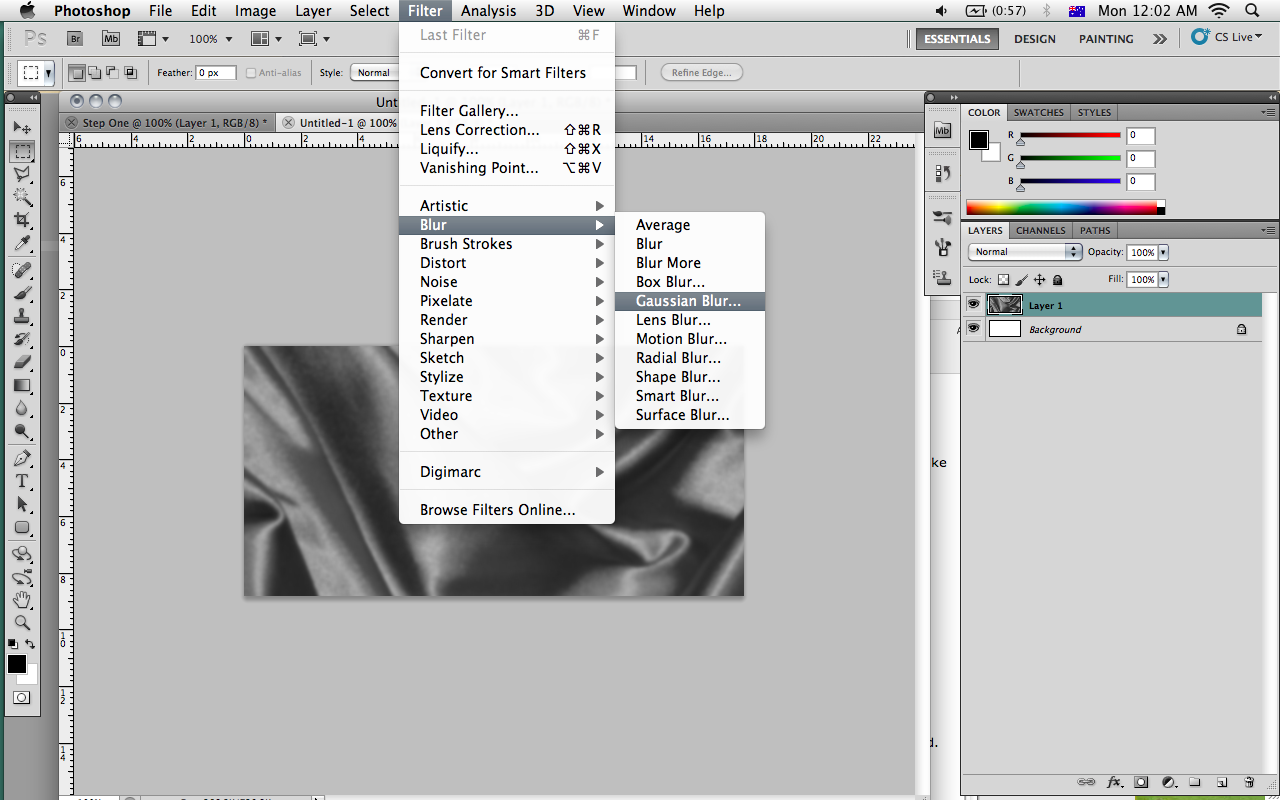
At the top of the screen, click Filter in the menu bar. Go to Blur -> Gaussian Blur. Make the radius 2.0 pixels.
Step Four:
Save this document as a .psd file. Name it whatever you like, and remember where it's saved.
Step Five:
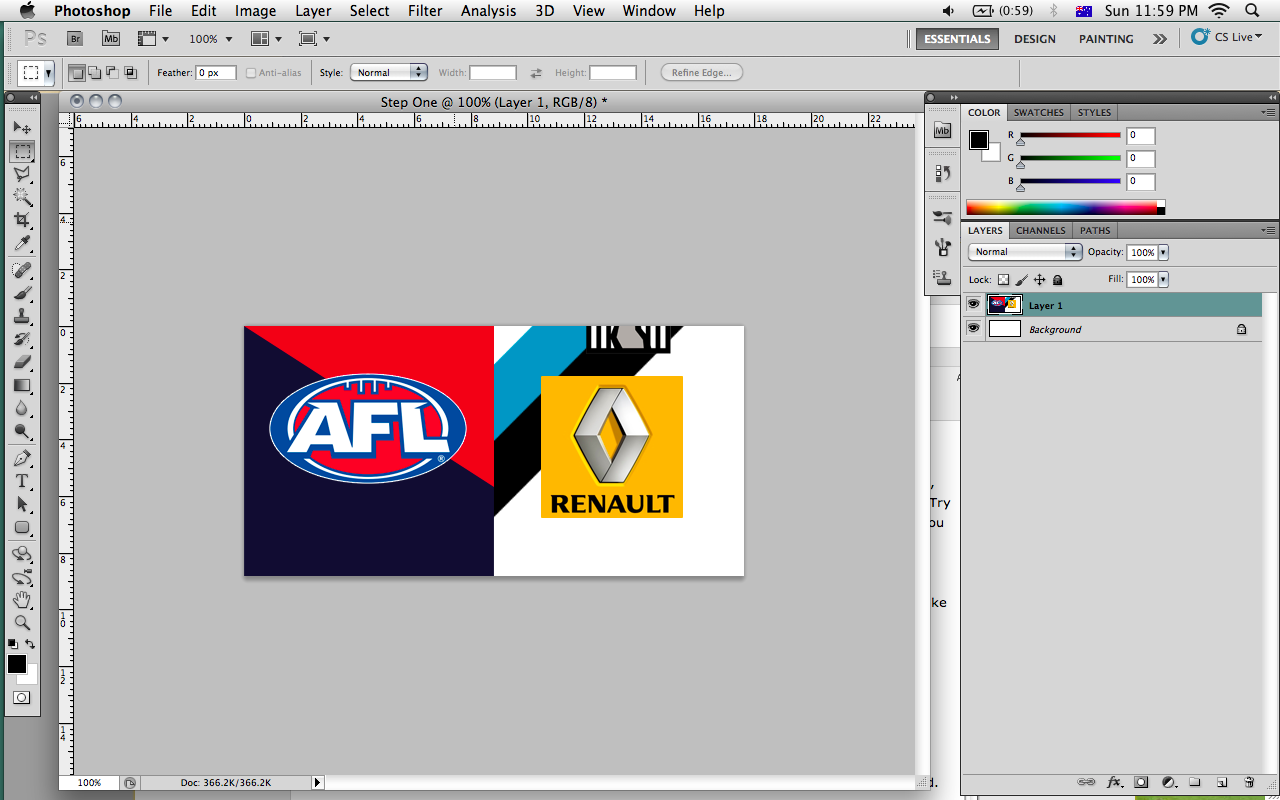
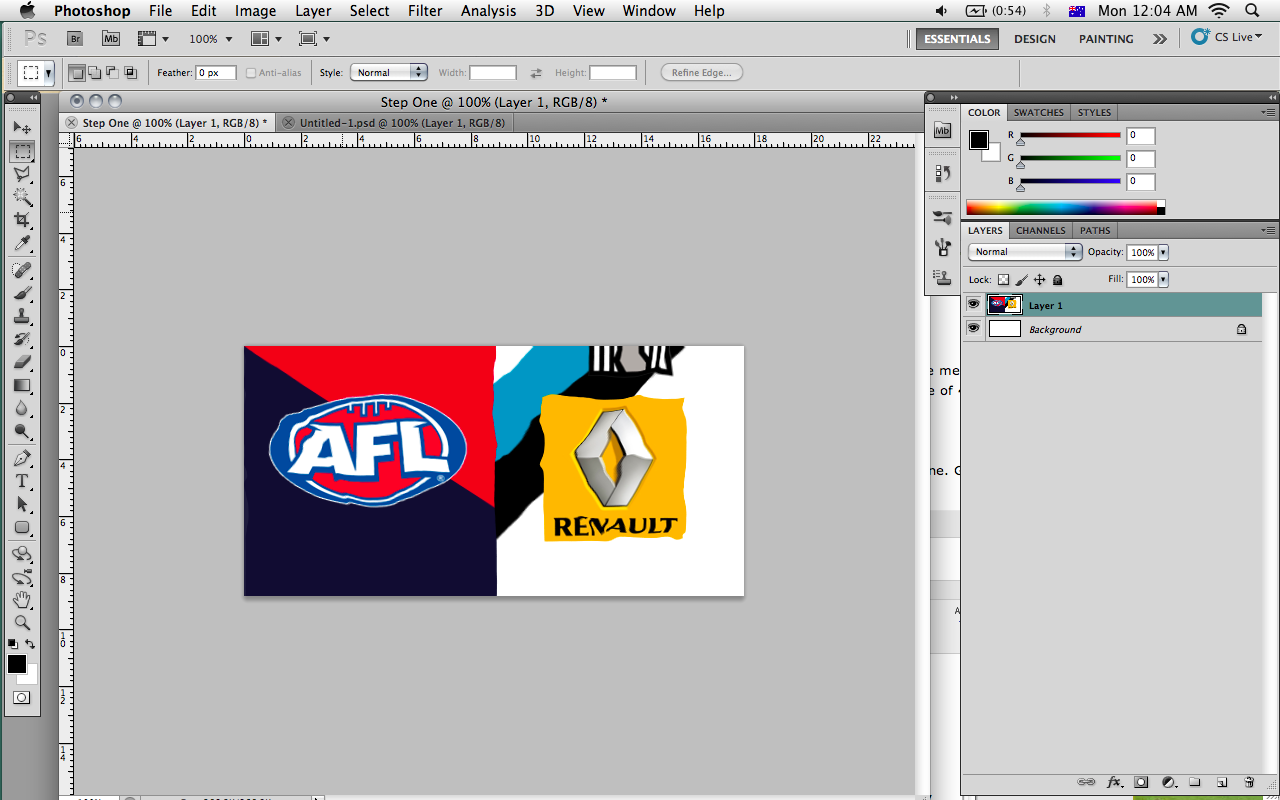
Go back to the document you had open in Step One. Click on the image, and then click Filter in the menu bar. Go to Distort -> Displace. You may have to play around, but I'd recommend a horizontal scale of 4 and a vertical scale of 4. Click okay, and then locate the .psd file that you just saved. It should look something like this:
Step Six:
Go back to the .psd file of the overlay. Undo the blur that you did in Step Three. Now, at the top of the menu bar, click Select -> All. Copy this selection. Open up the document of the image you want to make realistic, and paste the overlay on top.
Step Seven:
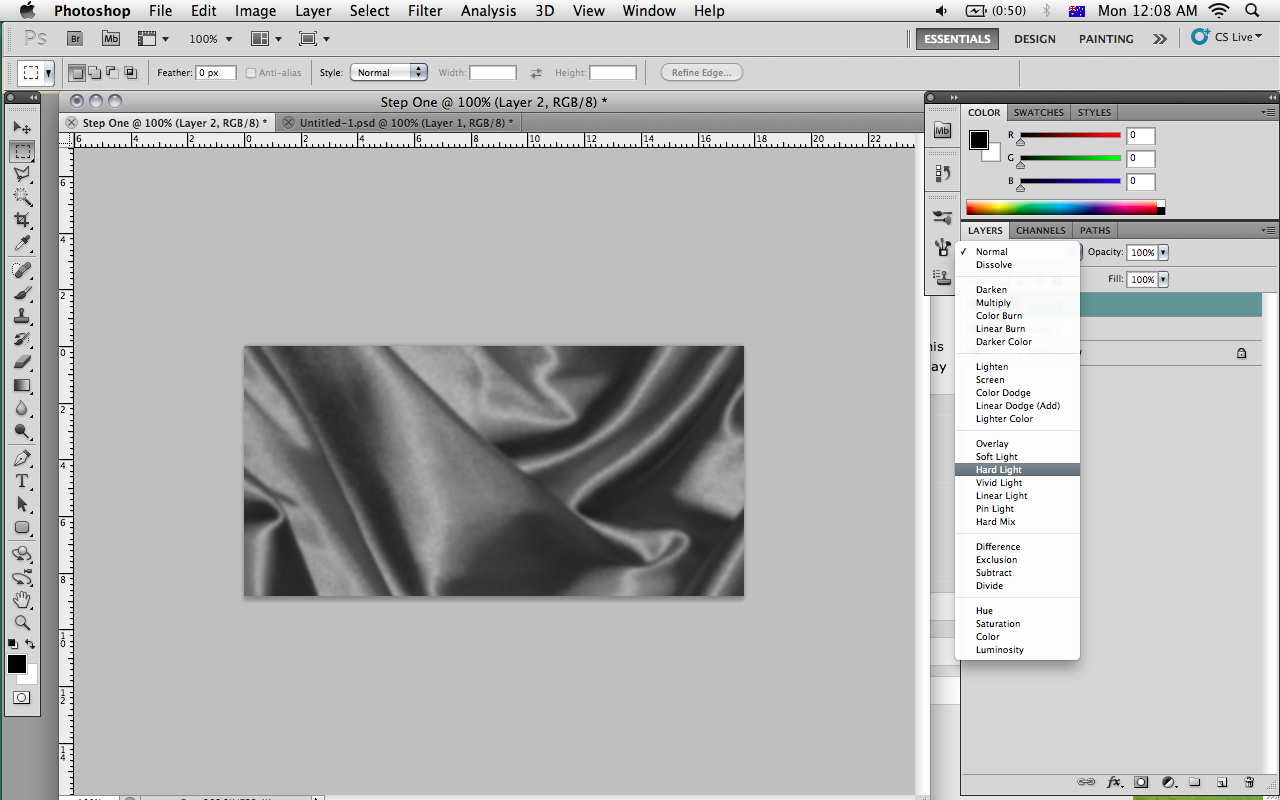
Change the blend mode of the overlay to "Hard Light". Feel free to reduce the opacity to about 70%, although this isn't necessary.
Step Eight:
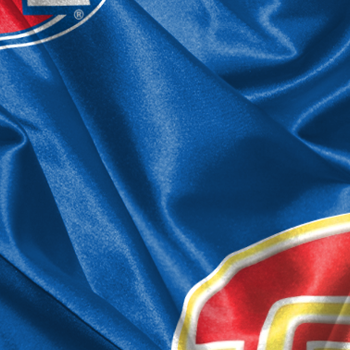
There is no step eight, you're done. It should look something like this:
Well done. Congratulations! You've converted 2D artwork into a 3D image that fits into the grooves and folds of the overlay. Sort of. Anyway, give yourself a pat on the back! You deserve it!

What you'll need:
- Photoshop
- This tutorial
- An image that you want to make look realistic
Step One:
Open up a photoshop document of the image you want to make look realistic. For this tutorial, we'll use this image. Keep this document open. Try to keep the image 600 pixels wide or less, and 420 pixels high or less, because the overlay you will be using is only this big.
Step Two:
Open up ANOTHER document using the EXACT SAME dimensions as the image you want to make realistic. Copy and paste the following image onto the document.
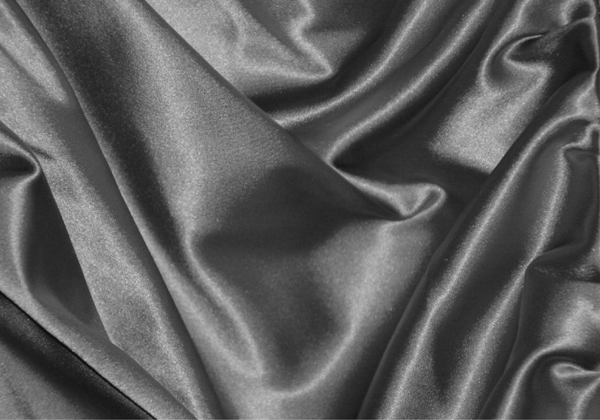
This is the overlay we'll be using. Feel free to resize or move it around, but it is not necessary.
PROTIP: You can make your own overlay! I'll make a tutorial on how to do that later.
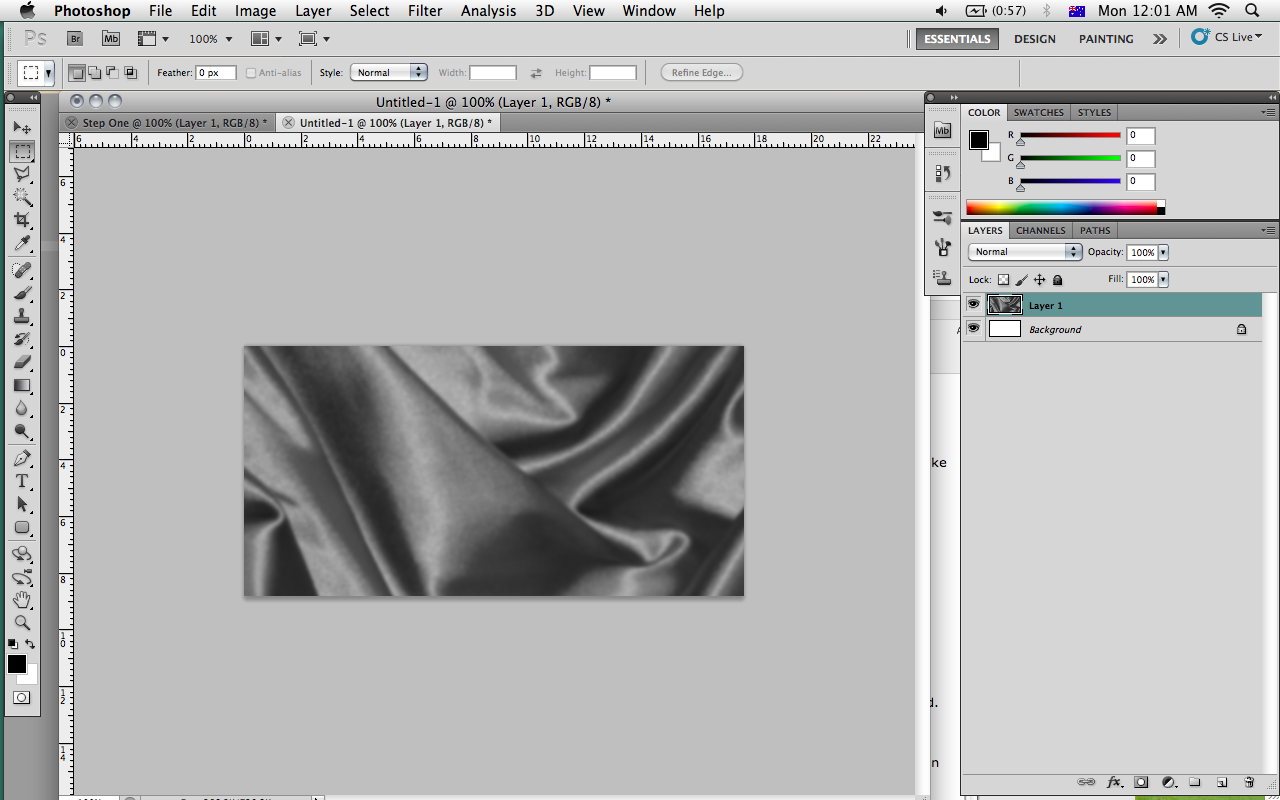
Notice how it is the same dimensions as the image that I want to make look realistic.
Step Three:
At the top of the screen, click Filter in the menu bar. Go to Blur -> Gaussian Blur. Make the radius 2.0 pixels.
Step Four:
Save this document as a .psd file. Name it whatever you like, and remember where it's saved.
Step Five:
Go back to the document you had open in Step One. Click on the image, and then click Filter in the menu bar. Go to Distort -> Displace. You may have to play around, but I'd recommend a horizontal scale of 4 and a vertical scale of 4. Click okay, and then locate the .psd file that you just saved. It should look something like this:
Step Six:
Go back to the .psd file of the overlay. Undo the blur that you did in Step Three. Now, at the top of the menu bar, click Select -> All. Copy this selection. Open up the document of the image you want to make realistic, and paste the overlay on top.
Step Seven:
Change the blend mode of the overlay to "Hard Light". Feel free to reduce the opacity to about 70%, although this isn't necessary.
Step Eight:
There is no step eight, you're done. It should look something like this:

Well done. Congratulations! You've converted 2D artwork into a 3D image that fits into the grooves and folds of the overlay. Sort of. Anyway, give yourself a pat on the back! You deserve it!