Workshop Template Feedback Thread

Remove this Banner Ad

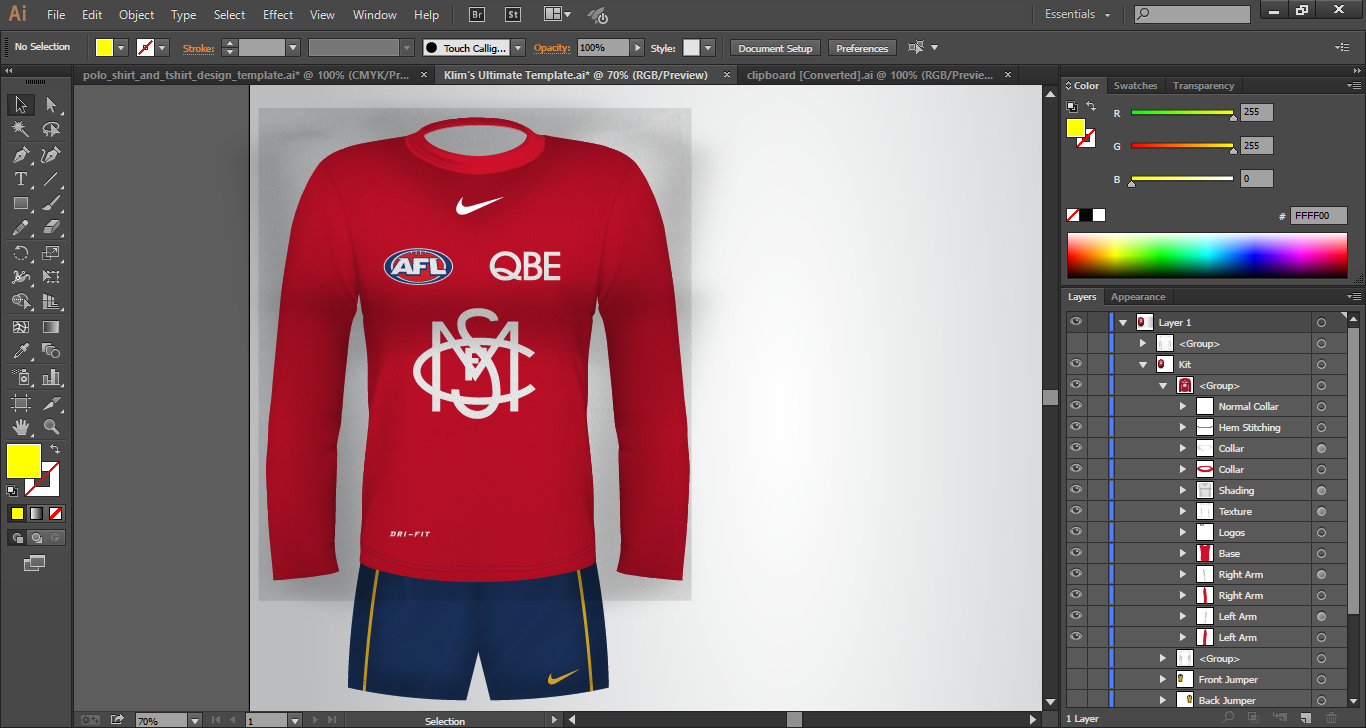
That is what I mean with using the back of the collar.

But you're not lined up with the jumper Screen Shot 2015-12-11 at 1.13.07 pm.png
See the straight line that goes behind the collar? You need to have the collar line up with the corners of that.
So line it up, and make it less curved, as it seems a bit exaggerated at the moment.
 
Also, I'd argue the triangle is a little big ATM.
Maybe make it smaller, and for design purposes, make it very slightly darker than the colour your using for the jumper base, so you can still see it , but it's not too noticeable.
 

Log in to remove this ad.

everything looks good besides the straight side panel stitching.
I'm not a fan of curved sidepanels and s**t. This doesn't interfere with designs except for sashes and hoops. And if they get printed on which is easier than on curved sidepanels, everything stays good.
 
I was directed here. Previously trying to create many different templates. Almost all of them have failed. The most recent is probably my best below you can see it in simplified form followed by a mock finished product.

MyFootyJumperTemplateSimple-S2dio.png
BillsFootyFinal.png
 
I was directed here. Previously trying to create many different templates. Almost all of them have failed. The most recent is probably my best below you can see it in simplified form followed by a mock finished product.

MyFootyJumperTemplateSimple-S2dio.png
BillsFootyFinal.png
Collar, shorts and socks curves look WAAAY too exaggerated.
 

(Log in to remove this ad.)

Eh, not bad for my first time going non-MS paint, I'll see what I can do to it on those regards...
As for the socks, what exactly - the feet?
The foot too shin ratio. Eg: My shoe (size 12) is as big as my 5yo step sisters shin. Shorten the foot.
Lift the back of the collar up a bit. My first effort was horrible, so keep at it, and work with a bigger canvas size.
 
The foot too shin ratio. Eg: My shoe (size 12) is as big as my 5yo step sisters shin. Shorten the foot.
Lift the back of the collar up a bit. My first effort was horrible, so keep at it, and work with a bigger canvas size.
I was considering making it larger as I had to downsize the stripes from uni-temp thread just a hare. The collar and cuffs are easy but the feet on the socks will be a little more interesting. My biggest concern was the shading effect on the whole thing...
 
Shape and proportion needs some work.

It's sometimes a good idea to roughly trace a player when you start out with a template to check proportions are close.

Also, when using paint, make the template massive. Make your image 5 times as big. Then when you've finished, copy it over to MSword and downsize it to the correct size there, which will stop your jagged edges.
I said it earlier in the thread, but I use Paint.Net which is in no way associated with MS Paint. I traced a hockey template of mine sans the arms and made significant overall alterations with both body's being the same in proportion. The only thing I did from scratch was the socks and that has been discussed already. As for template size, I like them smaller than larger, but thought this one could use a little extra.
 
I said it earlier in the thread, but I use Paint.Net which is in no way associated with MS Paint. I traced a hockey template of mine sans the arms and made significant overall alterations with both body's being the same in proportion. The only thing I did from scratch was the socks and that has been discussed already. As for template size, I like them smaller than larger, but thought this one could use a little extra.
Do your can a 5x bigger in paint.net then...
 
The bigger you start with, the smoother your lines will be when it's reduced. It's ultimately up to you
I see, so it's make it big so that it looks better should I decide to reduce it to be the size of what I've been working with. I think I understand the concept while still not seeing how that actually is possible... Is there an example you could show?
 
I see, so it's make it big so that it looks better should I decide to reduce it to be the size of what I've been working with. I think I understand the concept while still not seeing how that actually is possible... Is there an example you could show?
I don't, because I don't use paint, but try it. Make a really large shape, say a circle, in paint at like 3000x3000 then copy it over to word and reduce it down. You'll lose the jagged edges.
 
I see, so it's make it big so that it looks better should I decide to reduce it to be the size of what I've been working with. I think I understand the concept while still not seeing how that actually is possible... Is there an example you could show?
Step 1: Make a design in paint with your large edges.
Step 2: Copy it and paste into word
Step 3: Shrink it in word.
Step 4: Copy it and paste it back into a new paint.net document
Step 5: Save it.
 
Decided to have a crack at a long sleeve and this what I'm up to so far. Any things I need to improve on. Stitching and collar designs are coming soon, just wanted to dip it in the water.
ITM2RME.png
 

Remove this Banner Ad

Back
Top