e-AFL eAFL Round 9 - St Kilda Saints v Melbourne Demons at Marvel Stadium - Sunday 3/5/20

Who wins?

  • Saints

    Votes: 1 25.0%
  • Demons

    Votes: 3 75.0%

  • Total voters
    4

Remove this Banner Ad

0DYoxGb.png


Saints, Dees desperate to deliver


a157737c271219d4036ae357be7e3a85


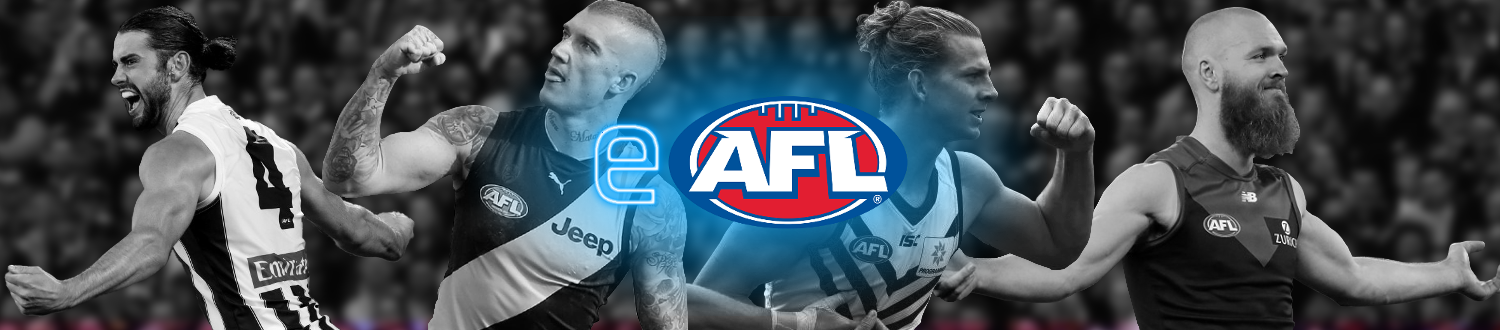
Welcome to this Round 9 clash of BigFooty's own, inaugural 2020 e-AFL season.


[TD valign="top"] Match [/TD][TD valign="top"] St Kilda Saints (14th, 3-5) v Melbourne Demons (13th, 3-5) [/TD]

[TD valign="top"] Date and Time [/TD][TD valign="top"] Sunday 3rd May 2020 [/TD]

[TD valign="top"] Previous AFL result [/TD][TD valign="top"] 28 July 2019, STK 15.14 (104) def MEL 13.7 (85) [/TD]


[TD valign="top"]
[/TD]
[TD valign="top"]
ST KILDA SAINTS
[/TD]
[TD valign="top"]
MELBOURNE DEMONS
[/TD]

[TD valign="top"] Preview [/TD][TD valign="top"] The Saints come into this Round 9 clash on a three game losing streak and sitting 14th on the ladder at the halfway mark of the season, having been outgunned by the Suns in Round 8 at home. After being demolished early in the season at home by a rampant Dockers outfit, they've struggled to recover since, and find themselves just 1 game shy of the bottom searching for a win to arrest their slide. A win this week against the Dees could mathematically see them squeeze back into the eight. [/TD][TD valign="top"] The Dees have also found the going tough in 2020, as they sit just one spot above the Saints on the ladder at 3-5 and needing a win to steady the ship. Having also been pantsed at home by a powerful Fremantle side, the Dees are just as desperate for a win as the Saints, having lost 4 of their last 5 games heading into this must win clash. They'll be looking to bounce back this week away under the roof at Marvel and would fancy their chances against a Saints side down on their luck. [/TD]

[TD valign="top"] Key matchup [/TD][TD valign="top"] Bradley Hill v Christian Petracca
The outside gun versus the inside bull, both star midfielders are crucial to their side's attack and game style. With Hill sitting #4 int he competition for handballs, and Petracca at #3 for kicks, whoever gets the most pill from these two will go along way to giving their team the advantage.[/TD]


[TD valign="top"] Key statistics [/TD]
[TD valign="top"] Last [/TD][TD valign="top"]Defeated by Gold Coast 57-100[/TD][TD valign="top"]Defeated by Fremantle 117-123[/TD]

[TD valign="top"] Goals [/TD][TD valign="top"]Max King (21, 14th)[/TD][TD valign="top"]Tom McDonald (28, 7th)[/TD]

[TD valign="top"] Marks [/TD][TD valign="top"]Bradley Hill (36, 47th)[/TD][TD valign="top"]Miichael Hibberd (46, 8th)[/TD]

[TD valign="top"] Disposals [/TD][TD valign="top"]Bradley Hill (165, 18th)[/TD][TD valign="top"]Christian Petracca (167, 14th)[/TD]

[TD valign="top"] Tackles [/TD][TD valign="top"]Seb Ross (41, 13th)[/TD][TD valign="top"]Christian Petracca (51, 3rd)[/TD]

[TD valign="top"] Fantasy [/TD][TD valign="top"]Rowan Marshall (665, 9th)[/TD][TD valign="top"]Christian Petracca (694, 5th)[/TD]


Predicted result: Dees by 27 points

Who do you think will win? Vote in the poll above, comment below and join us for the match as it happens.


With the real season in limbo, we at BigFooty are recreating the 2020 season in simulation. Every team has the same chance of winning. See https://www.bigfooty.com/forum/threads/afl-season-to-be-rebooted-in-simulation.1237892/ for further details.


Saints team thread:
https://www.bigfooty.com/forum/threads/e-afl-saints-team-thread.1238071/
Gosaints12 Sab22 Papa Juggs


Demons team thread: https://www.bigfooty.com/forum/threads/2020-e-afl-season-round-8-vs-dockers-help-pick-the-demons-team.1238079/
FootyGuy13 harry000 Headless Proper Gander


Ant Bear Wooshette Loonerty NaturalDisaster
 
Last edited:

Log in to remove this ad.

Team up;

FB: D Roberton/ D Howard/ C Wilkie
HB: Z Jones/J Battle/H Clark
C: B Hill/J Steele/ D Hannebery
HF: D Butler/T Membrey/J Billings
FF: J Lonie/ M King/J Gresham
Fol: S Ross/L Dustan/R Marshall
Bch:B Long/J Carsile

Sorry for my spelling.
 
Melbourne Demons Official Team Round 9
B: Neville Jetta - Steven May - Christian Salem
HB: Nathan Jones– Jake Lever - Michael Hibberd
C: Ed Langdon - Clayton Oliver – Adam Tomlinson
HF: Aaron Vandenberg - Luke Jackson - Jake Melksham
F: James Harmes - Tom McDonald - Mitch Brown
Foll: Max Gawn - Christian Petracca - Jack Viney
INT: Kysaiah Pickett – Jay Lockhart

NO CHANGES
 
sQooty Commentary File - QOOTY (Quick Footy) Version 10.5
Qooty Website - http://qooty.footypedia.com


Match commencing shortly ... STK v MEL

Rich (BB code):
                       MEL
D Roberton                  D Howard                 C Wilkie
M Brown                     T McDonald               J Harmes

Z Jones                     J Battle                 H Clark
J Melksham                  L Jackson                A Vandenberg

B Hill                      J Steele                 D Hannebery
A Tomlinson                 C Oliver                 E Langdon

D Butler                    T Membery                J Billings
M Hibberd                   J Lever                  N Jones

J Lonie                     M King                   J Gresham
C Salem                     S May                    N Jetta
                            STK

STK Foll : S Ross, L Dunstan, R Marshall
MEL Foll : M Gawn, C Petracca, J Viney

STK INT : B Long, J Carsile
MEL INT : K Pickett, J Lockhart

PLAYERS TO WATCH :
St Kilda Saints: B Hill M King S Ross
Melbourne Demons: M Gawn C Petracca

Round 09, Conditions for this match - CLOUDY
 
1 : 0 {C} - S Ross palms the ball down.
1 : .07 {C} - Now J Steele has the ball. What can he do with it?.
1 : .12 {C} - He has a bounce.
1 : .16 {rHFF} - He kicks off the wrong boot.
1 : .18 {rHFF} - Top mark - not paid.
1 : .22 {rHFF} - D Butler does some crumbing and is away.
1 : .26 {rHFF} - D Butler's kick is close to the boundary. In fact its over the boundary.
1 : .3 {lHBF} - M Hibberd has possession.
1 : .32 - <<< J Carsile is coming on to replace D Roberton >>>
1 : .4 {lHBF} - M Hibberd has possession.
1 : .45 {lHBF} - Someone's changing.
1 : .47 - <<< C Petracca is trading places with E Langdon >>>
1 : .55 {lHBF} - M Hibberd to send the ball forward.
1 : .59 {rW} - He gets boot to ball immediately.
1 : 1.01 {rW} - C Petracca gets crunched in that marking contest but comes out with the ball.
1 : 1.05 {rW} - C Petracca slowing down the play.
1 : 1.09 {lW} - Huge handpass to A Tomlinson. As good as a kick.
1 : 1.13 {C} - Kick goes sideways.
1 : 1.16 {C} - But straight to J Steele.
1 : 1.2 {C} - J Steele sizes the options in front of him.
1 : 1.23 {C} - A quick handpass to R Marshall.
1 : 1.28 {C} - R Marshall has a bounce.
1 : 1.32 {rW} - A wild kick laterally towards B Hill.
1 : 1.34 {rW} - A Tomlinson gets a timely fist to the ball.
1 : 1.38 {lW} - A Tomlinson has it.
1 : 1.42 {lW} - He has a bounce.
1 : 1.46 {CHF} - He kicks off the wrong boot.
1 : 1.49 {CHF} - L Jackson traps the ball beautifully.
1 : 1.52 {CHF} - L Jackson wants to get on with proceedings.
1 : 1.57 {CHF} - L Jackson has a bounce.
1 : 2.01 {lFP} - M Brown and J Carsile jostle for position.
1 : 2.03 {lFP} - M Brown slips at the crucial moment and its marked by J Carsile.
1 : 2.07 {rBP} - J Carsile has possession.
1 : 2.11 {lHBF} - He rewards the H Clark lead.
1 : 2.15 {lHBF} - A Vandenberg upset the marking attempt by H Clark.
1 : 2.17 {lHBF} - H Clark dances around A Vandenberg.
1 : 2.22 {lHBF} - Long handpass to the running R Marshall.
1 : 2.25 {rW} - He tries to find B Hill with a chip pass.
1 : 2.3 {rW} - A Tomlinson drops an absolute sitter.
1 : 2.35 {lW} - A Tomlinson picks it up on the bounce.
1 : 2.35 {rW} - A wild kick laterally towards C Petracca.
1 : 2.4 {rW} - C Petracca spills the mark.
1 : 2.44 {rW} - Now C Petracca has the ball. What can he do with it?.
1 : 2.46 {rW} - There's a push-out.
1 : 2.5 {lW} - D Hannebery to send the ball forward.
1 : 2.54 {rW} - A lookaway handpass to B Hill.
1 : 2.58 {C} - No-look handpass to J Steele.
1 : 3.02 {CHF} - A wild handball - but luckily R Marshall was well placed to clean up.
1 : 3.07 {CHF} - He involves L Dunstan in the play.
1 : 3.09 {CHF} - Good bump as L Dunstan kicks - enough that the ball sprays over the boundary.
1 : 3.13 {CHB} - J Lever has possession.
1 : 3.17 {CHB} - J Lever just boots it forward towards the boundary. The umpire pings him for deliberate.
1 : 3.19 {rHFF} - D Butler has it. What can he do with it?.
1 : 3.24 {rHFF} - He has a bounce.
1 : 3.27 {rHFF} - Hands it off to R Marshall.
1 : 3.31 {rHFF} - That looks pretty close ....
1 : 3.34 {rHFF} - Didn't look good off the boot - a minor score.
St Kilda Saints : 0.1.1
Melbourne Demons : 0.0.0

1 : 3.42 {FB} - S May with the ball now.
1 : 3.46 {rBP} - A poor handpass but N Jetta is up to the challenge.
1 : 3.48 {CHB} - J Lever presents on a long lead.
1 : 3.52 {CHB} - The ball spills free.
1 : 3.57 {CHF} - T Membery looking for a lead.
1 : 4 {lFP} - Passes to J Gresham by hand.
1 : 4.04 {FF} - A slick handpass goes to M King.
1 : 4.07 {FF} - M King from thirty metres.
1 : 4.1 {FF} - M King gets the goal.
St Kilda Saints : 1.1.7
Melbourne Demons : 0.0.0

1 : 4.15 {C} - Neither ruckman can take advantage of the bounce.
1 : 5.15 {rW} - Quality gather by B Hill.
1 : 5.16 {rW} - Quick hands to L Dunstan.
1 : 5.16 {CHF} - His kick is towards T Membery.
1 : 5.16 {CHF} - J Lever gets a timely fist to the ball.
1 : 5.19 {CHB} - Quality gather by J Lever.
1 : 5.19 {CHB} - An underground handpass to J Viney.
1 : 5.19 {lHBF} - Long handpass to the running M Hibberd.
1 : 5.2 {C} - A kick towards C Oliver territory.
1 : 5.2 {C} - C Oliver is caught under pressure and knocks the ball forward.
1 : 5.23 {C} - C Oliver with some space now.
1 : 5.23 {rW} - Handballs to C Petracca.
1 : 5.25 {rW} - C Petracca loves a shot at goal.
1 : 5.25 {rW} - Starts left... comes right... goes through the middle.
St Kilda Saints : 1.1.7
Melbourne Demons : 1.0.6

1 : 5.25 {C} - That really should have been thrown up rather than bounced.
1 : 5.27 {lW} - S Ross takes them on.
1 : 5.27 {lW} - S Ross nearly got done for running too far but he remembers to bounce at last.
1 : 5.29 {rHFF} - He kicks off the wrong boot.
1 : 5.29 {rHFF} - The umpire calls play on.
1 : 5.31 {rHFF} - D Butler sizes the options in front of him.
1 : 5.35 {rHFF} - M Hibberd sews D Butler up in a fantastic tackle.
1 : 5.37 {CHB} - J Lever fighting to get a clear kick.
1 : 5.41 {CHB} - Gets hands off within the nick of time.
1 : 5.48 {CHB} - Draws a man and then with hands to E Langdon.
1 : 5.49 {CHB} - Great tackle by L Dunstan.
1 : 5.52 {lHFF} - J Billings has a paddock.
1 : 5.58 {lHFF} - He has a bounce.
1 : 6 {CHF} - Handpasses to T Membery.
1 : 6.04 {lHFF} - A slick handpass goes to J Billings.
1 : 6.06 {rHFF} - A short kick to D Butler.
1 : 6.12 {rHFF} - But chipping in front is M Hibberd.
1 : 6.2 {rHBF} - A bit of space for N Jones to utilise.
1 : 6.22 {lW} - Hurried kick towards A Tomlinson.
1 : 6.37 {lW} - No mark taken as A Tomlinson and B Hill wrestle for position.
1 : 6.37 {rW} - B Hill sizes the options in front of him.
1 : 6.39 {rW} - He has a bounce.
1 : 6.39 {rW} - B Hill loves a shot at goal.
1 : 6.41 {rW} - All clear from the umpire. Its a goal.
St Kilda Saints : 2.1.13
Melbourne Demons : 1.0.6

1 : 6.41 {C} - Neither ruckman can take advantage of the bounce.
1 : 6.49 {lW} - E Langdon has possession.
1 : 6.55 {lW} - He gets a handpass to M Gawn.
1 : 6.55 {C} - A wild kick laterally towards C Oliver.
1 : 6.58 {C} - C Oliver and J Steele both holding each other. No mark.
1 : 7.04 {C} - C Oliver streaming down the ground.
1 : 7.14 {C} - A lookaway handpass to E Langdon.
1 : 7.14 {C} - E Langdon has a bounce.
1 : 7.2 {CHF} - E Langdon is still looking for options and takes another.
1 : 7.24 {FF} - A hospital kick.
1 : 7.33 {FF} - But in the way is D Howard.
1 : 7.35 {lBP} - C Wilkie fighting to get a clear kick.
1 : 7.35 {lBP} - C Wilkie runs into J Harmes and is getting up very slowly.
1 : 7.37 {rFP} - Its hard and tough but J Harmes wins possession.
1 : 7.39 {rFP} - Huge handpass to J Viney. As good as a kick.
1 : 7.39 {rFP} - J Viney about twenty-five out.
1 : 7.41 {rFP} - The umpires consult and decide that one shaved the post.
St Kilda Saints : 2.1.13
Melbourne Demons : 1.1.7

1 : 7.49 {FB} - D Howard looking for a lead.
1 : 7.57 {FB} - A quick handpass to S Ross.
1 : 8.01 {FB} - Handpasses to R Marshall.
1 : 8.07 {rHBF} - He sends the ball to Z Jones.
1 : 8.1 {rHBF} - Spoilt by J Melksham.
1 : 8.1 {rHBF} - Z Jones with all the time in the world.
1 : 8.11 {rHBF} - Fires out the handpass to L Dunstan.
1 : 8.14 {rHBF} - Great tackle on L Dunstan.
1 : 8.18 {CHF} - Who wants it? L Jackson does. Great stuff.
1 : 8.22 {lHFF} - Quick hands to J Melksham under pressure.
1 : 8.24 {FF} - His kick is towards T McDonald.
1 : 8.28 {FF} - Atrocious kick. Not even kilometre perfect.
1 : 8.33 {FB} - D Howard threads his way through traffic.
1 : 8.38 {FB} - A long looping handpass to L Dunstan.
1 : 8.4 {rBP} - Gives the ball to J Carsile.
1 : 8.43 {rBP} - J Carsile dummy's the handpass and then takes a bounce.
1 : 8.47 {rBP} - Handballs to L Dunstan.
1 : 8.51 {lBP} - Handballs to C Wilkie.
1 : 8.53 {lBP} - C Wilkie bounces the ball.
1 : 8.57 {lBP} - A poor handpass but R Marshall is up to the challenge.
1 : 9.01 {lBP} - Handpasses to C Wilkie.
1 : 9.06 {lBP} - L Dunstan receives his handpass.
1 : 9.07 {lBP} - Huge handpass to C Wilkie. As good as a kick.
1 : 9.11 {FB} - He kicks across the ground towards D Howard.
1 : 9.16 {FB} - The ball spills free.
1 : 9.2 {FF} - T McDonald scoops up the ball.
1 : 9.23 {FF} - He has a bounce.
1 : 9.26 {FF} - T McDonald steadies himself and has a shot ....
1 : 9.3 {FF} - This will be - and is - a goal to T McDonald.
St Kilda Saints : 2.1.13
Melbourne Demons : 2.1.13

1 : 9.36 {C} - S Ross knocks the ball down.
1 : 9.4 {lW} - M Gawn has possession.
1 : 9.45 {lW} - Flicks it to J Viney.
1 : 9.51 {rHFF} - A bit of a miskick.
1 : 9.53 {rHFF} - The umpire calls play on.
1 : 9.55 {lHBF} - Running with the ball is H Clark.
1 : 10.03 {lHBF} - H Clark takes a bounce and nearly fumbles it.
1 : 10.03 {CHB} - Sees J Battle out of the corner of his eye.
1 : 10.18 {CHB} - L Jackson takes one of the best marks you'll ever see.
1 : 10.23 {lHFF} - J Melksham sizes the options in front of him.
1 : 10.3 {CHF} - Spears a kick towards L Jackson.
1 : 10.3 {CHF} - J Battle did enough to prevent a mark being taken.
1 : 10.32 {CHF} - Its hard and tough but L Jackson wins possession.
1 : 10.34 {CHF} - Quick hands to J Viney.
1 : 10.36 {CHF} - But J Viney tripped up S Ross.
1 : 10.36 {rHBF} - Z Jones sizes the options in front of him.
1 : 10.42 {lHBF} - Handballs to H Clark.
1 : 10.42 {lHBF} - A Vandenberg ducks into the tackle and emerges with the free.
1 : 10.42 {lHFF} - J Melksham has it.
1 : 10.46 {lHFF} - He takes the opportunity to bounce.
1 : 10.51 {lHFF} - Draws a man and then with hands to J Viney.
1 : 10.56 {rHFF} - Gives the ball to A Vandenberg.
1 : 11.01 {FF} - He chooses the sensible option - to kick it long.
1 : 11.07 {FF} - But D Howard is standing in the way and marks.
1 : 11.09 {FB} - Now D Howard has the ball. What can he do with it?.
1 : 11.11 {rBP} - He involves J Carsile in the play.
1 : 11.11 {CHB} - He chooses the sensible option - to kick it long.
1 : 11.15 {CHB} - Ohhh. J Battle runs back with the flight of the ball and nearly gets cleaned up.
1 : 11.21 {CHB} - J Battle slowing down the play.
1 : 11.23 {rW} - A kick towards B Hill territory.
1 : 11.25 {rW} - B Hill traps the ball beautifully.
1 : 11.3 {rW} - B Hill has possession.
1 : 11.34 {rHFF} - No-look handpass to L Dunstan.
1 : 11.38 {rHFF} - Goes the torp..
1 : 11.4 {rHFF} - Did E Langdon manage to get a finger to it? He did.
St Kilda Saints : 2.2.14
Melbourne Demons : 2.1.13

1 : 11.48 {FB} - C Salem has possession.
1 : 11.52 {lHBF} - He kicks towards M Hibberd and D Butler.
1 : 11.56 {lHBF} - Ooh the kick has gone straight to D Butler.
1 : 11.58 {rHFF} - D Butler has it. What can he do with it?.
1 : 12.03 {FF} - Boots the ball toward M King.
1 : 12.07 {FF} - S May will take this. No - he's dropped it.
1 : 12.11 {rBP} - N Jetta has it.
1 : 12.15 {lHBF} - He tries to find M Hibberd with a chip pass.
1 : 12.19 {lHBF} - Atrocious kick. Not even kilometre perfect.
1 : 12.21 {rHFF} - D Butler has it.
1 : 12.3 {rHFF} - A poor handpass but S Ross is up to the challenge.
1 : 12.3 {rHFF} - S Ross sells the dummy and helps himself to a bounce.
1 : 12.31 {lFP} - Gets onto his preferred foot and boots it long.
1 : 12.37 {lFP} - That's poor kicking and the mark is swallowed up by N Jetta.
1 : 12.41 {lBP} - C Salem signals for his teammates to present.
1 : 12.48 {rBP} - Quick hands to N Jetta under pressure.
1 : 12.48 {rBP} - N Jetta got into the back of J Gresham.
1 : 12.5 {FF} - M King has it.
1 : 12.54 {FF} - M King's eyes light up - he fires at goal.
1 : 12.56 {FF} - M King adds a minor score to his team's total.
St Kilda Saints : 2.3.15
Melbourne Demons : 2.1.13
 
1 : 13.06 {FB} - S May looking for a lead.
1 : 13.1 {rBP} - Spears a kick towards N Jetta.
1 : 13.1 {rBP} - J Gresham drops an absolute sitter.
1 : 13.15 {lFP} - J Gresham looking for a lead.
1 : 13.19 {lFP} - What a tackle.
1 : 13.23 {rBP} - N Jetta signals for his teammates to present.
1 : 13.27 {lHBF} - Hoofs it forward..
1 : 13.29 {lHBF} - The umpire calls play on.
1 : 13.33 {lHBF} - M Hibberd slowing down the play.
1 : 13.39 {rW} - That's a real up and under.
1 : 13.41 {rW} - The umpire calls play on.
1 : 13.43 {lW} - A bit of space for D Hannebery to utilise.
1 : 13.48 {rHFF} - Pumps it long for D Butler.
1 : 13.52 {rHFF} - Top mark - not paid.
1 : 13.56 {lHBF} - M Hibberd has it. What can he do with it?.
1 : 13.58 {lHBF} - He involves M Gawn in the play.
1 : 14.02 {rW} - He chooses the sensible option - to kick it long.
1 : 14.06 {rW} - In the right place at the right time is C Petracca who marks.
1 : 14.1 {rW} - C Petracca looks downfield.
1 : 14.12 {rW} - D Hannebery sews C Petracca up in a fantastic tackle.
1 : 14.16 {lW} - With the ball is D Hannebery.
1 : 14.21 {C} - Almost a throw to J Steele.
1 : 14.26 {C} - J Steele sells the dummy and helps himself to a bounce.
1 : 14.29 {C} - C Oliver applies the tackle on J Steele.
1 : 14.31 {C} - C Oliver has possession.
1 : 14.35 {C} - No-look handpass to E Langdon.
1 : 14.39 {rW} - Quick hands to C Petracca under pressure.
1 : 14.43 {lW} - He transfers play using A Tomlinson.
1 : 14.45 {lW} - A Tomlinson has one two three bites of the cherry and it's paid.
1 : 14.52 {lW} - A Tomlinson with the ball now.
1 : 14.53 {rHFF} - Hoofs it forward..
1 : 15.08 {rHFF} - A Vandenberg spills the mark.
1 : 15.14 {lHBF} - Nobody's checking H Clark.
1 : 15.16 - <<< J Lockhart is coming on to replace N Jetta >>>
1 : 15.16 {lHBF} - H Clark with the ball now.
1 : 15.16 {lW} - A wild handball - but luckily D Hannebery was well placed to clean up.
1 : 15.18 {C} - Finds J Steele with a handball.
1 : 15.22 {lW} - Gets a handpass away to D Hannebery.
1 : 15.26 {rHFF} - He kicks to a contest.
1 : 15.28 {rHFF} - Anybody's ball.
1 : 15.33 {rHFF} - Who wants it? D Butler does. Great stuff.
1 : 15.37 {CHF} - Flicks it to T Membery.
1 : 15.41 {CHF} - Brought down by J Lever.
1 : 15.45 {CHB} - J Lever does some crumbing and is away.
1 : 15.47 - <<< N Jetta is coming on to replace L Jackson >>>
1 : 15.55 {CHB} - J Lever weaves through the congestion.
1 : 16 {CHB} - He involves M Gawn in the play.
1 : 16.01 {rHBF} - Handpass to space. N Jones runs onto it.
1 : 16.06 {rHBF} - Heavy clash between J Billings and N Jones. J Billings comes off marginally better and collects the ball.
1 : 16.1 {lHFF} - J Billings is now off and running.
1 : 16.14 {lHFF} - No-one on the mark! J Billings takes off and kicks long at goal.
1 : 16.16 {lHFF} - Will it come around? No.
St Kilda Saints : 2.4.16
Melbourne Demons : 2.1.13

1 : 16.24 {FB} - So S May ... with a moment to digest his options.
1 : 16.28 {FB} - But a free kick for kicking in danger.
1 : 16.3 {lFP} - The ball is now with J Gresham.
1 : 16.34 {lFP} - J Gresham lines it up from forty metres.
1 : 16.38 {lFP} - That's one of those special goals. Number 1 for J Gresham.
St Kilda Saints : 3.4.22
Melbourne Demons : 2.1.13

1 : 16.43 {C} - That really should have been thrown up rather than bounced.
1 : 16.49 {lW} - Nobody's checking L Dunstan.
1 : 16.53 {lW} - That's a trip surely.
1 : 16.57 {lW} - A Tomlinson has it.
1 : 16.59 {CHF} - A measured kick to N Jetta.
1 : 17.03 {CHF} - J Battle drops an absolute sitter.
1 : 17.07 {CHF} - N Jetta signals for his teammates to present.
1 : 17.12 {CHF} - J Battle thinks that was deliberate and the umpires agree with him.
1 : 17.16 {CHB} - J Battle wants to get on with proceedings.
1 : 17.17 {CHB} - J Battle sells the dummy and helps himself to a bounce.
1 : 17.22 {rHBF} - He tries to find Z Jones with a chip pass.
1 : 17.26 {rHBF} - Z Jones can't mark but is able to bring the ball to ground.
1 : 17.32 {lHFF} - J Melksham wants to get on with proceedings.
1 : 17.4 {lHFF} - Z Jones has been held out of the contest - the whistle has gone.
1 : 17.42 {lHBF} - So H Clark ... with a moment to digest his options.
1 : 17.45 {CHB} - An underground handpass to J Battle.
1 : 17.46 {rW} - He kicks towards B Hill and A Tomlinson.
1 : 17.49 {rW} - But straight to A Tomlinson.
1 : 17.53 {rW} - C Petracca to send the ball forward.
1 : 17.59 {lW} - A short kick to A Tomlinson.
1 : 17.59 {lW} - B Hill upset the marking attempt by A Tomlinson.
1 : 18.01 {lW} - A Tomlinson with some space now.
1 : 18.13 {C} - He transfers play using C Oliver.
1 : 18.15 {C} - J Steele reads the kick best and marks well in front of C Oliver.
1 : 18.19 {C} - J Steele is now off and running.
1 : 18.19 {CHF} - He gets a handpass to R Marshall.
1 : 18.22 {lFP} - He kicks towards J Gresham and J Lockhart.
1 : 18.23 {lFP} - J Lockhart is third man up and takes it easily.
1 : 18.28 {rBP} - J Lockhart takes off.
1 : 18.32 {rBP} - Handpass to space. E Langdon runs onto it.
1 : 18.34 {CHB} - J Lever trying to offer a lead.
1 : 18.38 {CHB} - Great mark! No! The umpire calls play on.
1 : 18.42 {CHB} - J Lever threads his way through traffic.
1 : 18.46 {CHB} - Crunching tackle by T Membery.
1 : 18.48 {lHFF} - J Billings wants to get on with proceedings.
1 : 18.52 {rFP} - He just bombs away in the direction of J Lonie and C Salem.
1 : 18.57 {rFP} - C Salem claims the mark but its play on.
1 : 19.01 {lBP} - C Salem scoops up the ball.
1 : 19.03 {lBP} - He takes the opportunity to bounce.
1 : 19.07 {CHB} - He kicks to a contest.
1 : 19.11 {CHB} - J Lever takes the mark.
1 : 19.17 {CHB} - J Lever has possession.
1 : 19.17 {CHB} - Heavy clash between T Membery and J Lever. T Membery comes off marginally better and collects the ball.
1 : 19.21 {CHF} - T Membery with the ball now.
1 : 19.25 {CHF} - Ooof. J Lever blindsides T Membery and I heard that from here.
1 : 19.3 {CHB} - Nobody's checking J Lever.
1 : 19.32 {rW} - His kick is hurried.
1 : 19.36 {rW} - D Hannebery rises over the pack majestically.
1 : 19.4 {lW} - Running with the ball is D Hannebery.
1 : 19.44 {lW} - Fires out the handpass to L Dunstan.
1 : 19.48 {rW} - Handballs to B Hill.
1 : 19.5 {CHF} - His kick is hurried.
1 : 19.54 {CHF} - T Membery has surprised even himself by taking the mark.
1 : 19.58 {CHF} - T Membery has it. What can he do with it?.
1 : 20.02 {CHF} - A wild handball - but luckily R Marshall was well placed to clean up.
1 : 20.05 {CHF} - M Gawn monsters R Marshall.
1 : 20.08 {rHBF} - With the ball is N Jones.
1 : 20.13 {CHB} - A slick handpass goes to J Lever.
1 : 20.19 {rW} - C Petracca trying to offer a lead.
1 : 20.25 {rW} - D Hannebery floats over the top of the pack and marks that on his chest.
1 : 20.31 {lW} - D Hannebery has possession.
1 : 20.31 {C} - He elects to use J Steele and kicks in that direction.
1 : 20.31 {C} - All up but nobody can take the mark.
1 : 20.34 {lW} - A Tomlinson slowing down the play.
1 : 20.37 {lW} - A Tomlinson dummy's the handpass and then takes a bounce.
1 : 20.42 {C} - An underground handpass to C Oliver.
1 : 20.46 {C} - Heavy clash between J Steele and C Oliver. J Steele comes off marginally better and collects the ball.
1 : 20.5 {lW} - D Hannebery assessing what lies ahead of him.
1 : 20.52 {CHF} - His kick is hurried - in the direction of T Membery.
1 : 20.56 {CHF} - J Lever gets a timely fist to the ball.
1 : 21 {CHB} - J Lever with the ball now.
1 : 21.04 - <<< B Long is coming on to replace D Butler >>>
1 : 21.1 {CHB} - J Lever hits the ground running.
1 : 21.15 {CHB} - T Membery is going to get a free.
1 : 21.19 {CHF} - Now T Membery has the ball. What can he do with it?.
1 : 21.21 {lFP} - A kick in the general direction of J Gresham.
1 : 21.25 {lFP} - Over the head of J Gresham.
1 : 21.29 {rBP} - J Lockhart has possession.
1 : 21.33 {lHBF} - He chooses the sensible option - to kick it long.
1 : 21.36 {lHBF} - B Long reckons he got a touch to that but the umpire's having none of it. Mark to M Hibberd.
1 : 21.39 {lHBF} - M Hibberd wants to get on with proceedings.
1 : 21.43 {lHBF} - Huge handpass to J Viney. As good as a kick.
1 : 21.47 {lHBF} - He takes the opportunity to bounce.
1 : 21.5 {lHBF} - But he's been penalised for throwing.
1 : 21.53 {rHFF} - B Long to send the ball forward.
1 : 21.58 {rHFF} - A lookaway handpass to R Marshall.
1 : 22.02 {lHFF} - J Billings on the end of this.
1 : 22.04 {lHFF} - Draws a man and then with hands to S Ross.
1 : 22.08 {lHFF} - That's a monster kick ....
1 : 22.12 {lHFF} - That's a terrible miss.
St Kilda Saints : 3.5.23
Melbourne Demons : 2.1.13

1 : 22.21 {FB} - S May signals for his teammates to present.
1 : 22.23 {FB} - An underground handpass to M Gawn.
1 : 22.27 {FB} - J Viney runs past and takes the handpass.
1 : 22.31 {rHBF} - Kicks to a contest - N Jones looks to get to thre front.
1 : 22.35 {rHBF} - Poor option and J Billings makes him pay by chipping in for the mark.
1 : 22.37 {lHFF} - So J Billings ... with a moment to digest his options.
1 : 22.42 {CHF} - A short kick to T Membery.
1 : 22.45 {CHF} - The umpire calls play on.
1 : 22.49 {CHF} - T Membery through heavy traffic.
1 : 22.52 {rHFF} - Quick hands to B Long.
1 : 22.55 {FF} - He sends the ball to M King.
1 : 23 {FF} - He can't hold it.
1 : 23.04 {rBP} - J Lockhart picks it up on the bounce.
1 : 23.06 {rBP} - J Lockhart has a bounce.
1 : 23.1 {rBP} - J Viney runs past and takes the handpass.
1 : 23.14 {rBP} - A quick handpass to E Langdon.
1 : 23.21 {FB} - Quick hands to S May under pressure.
1 : 23.22 {lHBF} - Pumps it long for M Hibberd.
1 : 23.27 {lHBF} - M Hibberd can't take it.
1 : 23.28 {lHBF} - M Hibberd looking for a lead.
1 : 23.32 {lHBF} - J Viney on the end of this.
1 : 23.35 {lHBF} - Crunching tackle by S Ross.
1 : 23.39 {rHFF} - B Long breaks free and has found some space.
1 : 23.43 {CHF} - A short kick to T Membery.
1 : 23.47 {CHF} - J Lever comes in from the side to intercept.
1 : 23.51 {lHBF} - The bounce favours M Hibberd and he is off and running.
1 : 23.53 {lHBF} - M Hibberd takes a bounce and nearly fumbles it.
1 : 23.57 {lW} - He's still going.
1 : 24.01 {rW} - Finds C Petracca with a handball.
1 : 24.06 {rW} - C Petracca crunched by D Hannebery! C Petracca very slow to get up.
1 : 24.08 {lW} - D Hannebery is now off and running.
1 : 24.12 {lW} - D Hannebery has a bounce.
1 : 24.16 {lHFF} - D Hannebery has another.
1 : 24.2 {lHFF} - A lookaway handpass to R Marshall.
1 : 24.22 {rFP} - A bit of a miskick.
1 : 24.27 {rFP} - The umpire calls play on.
1 : 24.3 {rFP} - A bit of space for J Lonie to utilise.
1 : 24.34 {rFP} - J Lonie sells the dummy and helps himself to a bounce.
1 : 24.37 {rFP} - But he interfered with his opponent there.
1 : 24.41 {FB} - S May sizes the options in front of him.
1 : 24.45 {CHB} - Finds M Gawn with a handball.
1 : 24.49 {CHB} - A slick handpass goes to E Langdon.
1 : 24.53 {rHBF} - He handpasses to N Jones.
1 : 24.55 {rHBF} - N Jones sells the dummy and helps himself to a bounce.
=====================================
SIREN SOUNDS FOR THE END OF QUARTER 1
St Kilda Saints : 3.5.23
Melbourne Demons : 2.1.13
=====================================
 
2 : 25 {C} - M Gawn taps it down.
2 : .07 {C} - Not enough pressure on E Langdon.
2 : .1 {C} - Huge handpass to C Oliver. As good as a kick.
2 : .14 {C} - J Viney on the end of this.
2 : .18 {C} - Draws a man and then with hands to E Langdon.
2 : .22 {rHFF} - Gets onto his preferred foot and boots it long.
2 : .24 {rHFF} - A Vandenberg appeals for the mark but play on's the call.
2 : .28 {lHBF} - Its hard and tough but H Clark wins possession.
2 : .32 {C} - That kick makes it hard for J Steele.
2 : .36 {C} - Too long for J Steele and C Oliver marks.
2 : .38 {rW} - C Petracca takes them on.
2 : .43 - <<< L Jackson is coming on to replace C Salem >>>
2 : .51 {rW} - C Petracca breaks free and has found some space.
2 : .53 {rW} - Handpass over the shoulder to E Langdon.
2 : .57 {rW} - He takes the opportunity to bounce.
2 : 1.01 {CHF} - A worm burner to N Jetta.
2 : 1.05 {CHF} - Atrocious kick. Not even kilometre perfect.
2 : 1.09 {CHB} - J Battle through heavy traffic.
2 : 1.12 {CHB} - J Battle sells the dummy and helps himself to a bounce.
2 : 1.16 {C} - J Battle is still looking for options and takes another.
2 : 1.2 {C} - He takes another.
2 : 1.23 {lW} - Sees D Hannebery out of the corner of his eye.
2 : 1.26 {lW} - Terrible kick falls into the hands of C Petracca.
2 : 1.3 {rW} - C Petracca fighting to get a clear kick.
2 : 1.34 {lW} - A Tomlinson runs past and takes the handpass.
2 : 1.38 {rHFF} - A measured kick in the direction of A Vandenberg.
2 : 1.4 {rHFF} - Spoilt by H Clark.
2 : 1.45 {CHB} - J Battle signals for his teammates to present.
2 : 1.49 {CHB} - Long handpass to the running L Dunstan.
2 : 1.52 {CHB} - An underground handpass to S Ross.
2 : 1.55 {lHBF} - Sees H Clark out of the corner of his eye.
2 : 1.59 {lHBF} - H Clark gets crunched in that marking contest but comes out with the ball.
2 : 2.03 {lHBF} - H Clark has it.
2 : 2.07 {lW} - Finds D Hannebery with a handball.
2 : 2.09 {rW} - Spears a kick towards B Hill.
2 : 2.13 {rW} - A Tomlinson is third man up and takes it easily.
2 : 2.17 {lW} - A Tomlinson sizes the options in front of him.
2 : 2.22 {rW} - C Petracca screaming for the ball - and he is heard.
2 : 2.24 {rW} - D Hannebery was hanging around the back of the pack but the ball fell into his lap.
2 : 2.28 {lW} - D Hannebery has it. What can he do with it?.
2 : 2.32 {C} - Long handpass to the running J Steele.
2 : 2.35 {C} - Now has it got the carry?.
2 : 2.4 {C} - Oh no. It's come off his shin..
St Kilda Saints : 3.6.24
Melbourne Demons : 2.1.13

2 : 2.46 {FB} - L Jackson takes off.
2 : 2.5 {FB} - What a tackle by J Lonie.
2 : 2.54 {FF} - M King looking for a lead.
2 : 2.57 {FF} - Surely M King wouldn't miss this.
2 : 3.01 {FF} - They'll be talking about that goal tonight.
St Kilda Saints : 4.6.30
Melbourne Demons : 2.1.13

2 : 3.05 {C} - Superb ruckwork from M Gawn.
2 : 3.11 {lW} - Now A Tomlinson has the ball. What can he do with it?.
2 : 3.15 - <<< C Salem is coming on to replace A Tomlinson >>>
2 : 3.24 {lW} - C Salem signals for his teammates to present.
2 : 3.25 {C} - Spears a kick towards C Oliver.
2 : 3.3 {C} - C Oliver takes a strong mark. His form is ominous.
2 : 3.34 {C} - C Oliver wants to get on with proceedings.
2 : 3.38 {C} - This could be goal of the match.
2 : 3.42 {C} - Top goal.
St Kilda Saints : 4.6.30
Melbourne Demons : 3.1.19

2 : 3.44 {C} - Textbook ruckwork from S Ross.
2 : 3.52 {rW} - B Hill with the ball now.
2 : 3.57 {rW} - Someone call an ambulance for B Hill. C Salem lined him up and did the job well.
2 : 3.58 {lW} - C Salem tucks the ball under his arm and scoots away.
2 : 4.03 {lW} - He has a bounce.
2 : 4.07 {C} - Spears a kick towards C Oliver.
2 : 4.1 {C} - C Oliver in the best position takes the mark.
2 : 4.13 {C} - C Oliver has it. What can he do with it?.
2 : 4.17 {C} - C Oliver bounces the ball.
2 : 4.21 {lHFF} - A kick towards J Melksham territory.
2 : 4.25 {lHFF} - J Melksham is the target but he's outplayed by Z Jones.
2 : 4.27 {rHBF} - Z Jones takes off.
2 : 4.31 {rHBF} - Z Jones is crunched in a tackle by J Melksham.
2 : 4.35 {lHFF} - J Melksham fighting to get a clear kick.
2 : 4.4 {FF} - He kicks long and low.
2 : 4.41 {FF} - Great mark! No! The umpire calls play on.
2 : 4.46 {FB} - D Howard tucks the ball under his arm and scoots away.
2 : 4.5 {lHBF} - That kick makes it hard for H Clark.
2 : 4.54 {lHBF} - H Clark and A Vandenberg both holding each other. No mark.
2 : 4.56 {rHFF} - A Vandenberg dances around H Clark.
2 : 5 {rHFF} - Handballs over the top to J Viney.
2 : 5.04 {rHFF} - J Viney coathangers S Ross and then remonstrates with a few of his teammates. Calm down son or you'll get booked.
2 : 5.09 {CHB} - J Battle has it. What can he do with it?.
2 : 5.12 {rHBF} - He transfers play using Z Jones.
2 : 5.15 {rHBF} - Over the head of Z Jones.
2 : 5.19 {rHBF} - Its hard and tough but Z Jones wins possession.
2 : 5.23 {lW} - A wobbly old kick.
2 : 5.27 {lW} - No mark taken as D Hannebery and C Petracca wrestle for position.
2 : 5.29 {rW} - Running with the ball is C Petracca.
2 : 5.33 {lW} - Kick goes sideways.
2 : 5.37 {lW} - C Salem juggles the ball but secures the mark.
2 : 5.41 {lW} - The ball is now with C Salem.
2 : 5.43 {lW} - C Salem takes a bounce and nearly fumbles it.
2 : 5.48 {lW} - A lookaway handpass to M Gawn.
2 : 5.52 {rHFF} - He handpasses to A Vandenberg.
2 : 5.56 {rHFF} - A slick handpass goes to J Viney.
2 : 5.58 {rHFF} - M Gawn receives his handpass.
2 : 6.02 {rHFF} - Draws a man and then with hands to E Langdon.
2 : 6.06 {rHFF} - Quick hands to M Gawn under pressure.
2 : 6.1 {FF} - Kicks in the direction of T McDonald.
2 : 6.15 {FF} - T McDonald gets too far under the ball.
2 : 6.16 {FF} - T McDonald with the ball now.
2 : 6.2 {FF} - Surely T McDonald wouldn't miss this.
2 : 6.25 {FF} - It's going to result in a goal. Goal to T McDonald.
St Kilda Saints : 4.6.30
Melbourne Demons : 4.1.25

2 : 6.29 {C} - No clear advantage to either side.
2 : 6.35 {rW} - C Petracca turns on the afterburners - look at him go.
2 : 6.39 {rW} - D Hannebery sews C Petracca up in a fantastic tackle.
2 : 6.43 {C} - J Steele has a paddock.
2 : 6.45 {rW} - Fires out the handpass to B Hill.
2 : 6.49 {rW} - B Hill has lost it to C Salem due to an indecipherable umpiring decision.
2 : 6.54 {rW} - The ball is now with C Petracca.
2 : 6.58 {rW} - A quick handpass to E Langdon.
2 : 7 {lW} - Draws a man and then with hands to C Salem.
2 : 7.04 {lW} - That was illegal - and the free will go to B Hill.
2 : 7.08 {rW} - B Hill looks downfield.
2 : 7.12 {rW} - C Salem might be in trouble with the tribunal after that tackle on B Hill. Play on is the call.
2 : 7.14 {rW} - C Petracca sizes the options in front of him.
2 : 7.18 {CHF} - Gives the ball to N Jetta.
2 : 7.22 {rHFF} - Almost a throw to A Vandenberg.
2 : 7.26 {rHFF} - A Vandenberg sells the dummy and helps himself to a bounce.
2 : 7.28 {CHF} - He beckons for a lead.
2 : 7.33 {CHF} - Oh a turnover. The kick is marked by J Battle.
2 : 7.37 {CHB} - J Battle has it.
2 : 7.41 {CHB} - A quick handpass to S Ross.
2 : 7.45 {CHB} - He has a bounce.
2 : 7.47 {C} - Another bounce taken by S Ross.
2 : 7.51 {C} - Another bounce taken by S Ross.
2 : 7.55 {lHFF} - A short kick to J Billings.
2 : 8 {lHFF} - J Billings gets crunched in that marking contest but comes out with the ball.
2 : 8.01 {lHFF} - J Billings slowing down the play.
2 : 8.06 {FF} - He kicks to a contest.
2 : 8.1 {FF} - S May did enough to prevent a mark being taken.
2 : 8.14 {FB} - S May has possession.
2 : 8.16 {rBP} - Spears a kick towards J Lockhart.
2 : 8.2 {rBP} - No mark taken as J Lockhart and J Gresham wrestle for position.
2 : 8.24 {lFP} - The ball is now with J Gresham.
2 : 8.28 {lFP} - J Gresham has time to take a bounce.
2 : 8.3 {lFP} - J Gresham from point blank range.
2 : 8.34 {lFP} - What a goal from J Gresham.
St Kilda Saints : 5.6.36
Melbourne Demons : 4.1.25

2 : 8.38 {C} - J Viney is outbodied in the ruck contest.
2 : 8.45 {lW} - S Ross slowing down the play.
2 : 8.49 {lW} - S Ross isn't just seeing stars after that clash with J Viney. He could map the Milky Way.
2 : 8.53 {C} - C Oliver picks it up on the bounce.
2 : 8.57 {rW} - He transfers play using C Petracca.
2 : 8.59 {rW} - What a shocking kick - straight to D Hannebery.
2 : 9.03 {lW} - D Hannebery signals for his teammates to present.
2 : 9.07 {lW} - What a tackle by C Petracca.
2 : 9.11 {C} - C Oliver with a little space.
2 : 9.16 {C} - Great tackle on C Oliver.
2 : 9.18 {C} - J Steele tucks the ball under his arm and scoots away.
2 : 9.22 {C} - Handpass to space. L Dunstan runs onto it.
2 : 9.26 {lW} - Quick hands to D Hannebery under pressure.
2 : 9.3 {CHF} - Long raking kick in the direction of T Membery.
2 : 9.32 {CHF} - T Membery misjudges it and it's an easy mark to J Lever.
2 : 9.36 {CHB} - J Lever with some space now.
2 : 9.4 {CHB} - J Lever has time to take a bounce.
2 : 9.45 {C} - He takes another.
2 : 9.46 {C} - No-look handpass to J Viney.
2 : 9.51 {rW} - A short kick to C Petracca.
2 : 9.55 {rW} - C Petracca wrestles with D Hannebery - and wins. Good mark.
2 : 9.59 {rW} - Now C Petracca has the ball. What can he do with it?.
2 : 10.03 {lHFF} - J Melksham calls for it.
2 : 10.05 {lHFF} - J Melksham and Z Jones both holding each other. No mark.
2 : 10.09 {rHBF} - Z Jones wants to get on with proceedings.
2 : 10.13 {rHBF} - He has a bounce.
2 : 10.18 {lW} - Kicks to a contest - D Hannebery looks to get to thre front.
2 : 10.19 {lW} - D Hannebery has surprised even himself by taking the mark.
2 : 10.23 {lW} - D Hannebery takes off.
2 : 10.28 {C} - Flicks it to J Steele.
2 : 10.32 {C} - Ooof. C Oliver blindsides J Steele and I heard that from here.
2 : 10.34 {C} - C Oliver assessing what lies ahead of him.
2 : 10.38 - <<< A Tomlinson is coming on to replace M Brown >>>
2 : 10.46 {C} - The bounce favours C Oliver and he is off and running.
2 : 10.48 {C} - Gets a handpass away to M Gawn.
2 : 10.52 {lHFF} - Handpasses to J Melksham.
2 : 10.56 {CHF} - Handpasses to N Jetta.
2 : 11.01 {CHF} - Quick hands to J Viney under pressure.
2 : 11.03 {lHFF} - An underground handpass to J Melksham.
2 : 11.07 {FF} - Kicks with his non-preferred side.
2 : 11.11 {FF} - Great mark! No! The umpire calls play on.
2 : 11.15 {FF} - T McDonald looks downfield.
2 : 11.17 {FF} - T McDonald lines it up from forty metres.
2 : 11.21 {FF} - Run through by D Howard for a minor score.
St Kilda Saints : 5.6.36
Melbourne Demons : 4.2.26

2 : 11.3 {FB} - D Howard has possession.
2 : 11.34 {lBP} - A long looping handpass to C Wilkie.
2 : 11.36 {rHBF} - A quick handpass to Z Jones.
2 : 11.4 {lHBF} - A wild kick laterally towards H Clark.
2 : 11.44 {lHBF} - H Clark marks strongly on the lead.
2 : 11.48 {lHBF} - Nobody's checking H Clark.
2 : 11.5 {lHBF} - H Clark takes a bounce and nearly fumbles it.
2 : 11.54 {lHBF} - Handpasses to S Ross.
2 : 11.58 {rW} - A measured kick to B Hill.
2 : 12.03 {rW} - B Hill takes the mark one-handed.
2 : 12.04 {rW} - B Hill sizes the options in front of him.
2 : 12.08 {rW} - That's a monster kick ....
2 : 12.13 {rW} - And he gets it.
St Kilda Saints : 6.6.42
Melbourne Demons : 4.2.26
 
2 : 12.17 {C} - M Gawn knocks the ball down.
2 : 12.23 {rW} - Its hard and tough but M Gawn wins possession.
2 : 12.27 {rW} - He's brought down by R Marshall.
2 : 12.31 {rW} - B Hill picks it up on the bounce.
2 : 12.33 {CHF} - Geeze he's got onto that one. Pressure on T Membery to mark.
2 : 12.37 {CHF} - T Membery is the target but he's outplayed by J Lever.
2 : 12.41 {CHB} - J Lever tucks the ball under his arm and scoots away.
2 : 12.46 {CHB} - A quick handpass to E Langdon.
2 : 12.48 {lW} - He chooses the sensible option - to kick it long.
2 : 12.52 {lW} - Poor effort from C Salem and B Hill takes the mark.
2 : 12.56 {C} - J Steele scoops up the ball.
2 : 13 {rHFF} - He kicks to a contest.
2 : 13.04 {rHFF} - Great mark! No! The umpire calls play on.
2 : 13.06 {rHBF} - A bit of space for N Jones to utilise.
2 : 13.1 {rHBF} - Almost a throw to M Gawn.
2 : 13.15 {rHBF} - Gets a handpass away to J Viney.
2 : 13.19 {rHBF} - J Viney sells the dummy and helps himself to a bounce.
2 : 13.21 {lW} - A spearing pass towards C Salem.
2 : 13.25 {lW} - Shocking kick and B Hill will take the mark.
2 : 13.29 {rW} - B Hill with some space now.
2 : 13.33 {C} - That came off the outside of the boot.
2 : 13.35 {C} - All up but nobody can take the mark.
2 : 13.39 {lW} - C Salem slowing down the play.
2 : 13.43 {C} - Spears a kick towards C Oliver.
2 : 13.48 {C} - C Oliver can't take it.
2 : 13.5 {C} - C Oliver has a paddock.
2 : 13.53 {CHF} - He gets a handpass to M Gawn.
2 : 13.58 {CHF} - M Gawn bounces the ball.
2 : 14.02 {rHFF} - Gets a handpass away to A Vandenberg.
2 : 14.06 {rFP} - Flicks it to E Langdon.
2 : 14.08 {rFP} - E Langdon - about 45 metres and not much angle.
2 : 14.12 {rFP} - E Langdon should hang his head in shame - a bad miss.
St Kilda Saints : 6.6.42
Melbourne Demons : 4.3.27

2 : 14.21 {FB} - With the ball is D Howard.
2 : 14.22 {FB} - Finds S Ross with a handball.
2 : 14.26 {lHBF} - His kick covers more height than distance.
2 : 14.31 {lHBF} - H Clark is caught under pressure and knocks the ball forward.
2 : 14.35 {CHF} - N Jetta with the ball now.
2 : 14.37 {FF} - Hurried kick towards T McDonald.
2 : 14.41 {FF} - Brilliant mark by T McDonald!.
2 : 14.45 {FF} - T McDonald has it. What can he do with it?.
2 : 14.49 {FF} - Surely T McDonald wouldn't miss this.
2 : 14.52 {FF} - They'll be talking about that goal tonight.
St Kilda Saints : 6.6.42
Melbourne Demons : 5.3.33

2 : 14.55 {C} - That's a shocking bounce!.
2 : 15.04 {C} - J Steele threads his way through traffic.
2 : 15.06 {C} - J Steele has time to take a bounce.
2 : 15.1 {C} - Handpasses to S Ross.
2 : 15.14 {C} - S Ross has a bounce.
2 : 15.18 {rW} - Sees B Hill out of the corner of his eye.
2 : 15.21 {rW} - C Salem drops an absolute sitter.
2 : 15.24 {rW} - B Hill breaks free and has found some space.
2 : 15.28 {rW} - An underground handpass to L Dunstan.
2 : 15.33 {lW} - He beckons for a lead.
2 : 15.37 {lW} - Great grab by D Hannebery.
2 : 15.38 {lW} - Now D Hannebery has the ball. What can he do with it?.
2 : 15.43 {rW} - Gives the ball to B Hill.
2 : 15.47 {rW} - B Hill crunched by C Salem! B Hill very slow to get up.
2 : 15.51 {lW} - C Salem with some space now.
2 : 15.53 {C} - A long looping handpass to C Oliver.
2 : 15.57 {lHFF} - A flat punt.
2 : 16.01 {lHFF} - That's an extraordinary juggled one-hander to Z Jones.
2 : 16.06 {rHBF} - Z Jones tucks the ball under his arm and scoots away.
2 : 16.08 {lW} - Thumps the ball forward.
2 : 16.12 {lW} - That's an extraordinary juggled one-hander to C Petracca.
2 : 16.16 {rW} - C Petracca hits the ground running.
2 : 16.2 {CHF} - He just bombs away in the direction of N Jetta and J Battle.
2 : 16.22 {CHF} - N Jetta outbodies J Battle and takes the mark.
2 : 16.27 {CHF} - The ball is now with N Jetta.
2 : 16.3 {rFP} - He spots an option and kicks to J Harmes.
2 : 16.34 {rFP} - J Harmes is caught under pressure and knocks the ball forward.
2 : 16.4 {rFP} - J Harmes through heavy traffic.
2 : 16.43 {rFP} - Flicks it to E Langdon.
2 : 16.45 {rFP} - This will be a goal to E Langdon.
2 : 16.49 {rFP} - E Langdon gives some to the crowd after that goal.
St Kilda Saints : 6.6.42
Melbourne Demons : 6.3.39

2 : 16.53 {C} - Both ruckmen fooled by a rare decent bounce up.
2 : 16.59 {C} - J Steele is now off and running.
2 : 17.03 {lHFF} - A short kick to J Billings.
2 : 17.07 {lHFF} - J Billings gets too far under the ball.
2 : 17.1 {rHBF} - Not enough pressure on N Jones.
2 : 17.13 {rHBF} - N Jones dummy's the handpass and then takes a bounce.
2 : 17.17 {rW} - N Jones has another.
2 : 17.22 {rW} - D Hannebery applies the tackle on C Petracca.
2 : 17.24 {lW} - D Hannebery wants to get on with proceedings.
2 : 17.28 {lW} - Quick hands to S Ross under pressure.
2 : 17.32 {rW} - Fires out the handpass to B Hill.
2 : 17.4 {rHBF} - A poor handpass but R Marshall is up to the challenge.
2 : 17.42 {C} - He sends the ball to J Steele.
2 : 17.45 {C} - C Oliver upset the marking attempt by J Steele.
2 : 17.46 {C} - The bounce favours J Steele and he is off and running.
2 : 17.51 {C} - Heavy clash between C Oliver and J Steele. C Oliver comes off marginally better and collects the ball.
2 : 17.53 {C} - C Oliver tucks the ball under his arm and scoots away.
2 : 17.57 {rHFF} - A kick in the general direction of A Vandenberg.
2 : 18.01 {rHFF} - Ooh the kick has gone straight to H Clark.
2 : 18.05 {lHBF} - H Clark with a little space.
2 : 18.09 {lHBF} - A slick handpass goes to L Dunstan.
2 : 18.12 {lHBF} - A quick handpass to R Marshall.
2 : 18.15 {lHBF} - Quick hands to L Dunstan.
2 : 18.19 {CHB} - He transfers play using J Battle.
2 : 18.23 {CHB} - Great mark! No! The umpire calls play on.
2 : 18.26 {CHF} - Its hard and tough but N Jetta wins possession.
2 : 18.3 {CHF} - N Jetta sells the dummy and helps himself to a bounce.
2 : 18.34 {lFP} - He gets onto his right side and kicks to A Tomlinson.
2 : 18.38 {lFP} - J Carsile takes one of the best marks you'll ever see.
2 : 18.4 {FB} - D Howard with some space now.
2 : 18.45 {FB} - Handpass over the shoulder to S Ross.
2 : 18.48 {FB} - A lookaway handpass to R Marshall.
2 : 18.52 {lHBF} - H Clark trying to offer a lead.
2 : 19.01 {lHBF} - Anybody's ball.
2 : 19.13 {rHFF} - A Vandenberg streaming down the ground.
2 : 19.15 {rHFF} - Then he runs it out of bounds ... deliberately.
2 : 19.15 {lHBF} - H Clark sizes the options in front of him.
2 : 19.17 - <<< D Butler is coming on to replace J Carsile >>>
2 : 19.17 {lHBF} - H Clark wants to get on with proceedings.
2 : 19.28 {lHBF} - He gets a handpass to S Ross.
2 : 19.3 {rHBF} - Z Jones receives his handpass.
2 : 19.3 {lW} - He looks for D Hannebery.
2 : 19.34 {lW} - No-one can take the mark.
2 : 19.36 {rW} - C Petracca has possession.
2 : 19.4 {rW} - A long looping handpass to E Langdon.
2 : 19.42 {rW} - Gives the ball to M Gawn.
2 : 19.46 {CHF} - Long raking kick in the direction of N Jetta.
2 : 19.5 {CHF} - Great mark! No! The umpire calls play on.
2 : 20.07 {rHBF} - Z Jones looking for a lead.
2 : 20.15 {rHBF} - A lookaway handpass to R Marshall.
2 : 20.17 {C} - J Steele presents on a long lead.
2 : 20.17 {C} - But he picks out the opposition.
2 : 20.17 {rW} - C Petracca sizes the options in front of him.
2 : 20.21 {rW} - Don't tell me he's kicked it.
2 : 20.21 {rW} - D Hannebery chooses the safe option in rushing it through.
St Kilda Saints : 6.6.42
Melbourne Demons : 6.4.40

2 : 20.23 {FB} - D Howard takes off.
2 : 20.27 {FB} - A poor handpass but L Dunstan is up to the challenge.
2 : 20.3 {FB} - Quick hands to S Ross.
2 : 20.34 {rHBF} - The kick seeks out Z Jones.
2 : 20.4 {rHBF} - J Melksham drops an absolute sitter.
2 : 20.42 {CHF} - The ball is now with N Jetta.
2 : 20.48 {CHF} - N Jetta from just outside the fifty ...
2 : 20.5 {CHF} - He has missed.
St Kilda Saints : 6.6.42
Melbourne Demons : 6.5.41

2 : 21.04 {FB} - D Howard looking for a lead.
2 : 21.07 {lHBF} - His kick covers more height than distance.
2 : 21.07 {lHBF} - Top mark H Clark.
2 : 21.07 {lHBF} - H Clark takes off.
2 : 21.1 {C} - Kicks to a contest - J Steele looks to get to thre front.
2 : 21.13 {C} - J Steele gets too far under the ball.
2 : 21.17 {rW} - C Petracca with the ball now.
2 : 21.21 {rW} - C Petracca bounces the ball.
2 : 21.25 {rW} - Long handpass to the running E Langdon.
2 : 21.27 {C} - Handpasses to C Oliver.
2 : 21.31 {rHFF} - Long raking kick in the direction of A Vandenberg.
2 : 21.36 {rHFF} - Great mark! No! The umpire calls play on.
2 : 21.39 {lHBF} - H Clark has it. What can he do with it?.
2 : 21.42 {CHB} - Spears a kick towards J Battle.
2 : 21.46 {CHB} - That's a great mark.
2 : 21.5 {CHB} - J Battle slowing down the play.
2 : 21.53 {rHBF} - Handpass to space. Z Jones runs onto it.
2 : 21.58 {rHBF} - He has time to take a bounce.
2 : 22 {rHBF} - Brought down by J Melksham.
2 : 22.04 {lHFF} - J Melksham with the ball now.
2 : 22.08 {lHFF} - Watch out! Oh! Z Jones has laid J Melksham out flat.
2 : 22.12 {CHB} - J Battle is now off and running.
2 : 22.16 {lW} - A short kick to D Hannebery.
2 : 22.21 {lW} - Great saving mark taken by C Petracca.
2 : 22.23 {rW} - Now C Petracca has the ball. What can he do with it?.
2 : 22.27 {rW} - Gets a handpass away to E Langdon.
2 : 22.29 {rW} - Good bump as E Langdon kicks - enough that the ball sprays over the boundary.
2 : 22.33 {C} - J Steele to send the ball forward.
2 : 22.37 {lHFF} - His kick is hurried.
2 : 22.42 {lHFF} - J Billings takes the mark.
2 : 22.43 {lHFF} - J Billings takes off.
2 : 22.47 {rHFF} - Fires out the handpass to B Long.
2 : 22.52 {rHFF} - That's a fantasic tackle by M Hibberd.
2 : 22.55 {rHBF} - N Jones has it.
2 : 22.58 {lW} - Pumps it long for C Salem.
2 : 23.02 {lW} - C Salem can't take it.
2 : 23.06 {rW} - B Hill with the ball now.
2 : 23.14 {C} - J Steele receives his handpass.
2 : 23.16 {C} - Monster shot at goal from J Steele.
2 : 23.18 {C} - Punched through for a point.
St Kilda Saints : 6.7.43
Melbourne Demons : 6.5.41

2 : 23.25 {FB} - J Lockhart takes off.
2 : 23.28 {rHBF} - He kicks towards N Jones and J Billings.
2 : 23.31 {rHBF} - N Jones uses his body to perfection and reels in the mark.
2 : 23.35 {rHBF} - N Jones has it.
2 : 23.39 {C} - That kick makes it hard for C Oliver.
2 : 23.51 {C} - J Steele must wash his hands in superglue. Astonishing mark.
2 : 23.55 {C} - J Steele wants to get on with proceedings.
2 : 23.57 {rW} - He beckons for a lead.
2 : 23.57 {rW} - Top mark C Salem.
2 : 24 {lW} - C Salem with the ball now.
2 : 24 {lW} - You've got to get rid of it son.
2 : 24.08 {lW} - D Hannebery has possession.
2 : 24.08 {C} - Huge handpass to J Steele. As good as a kick.
2 : 24.12 {C} - A slick handpass goes to S Ross.
2 : 24.14 {C} - Almost a throw to L Dunstan.
2 : 24.18 {lHFF} - J Billings makes an offer.
2 : 24.22 {lHFF} - Top mark - not paid.
2 : 24.3 {lHFF} - J Billings with the ball now.
2 : 24.37 {lHFF} - Handpasses to R Marshall.
2 : 24.38 {lHFF} - Don't tell me he's kicked it... DON'T TELL ME....
2 : 24.38 {lHFF} - R Marshall should hang his head in shame - a bad miss.
St Kilda Saints : 6.8.44
Melbourne Demons : 6.5.41

2 : 24.45 {FB} - The ball is now with L Jackson.
2 : 24.47 {rBP} - Finds J Lockhart with a handball.
2 : 24.51 {rBP} - A poor handpass but M Gawn is up to the challenge.
2 : 24.55 {lHBF} - A lookaway handpass to M Hibberd.
=====================================
SIREN SOUNDS FOR THE END OF QUARTER 2
St Kilda Saints : 6.8.44
Melbourne Demons : 6.5.41
=====================================
 
3 : 25 {C} - Almost a throw to J Viney.
3 : 25 {C} - Neither ruckman can take advantage of the bounce.
3 : .06 {C} - J Steele with the ball now.
3 : .1 {lW} - Handpass to space. D Hannebery runs onto it.
3 : .14 {lW} - Wayward kick goes out of bounds on the full.
3 : .16 {C} - C Oliver with the ball now.
3 : .2 {rHFF} - He gets boot to ball immediately.
3 : .24 {rHFF} - Top mark - not paid.
3 : .28 {rHFF} - A Vandenberg has possession.
3 : .3 {rHFF} - Almost a throw to M Gawn.
3 : .34 {rHFF} - Whistle blows for kicking in danger.
3 : .38 {rHBF} - So Z Jones ... with a moment to digest his options.
3 : .43 {lHBF} - A wild kick laterally towards H Clark.
3 : .45 {lHBF} - A Vandenberg did enough to prevent a mark being taken.
3 : .49 {rHFF} - A Vandenberg to send the ball forward.
3 : .57 {CHF} - Sees N Jetta out of the corner of his eye.
3 : .59 {CHF} - No mark taken as N Jetta and J Battle wrestle for position.
3 : 1.05 {CHB} - So J Battle ... with a moment to digest his options.
3 : 1.09 {lHBF} - Spears a kick towards H Clark.
3 : 1.09 {lHBF} - A Vandenberg drops an absolute sitter.
3 : 1.12 {lHFF} - J Melksham to send the ball forward.
3 : 1.16 {lHFF} - J Melksham nearly got done for running too far but he remembers to bounce at last.
3 : 1.17 {lHFF} - An underground handpass to E Langdon.
3 : 1.22 {rFP} - J Harmes runs past and takes the handpass.
3 : 1.26 {rFP} - J Harmes has time to take a bounce.
3 : 1.3 {rFP} - J Harmes let's fly toward goal.
3 : 1.32 {rFP} - C Wilkie boots it through the big sticks... of the wrong goals. Oops.
St Kilda Saints : 6.8.44
Melbourne Demons : 6.6.42

3 : 1.4 {FB} - D Butler wants to get on with proceedings.
3 : 1.45 {FB} - He has time to take a bounce.
3 : 1.46 {rHBF} - Sees Z Jones ahead and sends it his way.
3 : 1.51 {rHBF} - Anybody's ball.
3 : 1.55 {rHBF} - Z Jones breaks free and has found some space.
3 : 1.59 - <<< K Pickett is coming on to replace J Lockhart >>>
3 : 2.05 {rHBF} - Z Jones through heavy traffic.
3 : 2.11 - <<< M Brown is coming on to replace N Jones >>>
3 : 2.17 {rHBF} - Z Jones wants to get on with proceedings.
3 : 2.19 {rHBF} - Great tackle on Z Jones.
3 : 2.24 {rHFF} - Not enough pressure on A Vandenberg.
3 : 2.32 {rHFF} - He takes the opportunity to bounce.
3 : 2.34 {rHFF} - That's a monster kick ....
3 : 2.34 {rHFF} - Fades away to the left. One behind to the score..
St Kilda Saints : 6.8.44
Melbourne Demons : 6.7.43

3 : 2.42 {FB} - The ball is now with D Howard.
3 : 2.46 {FB} - D Howard dummy's the handpass and then takes a bounce.
3 : 2.48 {FB} - Hands it off to L Dunstan.
3 : 2.54 {FB} - L Dunstan sells the dummy and helps himself to a bounce.
3 : 2.57 {CHB} - Handballs over the top to R Marshall.
3 : 3.01 {CHB} - Crunching tackle by M Gawn.
3 : 3.02 {rHFF} - A Vandenberg has a paddock.
3 : 3.09 {lFP} - Kicks to a contest - A Tomlinson looks to get to thre front.
3 : 3.11 {lFP} - Oh a turnover. The kick is marked by D Butler.
3 : 3.17 {rBP} - D Butler has it. What can he do with it?.
3 : 3.19 {rBP} - A poor handpass but L Dunstan is up to the challenge.
3 : 3.24 {CHB} - Hurried kick towards J Battle.
3 : 3.25 {CHB} - N Jetta will take this. No - he's dropped it.
3 : 3.3 {CHF} - N Jetta takes off.
3 : 3.38 {lFP} - He gets his kick away.
3 : 3.4 {lFP} - Poor effort from A Tomlinson and D Butler takes the mark.
3 : 3.42 {FB} - D Howard takes off.
3 : 3.48 {rBP} - He gets a handpass to D Butler.
3 : 3.48 {CHB} - That's a real finger-breaker in the direction of J Battle.
3 : 3.5 {CHB} - Top mark N Jetta.
3 : 3.54 {rHFF} - A Vandenberg does some crumbing and is away.
3 : 4.03 {rHFF} - Great tackle by H Clark.
3 : 4.1 {lHBF} - H Clark threads his way through traffic.
3 : 4.17 {C} - He kicks towards J Steele and C Oliver.
3 : 4.19 {C} - Ooh the kick has gone straight to C Oliver.
3 : 4.19 {lW} - C Salem through heavy traffic.
3 : 4.23 {lW} - Great bump by B Hill. C Salem has not moved.
3 : 4.23 {rW} - B Hill has a paddock.
3 : 4.25 {rW} - Handpass to space. R Marshall runs onto it.
3 : 4.27 {rW} - Crunching tackle by M Gawn.
3 : 4.31 {C} - C Oliver looks downfield.
3 : 4.37 - <<< J Carsile is coming on to replace D Hannebery >>>
3 : 4.41 {C} - C Oliver with all the time in the world.
3 : 4.58 {rW} - Kick goes sideways.
3 : 5.06 {rW} - C Petracca can't take it.
3 : 5.09 {rW} - Its hard and tough but C Petracca wins possession.
3 : 5.1 {rHFF} - Passes to E Langdon by hand.
3 : 5.1 {rHFF} - E Langdon takes a bounce and nearly fumbles it.
3 : 5.1 {CHF} - Handballs to N Jetta.
3 : 5.1 {FF} - T McDonald calls for it.
3 : 5.1 {FF} - No-one can take the mark.
3 : 5.15 {FB} - D Howard sizes the options in front of him.
3 : 5.19 - <<< D Hannebery is coming on to replace R Marshall >>>
3 : 5.25 {FB} - D Howard takes off.
3 : 5.31 {CHB} - A wild handball - but luckily L Dunstan was well placed to clean up.
3 : 5.33 {lW} - J Carsile presents.
3 : 5.35 {lW} - C Petracca must wash his hands in superglue. Astonishing mark.
3 : 5.39 {rW} - C Petracca looking for a lead.
3 : 5.48 {C} - Almost a throw to C Oliver.
3 : 5.52 {lHFF} - J Melksham takes off on a lead.
3 : 5.54 {lHFF} - J Melksham gets too far under the ball.
3 : 5.56 {lHFF} - Who wants it? J Melksham does. Great stuff.
3 : 5.58 {FF} - T McDonald trying to offer a lead.
3 : 6.02 {FF} - The umpire calls play on.
3 : 6.06 {FB} - A bit of space for D Howard to utilise.
3 : 6.08 - <<< R Marshall is coming on to replace B Long >>>
3 : 6.16 {FB} - D Howard breaks free and has found some space.
3 : 6.2 {lHBF} - A worm burner to H Clark.
3 : 6.22 {lHBF} - A Vandenberg floats over the top of the pack and marks that on his chest.
3 : 6.26 {rHFF} - A bit of space for A Vandenberg to utilise.
3 : 6.31 {rHFF} - A Vandenberg nearly got done for running too far but he remembers to bounce at last.
3 : 6.35 {rHFF} - M Gawn runs past and takes the handpass.
3 : 6.37 {FF} - Searching pass in the direction of T McDonald.
3 : 6.43 {FF} - Here's a chance for an opportunist rover.
3 : 6.45 {FF} - Taking the ball is T McDonald.
3 : 6.54 {FF} - T McDonald may even have goaled.
3 : 7.02 {FF} - Straight through the centre.
St Kilda Saints : 6.8.44
Melbourne Demons : 7.7.49

3 : 7.02 {C} - Neither ruckman can take advantage of the bounce.
3 : 7.04 {rW} - B Hill looking for a lead.
3 : 7.08 {lHFF} - That's a real finger-breaker in the direction of J Billings.
3 : 7.14 {lHFF} - J Billings is caught under pressure and knocks the ball forward.
3 : 7.14 {rHBF} - Now M Brown has the ball. What can he do with it?.
3 : 7.2 {CHB} - Handpasses to J Lever.
3 : 7.22 {lHBF} - He beckons for a lead.
3 : 7.26 {lHBF} - M Hibberd uses his body to perfection and reels in the mark.
3 : 7.28 {lHBF} - M Hibberd looks downfield.
3 : 7.35 {rW} - A measured kick in the direction of C Petracca.
3 : 7.37 {rW} - Top mark - not paid.
3 : 7.39 {rW} - C Petracca sizes the options in front of him.
3 : 7.45 {lHFF} - A measured kick to J Melksham.
3 : 7.47 {lHFF} - No-one can take the mark.
3 : 7.53 {CHB} - J Battle scoops up the ball.
3 : 7.53 {CHB} - A quick handpass to L Dunstan.
3 : 7.57 {CHB} - Finds D Hannebery with a handball.
3 : 8.01 {rHBF} - Fires out the handpass to Z Jones.
3 : 8.06 {rHBF} - A lookaway handpass to S Ross.
3 : 8.07 {rHBF} - S Ross has time to take a bounce.
3 : 8.11 {rHBF} - J Melksham sews Z Jones up in a fantastic tackle.
3 : 8.16 {lHFF} - Not enough pressure on J Melksham.
3 : 8.2 {lHFF} - M Gawn runs past and takes the handpass.
3 : 8.22 {lHFF} - M Gawn seems to like his chances ....
3 : 8.26 {lHFF} - M Gawn racks up number 1.
St Kilda Saints : 6.8.44
Melbourne Demons : 8.7.55

3 : 8.3 {C} - No-one can win the tapout.
3 : 8.38 {rW} - C Petracca has it. What can he do with it?.
3 : 8.4 {C} - A wild kick laterally towards C Oliver.
3 : 8.45 {C} - C Oliver plucks that milimetres off the turf.
3 : 8.49 {C} - C Oliver has possession.
3 : 8.53 {lW} - Kick goes sideways.
3 : 8.55 {lW} - B Hill will take this. No - he's dropped it.
3 : 8.59 {C} - J Steele has possession.
3 : 9.03 {lHFF} - He tries to find J Billings with a chip pass.
3 : 9.07 {lHFF} - J Billings spills the mark.
3 : 9.09 {lHFF} - J Billings fighting to get a clear kick.
3 : 9.13 {CHF} - Handballs to T Membery.
3 : 9.18 {rFP} - He sees a lead by J Lonie and kicks in that direction.
3 : 9.22 {rFP} - L Jackson plants a foot on J Lonie's neck and takes a screamer.
3 : 9.23 {lBP} - Quality gather by L Jackson.
3 : 9.28 {lBP} - He has time to take a bounce.
3 : 9.32 {lBP} - Heavy clash between J Lonie and L Jackson. J Lonie comes off marginally better and collects the ball.
3 : 9.36 {rFP} - J Lonie slowing down the play.
3 : 9.38 {rFP} - Surely J Lonie wouldn't miss this.
3 : 9.42 {rFP} - Punched through for a point.
St Kilda Saints : 6.9.45
Melbourne Demons : 8.7.55

3 : 9.51 {FB} - K Pickett sizes the options in front of him.
3 : 9.59 - <<< J Lockhart is coming on to replace K Pickett >>>
3 : 10.01 {FB} - J Lockhart looks downfield.
3 : 10.09 {FB} - J Lockhart has a bounce.
3 : 10.09 {FB} - M King applies the tackle.
3 : 10.11 {FF} - M King slowing down the play.
3 : 10.15 {FF} - But he tripped up S May.
3 : 10.19 {FB} - S May takes off.
3 : 10.23 {FB} - He has a bounce.
3 : 10.25 {rHBF} - He sends the ball to M Brown.
3 : 10.3 {rHBF} - But J Billings is better positioned and marks safely.
3 : 10.34 {CHF} - So T Membery ... with a moment to digest his options.
3 : 10.38 {lHFF} - A quick handpass to J Billings.
3 : 10.4 {lHFF} - J Billings has a shot from fifty.
3 : 10.44 {lHFF} - I hesitate to say that J Billings has the yips but that was a shocking effort.
St Kilda Saints : 6.10.46
Melbourne Demons : 8.7.55

3 : 10.52 {FB} - L Jackson takes off.
3 : 10.55 {rHBF} - A long pass towards M Brown.
3 : 10.58 {rHBF} - M Brown takes the mark on the second attempt.
3 : 11.03 {rHBF} - M Brown to send the ball forward.
3 : 11.07 {lW} - A worm burner to C Salem.
3 : 11.09 {lW} - The ball drops short of C Salem.
3 : 11.13 {rW} - B Hill slowing down the play.
3 : 11.17 {C} - He elects to use J Steele and kicks in that direction.
3 : 11.21 {C} - J Steele can't take it.
3 : 11.25 {C} - Now C Oliver has the ball. What can he do with it?.
3 : 11.27 {lW} - He tries to find C Salem with a chip pass.
3 : 11.31 {lW} - B Hill gets a timely fist to the ball.
3 : 11.36 {rW} - B Hill looks downfield.
3 : 11.4 {rW} - Good bump as B Hill kicks - enough that the ball sprays over the boundary.
3 : 11.42 {C} - C Oliver to send the ball forward.
3 : 11.46 - <<< N Jones is coming on to replace C Petracca >>>
3 : 11.54 {C} - C Oliver has it. What can he do with it?.
3 : 11.56 - <<< C Petracca is coming on to replace L Jackson >>>
3 : 12.04 {C} - C Oliver slowing down the play.
3 : 12.08 {C} - Brought down by J Steele.
3 : 12.11 {C} - With the ball is J Steele.
3 : 12.15 {rW} - A lookaway handpass to B Hill.
3 : 12.19 {C} - He transfers play using J Steele.
3 : 12.23 {C} - J Steele gets too far under the ball.
3 : 12.27 {C} - C Oliver looking for a lead.
3 : 12.3 {rW} - He kicks sideways towards N Jones.
3 : 12.33 {rW} - Top mark - not paid.
3 : 12.37 {rW} - N Jones assessing what lies ahead of him.
3 : 12.41 {rW} - Good bump as N Jones kicks - enough that the ball sprays over the boundary.
3 : 12.44 {lW} - Nobody's checking J Carsile.
3 : 12.48 {rHFF} - His kick is towards R Marshall.
3 : 12.52 {rHFF} - Spoilt by M Hibberd.
3 : 12.56 {CHB} - So J Lever ... with a moment to digest his options.
3 : 12.58 {CHB} - J Viney receives his handpass.
3 : 13.02 {CHB} - J Viney has a bounce.
3 : 13.06 {CHB} - Handballs to E Langdon.
3 : 13.1 {CHB} - Quick hands to M Gawn.
3 : 13.13 {CHB} - M Gawn bounces the ball.
3 : 13.17 {CHB} - Gets a handpass away to E Langdon.
3 : 13.21 {rW} - Kicks in the direction of N Jones.
3 : 13.25 {rW} - Anybody's ball.
3 : 13.27 {rW} - N Jones does some crumbing and is away.
3 : 13.31 {lHFF} - A wobbly old kick.
3 : 13.35 {lHFF} - J Melksham spills the mark.
3 : 13.39 {rHBF} - Z Jones has possession.
3 : 13.41 {rHBF} - Z Jones bounces the ball.
3 : 13.46 {rW} - Another bounce taken by Z Jones.
3 : 13.5 {rW} - Z Jones has another.
3 : 13.53 {lW} - An underground handpass to J Carsile.
3 : 14 {lW} - Passes to L Dunstan by hand.
3 : 14.02 {lW} - L Dunstan takes a bounce and nearly fumbles it.
3 : 14.04 {lHFF} - He has another one.
3 : 14.08 {rHFF} - Kick goes sideways.
3 : 14.12 {rHFF} - R Marshall gets too far under the ball.
3 : 14.15 {lHBF} - M Hibberd sizes the options in front of him.
3 : 14.19 {lHBF} - R Marshall was tripped.
3 : 14.22 {rHFF} - Now R Marshall has the ball. What can he do with it?.
3 : 14.26 {rHFF} - M Hibberd applies the tackle.
3 : 14.29 {lHBF} - M Hibberd looking for a lead.
3 : 14.33 {lHBF} - A wild handball - but luckily M Gawn was well placed to clean up.
3 : 14.37 {lHBF} - Gets hands off within the nick of time.
3 : 14.41 {CHB} - Handpasses to J Lever.
3 : 14.43 {rW} - That's a real up and under.
3 : 14.48 {rW} - J Carsile drops an absolute sitter.
3 : 14.52 {rW} - N Jones sucks it up like a dustbuster and he's off and running.
3 : 14.55 {rW} - A long looping handpass to E Langdon.
3 : 14.58 {rW} - E Langdon is crunched in a tackle.
3 : 15.02 {lW} - J Carsile has possession.
3 : 15.12 {lW} - J Carsile bounces the ball.
3 : 15.12 {lHFF} - J Carsile has another.
3 : 15.14 {lHFF} - J Carsile has another.
3 : 15.16 {lHFF} - Open goal!.
3 : 15.21 {lHFF} - J Carsile's kick slams into the right goal post.
St Kilda Saints : 6.11.47
Melbourne Demons : 8.7.55
 
3 : 15.28 {FB} - J Lockhart takes off.
3 : 15.31 {FB} - Quick hands to M Gawn.
3 : 15.37 {FB} - A quick handpass to S May.
3 : 15.38 {FB} - E Langdon receives his handpass.
3 : 15.43 {lBP} - A wild handball - but luckily C Petracca was well placed to clean up.
3 : 15.45 {lBP} - C Petracca has run too far.
3 : 15.49 {rFP} - J Lonie with the ball now.
3 : 15.55 {rFP} - J Lonie kicks under pressure but there's too much on it. Out on the full.
3 : 16 {FB} - With the ball is S May.
3 : 16 {lHBF} - Finds M Hibberd with a handball.
3 : 16.04 {CHB} - He tries to find J Lever with a chip pass.
3 : 16.08 {CHB} - Running back with the flight of the ball is J Lever! Brave mark.
3 : 16.12 {CHB} - J Lever slowing down the play.
3 : 16.16 {rW} - A mongrel punt in the direction of N Jones.
3 : 16.18 {rW} - One grab... Two... Three... Mark to N Jones.
3 : 16.22 {rW} - N Jones looking for a lead.
3 : 16.27 {rHFF} - J Viney on the end of this.
3 : 16.3 {rHFF} - Almost a throw to E Langdon.
3 : 16.32 {CHF} - Sees N Jetta out of the corner of his eye.
3 : 16.37 {CHF} - N Jetta marks easily.
3 : 16.4 {CHF} - N Jetta signals for his teammates to present.
3 : 16.45 {rFP} - His kick is hurried.
3 : 16.47 {rFP} - Here's a chance for an opportunist rover.
3 : 16.51 {rFP} - J Harmes looking for a lead.
3 : 16.55 {rFP} - J Harmes walks into goal.
3 : 17.01 {rFP} - He's kicked a sausage roll.
St Kilda Saints : 6.11.47
Melbourne Demons : 9.7.61

3 : 17.01 {C} - M Gawn gets the ball down.
3 : 17.1 {lW} - C Salem with a moment to look downfield.
3 : 17.13 {lW} - The coach is on the blower....
3 : 17.16 - <<< C Oliver is trading places with J Harmes >>>
3 : 17.24 {lW} - Its hard and tough but C Salem wins possession.
3 : 17.28 {lW} - He has a bounce.
3 : 17.3 {lW} - Fires out the handpass to E Langdon.
3 : 17.34 {lW} - Then he runs it out of bounds ... deliberately.
3 : 17.38 {rW} - B Hill has it.
3 : 17.42 {lW} - He tries to find J Carsile with a chip pass.
3 : 17.46 {lW} - J Carsile pushes off and take a gutsy diving mark.
3 : 17.49 {lW} - J Carsile looks downfield.
3 : 17.53 {lW} - A slick handpass goes to D Hannebery.
3 : 17.57 {lW} - D Hannebery nearly got done for running too far but he remembers to bounce at last.
3 : 18.01 {rHBF} - A long looping handpass to Z Jones.
3 : 18.03 {lHBF} - Gets a handpass away to H Clark.
3 : 18.07 {lHBF} - A Vandenberg gets enough of a grip to dislodge the ball.
3 : 18.12 {rHFF} - A Vandenberg signals for his teammates to present.
3 : 18.15 {rHFF} - A Vandenberg didn't see that tackle coming from H Clark.
3 : 18.17 {lHBF} - With the ball is H Clark.
3 : 18.22 {CHB} - Flicks it to J Battle.
3 : 18.28 {lHBF} - A wild kick laterally towards H Clark.
3 : 18.3 {lHBF} - No-one can take the mark.
3 : 18.32 {rHFF} - A Vandenberg has it. What can he do with it?.
3 : 18.36 {rHFF} - Long shot at goal from A Vandenberg.
3 : 18.4 {rHFF} - A Vandenberg says 'Goals are fun and I'm having one'.
St Kilda Saints : 6.11.47
Melbourne Demons : 10.7.67

3 : 18.45 {C} - M Gawn gets the ball down.
3 : 18.51 {rW} - Running with the ball is N Jones.
3 : 18.55 {lHFF} - J Melksham trying to offer a lead.
3 : 18.59 {lHFF} - Z Jones drops an absolute sitter.
3 : 19.03 {lHFF} - J Melksham through heavy traffic.
3 : 19.05 {lHFF} - Someone call a dentist. J Melksham has run into Z Jones and is hurting.
3 : 19.09 {rHBF} - Z Jones threads his way through traffic.
3 : 19.15 {rHBF} - Great tackle on Z Jones.
3 : 19.17 {lHFF} - Taking the ball is J Melksham.
3 : 19.19 {FF} - A kick in the general direction of T McDonald.
3 : 19.23 {FF} - D Howard did enough to prevent a mark being taken.
3 : 19.28 {FB} - D Howard sucks it up like a dustbuster and he's off and running.
3 : 19.32 {FB} - D Howard sells the dummy and helps himself to a bounce.
3 : 19.34 {FB} - He's brought down by T McDonald.
3 : 19.38 {FF} - Running with the ball is T McDonald.
3 : 19.42 {FF} - T McDonald from thirty metres.
3 : 19.46 {FF} - Shepherded through for a goal.
St Kilda Saints : 6.11.47
Melbourne Demons : 11.7.73

3 : 19.5 {C} - The ball is bounced to the clear advantage of S Ross.
3 : 19.57 {lW} - C Salem scoops up the ball.
3 : 20.01 {lW} - An underground handpass to J Viney.
3 : 20.02 {lW} - J Viney is crunched in a tackle.
3 : 20.07 {C} - Quality gather by J Steele.
3 : 20.11 {lHFF} - He kicks towards J Billings and M Brown.
3 : 20.15 {lHFF} - M Brown upset the marking attempt by J Billings.
3 : 20.19 {CHB} - J Lever threads his way through traffic.
3 : 20.21 {C} - Quick hands to J Viney under pressure.
3 : 20.25 {C} - Handpasses to E Langdon.
3 : 20.3 {rW} - Huge handpass to N Jones. As good as a kick.
3 : 20.34 {rW} - J Carsile applies the tackle.
3 : 20.36 {C} - J Steele has possession.
3 : 20.4 {lHFF} - He rewards the J Billings lead.
3 : 20.44 {lHFF} - J Billings and M Brown both holding each other. No mark.
3 : 20.5 {lHFF} - J Billings turns on the afterburners - look at him go.
3 : 20.54 {lHFF} - J Billings didn't see that tackle coming from M Brown.
3 : 20.56 {rHBF} - M Brown breaks a tackle and is off.
3 : 21 {lHBF} - He handpasses to M Hibberd.
3 : 21.02 {lHBF} - Gets hands off within the nick of time.
3 : 21.04 {lHBF} - E Langdon nearly got done for running too far but he remembers to bounce at last.
3 : 21.08 {lHBF} - Fires out the handpass to M Hibberd.
3 : 21.13 {C} - Long raking kick in the direction of J Harmes.
3 : 21.17 {C} - All up but nobody can take the mark.
3 : 21.19 {C} - The bounce favours J Harmes and he is off and running.
3 : 21.27 {rHFF} - A hospital kick.
3 : 21.27 {rHFF} - Too long for A Vandenberg and H Clark marks.
3 : 21.31 {CHB} - J Battle with a moment to look downfield.
3 : 21.33 {CHB} - J Battle takes a bounce and nearly fumbles it.
3 : 21.39 {C} - No-look handpass to L Dunstan.
3 : 21.46 {rW} - Spears a kick towards B Hill.
3 : 21.47 {rW} - Over the back of the pack comes B Hill and plucks it out.
3 : 21.5 {rW} - B Hill takes off.
3 : 21.52 {C} - A long looping handpass to J Steele.
3 : 21.56 {C} - Handpass over the shoulder to S Ross.
3 : 22 {lHFF} - Kicks to a contest - J Billings looks to get to thre front.
3 : 22.04 {lHFF} - J Billings misjudges it and it's an easy mark to M Brown.
3 : 22.06 {CHB} - Nobody's checking J Lever.
3 : 22.12 {rHBF} - He tries to find M Brown with a chip pass.
3 : 22.15 {rHBF} - All up but nobody can take the mark.
3 : 22.19 {lHFF} - Now J Billings has the ball. What can he do with it?.
3 : 22.21 {lFP} - Hands it off to L Dunstan.
3 : 22.25 {lFP} - A quick handpass to J Gresham.
3 : 22.29 {lFP} - J Gresham hoofs the ball into space but J Lockhart runs onto it.
3 : 22.33 {rBP} - J Lockhart signals for his teammates to present.
3 : 22.35 {rBP} - He has time to take a bounce.
3 : 22.39 {lBP} - That came off the outside of the boot.
3 : 22.43 {lBP} - J Lonie reckons he got a touch to that but the umpire's having none of it. Mark to C Petracca.
3 : 22.47 {lBP} - C Petracca takes off.
3 : 22.52 {lBP} - Handpass over the shoulder to E Langdon.
3 : 22.53 {lBP} - Draws a man and then with hands to C Petracca.
3 : 22.58 {lBP} - Quick hands to M Gawn.
3 : 23.02 {CHB} - His kick is hurried - in the direction of J Lever.
3 : 23.06 {CHB} - The umpire calls play on.
3 : 23.08 {CHF} - T Membery has it.
3 : 23.12 {CHF} - That looks pretty close ....
3 : 23.16 {CHF} - Can he kick it? Yes he can.
St Kilda Saints : 7.11.53
Melbourne Demons : 11.7.73

3 : 23.21 {C} - Two-handed smash out of the ruck by M Gawn.
3 : 23.27 {C} - D Hannebery breaks free and has found some space.
3 : 23.31 {lW} - Almost a throw to J Carsile.
3 : 23.35 {rHFF} - He gets boot to ball immediately.
3 : 23.37 {rHFF} - R Marshall can't mark but is able to bring the ball to ground.
3 : 23.41 {rHBF} - M Brown takes them on.
3 : 23.45 {lHBF} - Flicks it to M Hibberd.
3 : 23.49 {lHBF} - In danger.
3 : 23.51 {rHFF} - R Marshall to send the ball forward.
3 : 23.55 {FF} - He rewards the M King lead.
3 : 24 {FF} - S May gets a timely fist to the ball.
3 : 24.04 {FB} - So S May ... with a moment to digest his options.
3 : 24.06 {FB} - Gets hands off within the nick of time.
3 : 24.1 {FB} - Handpasses to J Viney.
3 : 24.14 {rHBF} - Throws it onto his boot.
3 : 24.18 {rHBF} - J Billings upset the marking attempt by M Brown.
3 : 24.22 {rHBF} - Now M Brown has the ball. What can he do with it?.
3 : 24.24 {rHBF} - M Brown dummy's the handpass and then takes a bounce.
3 : 24.28 {rHBF} - M Brown crunched by J Billings! M Brown very slow to get up.
3 : 24.32 {lHFF} - J Billings looking for a lead.
3 : 24.37 {lHFF} - Handpass to space. D Hannebery runs onto it.
3 : 24.38 {lHFF} - A lookaway handpass to L Dunstan.
3 : 24.43 {CHF} - Gets hands off within the nick of time.
3 : 24.47 {CHF} - T Membery has latched onto a torp!.
3 : 24.51 {CHF} - Tremendous solo effort from T Membery results in a goal.
St Kilda Saints : 8.11.59
Melbourne Demons : 11.7.73

3 : 24.53 {C} - Easy tapout for S Ross.
=====================================
SIREN SOUNDS FOR THE END OF QUARTER 3
St Kilda Saints : 8.11.59
Melbourne Demons : 11.7.73
=====================================
 
4 : 25.01 {C} - The ball is bounced to the clear advantage of M Gawn.
4 : .06 {C} - E Langdon fighting to get a clear kick.
4 : .1 {CHF} - Fires out the handpass to J Viney.
4 : .14 {CHF} - S Ross dispossesses him.
4 : .18 {CHB} - J Battle has it. What can he do with it?.
4 : .2 {lHBF} - H Clark runs past and takes the handpass.
4 : .24 {CHB} - He elects to use J Battle and kicks in that direction.
4 : .28 {CHB} - N Jetta must wash his hands in superglue. Astonishing mark.
4 : .32 {CHF} - N Jetta takes off.
4 : .36 {CHF} - Boot to ball from N Jetta under pressure.
4 : .38 {CHF} - It's a goal. N Jetta has 1.
St Kilda Saints : 8.11.59
Melbourne Demons : 12.7.79

4 : .43 {C} - M Gawn waits and wins the hitout.
4 : .51 {rW} - Now B Hill has the ball. What can he do with it?.
4 : .53 {lHFF} - A hospital kick.
4 : .57 {lHFF} - Great saving mark taken by M Brown.
4 : 1.01 {rHBF} - M Brown assessing what lies ahead of him.
4 : 1.05 {rHBF} - J Billings dispossesses him.
4 : 1.07 {lHFF} - J Billings signals for his teammates to present.
4 : 1.12 {lHFF} - The crowd yells Ball but its judged a high tackle.
4 : 1.16 {rHBF} - M Brown looks downfield.
4 : 1.2 {lHBF} - Hands it off to M Hibberd.
4 : 1.22 {CHB} - Handpasses to J Lever.
4 : 1.26 {lW} - Searching pass in the direction of C Salem.
4 : 1.3 {lW} - B Hill comes in from the side to intercept.
4 : 1.34 {lW} - J Carsile signals for his teammates to present.
4 : 1.45 {C} - Spears a kick towards J Steele.
4 : 1.45 {C} - Poor option and J Harmes makes him pay by chipping in for the mark.
4 : 1.46 {C} - So J Harmes ... with a moment to digest his options.
4 : 1.49 {C} - He has time to take a bounce.
4 : 1.52 {rHFF} - Geeze he's got onto that one. Pressure on A Vandenberg to mark.
4 : 1.55 {rHFF} - All up but nobody can take the mark.
4 : 1.59 {rHFF} - A Vandenberg has it. What can he do with it?.
4 : 2.03 {rHFF} - A Vandenberg nearly got done for running too far but he remembers to bounce at last.
4 : 2.07 {rFP} - A Vandenberg touches the ball to the ground.
4 : 2.09 {rFP} - A Vandenberg steadies himself and has a shot ....
4 : 2.13 {rFP} - Did H Clark manage to get a finger to it? He did.
St Kilda Saints : 8.11.59
Melbourne Demons : 12.8.80

4 : 2.22 {FB} - With the ball is D Howard.
4 : 2.24 {lHBF} - Searching pass in the direction of H Clark.
4 : 2.28 {lHBF} - A Vandenberg will take this. No - he's dropped it.
4 : 2.32 {lHBF} - H Clark streaming down the ground.
4 : 2.35 {lHBF} - Handpasses to S Ross.
4 : 2.38 {lHBF} - Brought down by J Viney.
4 : 2.42 {rHFF} - A Vandenberg slowing down the play.
4 : 2.46 {rHFF} - A poor handpass but E Langdon is up to the challenge.
4 : 2.5 {rHFF} - He has time to take a bounce.
4 : 2.52 {rHFF} - Draws a man and then with hands to M Gawn.
4 : 2.57 {rHFF} - Fires out the handpass to J Viney.
4 : 3.01 {rHFF} - Great tackle on J Viney.
4 : 3.05 {rHBF} - Z Jones looks downfield.
4 : 3.09 {lHBF} - He tries to find H Clark with a chip pass.
4 : 3.11 {lHBF} - What a shocking kick - straight to A Vandenberg.
4 : 3.15 {CHF} - N Jetta looking for a lead.
4 : 3.19 {rFP} - Quick hands to C Oliver.
4 : 3.24 {rFP} - C Oliver - about 45 metres and not much angle.
4 : 3.25 {rFP} - He's put it through.
St Kilda Saints : 8.11.59
Melbourne Demons : 13.8.86

4 : 3.3 {C} - M Gawn taps it down.
4 : 3.38 {C} - J Harmes weaves through the congestion.
4 : 3.4 {C} - But he's been penalised for throwing.
4 : 3.44 {lW} - So J Carsile ... with a moment to digest his options.
4 : 3.48 - <<< D Roberton is coming on to replace J Carsile >>>
4 : 3.54 {lW} - D Roberton has it. What can he do with it?.
4 : 3.58 {lW} - A slick handpass goes to L Dunstan.
4 : 4.03 {C} - Fires out the handpass to J Steele.
4 : 4.07 {rW} - He elects to use B Hill and kicks in that direction.
4 : 4.09 {rW} - Over the head of B Hill.
4 : 4.13 {rW} - B Hill has possession.
4 : 4.17 {rW} - He takes the opportunity to bounce.
4 : 4.21 {lHFF} - That's a real up and under.
4 : 4.25 {lHFF} - M Brown reads the kick best and marks well in front of J Billings.
4 : 4.27 {rHBF} - M Brown assessing what lies ahead of him.
4 : 4.31 {C} - He looks for J Harmes.
4 : 4.35 {C} - J Steele plants a foot on J Harmes's neck and takes a screamer.
4 : 4.4 {C} - J Steele through heavy traffic.
4 : 4.41 {CHF} - Fires out the handpass to L Dunstan.
4 : 4.46 {FF} - He gets his kick away.
4 : 4.5 {FF} - S May drops an absolute sitter.
4 : 4.54 {FF} - M King breaks free and has found some space.
4 : 4.56 {FF} - M King has a shot at goal.
4 : 5 {FF} - That's a very important six points.
St Kilda Saints : 9.11.65
Melbourne Demons : 13.8.86

4 : 5.04 {C} - Both ruckman miss the ball completely.
4 : 5.12 {rW} - B Hill breaks a tackle and is off.
4 : 5.15 {lHFF} - A measured kick to J Billings.
4 : 5.19 {lHFF} - Poor effort M Brown. J Billings takes the mark.
4 : 5.23 {lHFF} - Nobody's checking J Billings.
4 : 5.25 {rFP} - His kick is hurried.
4 : 5.29 {rFP} - Top mark - not paid.
4 : 5.33 {lBP} - C Petracca looking for a lead.
4 : 5.37 {FB} - A poor handpass but S May is up to the challenge.
4 : 5.41 {lHBF} - Passes to M Hibberd by hand.
4 : 5.43 {CHB} - Gives the ball to J Lever.
4 : 5.49 {CHB} - J Lever takes a bounce and nearly fumbles it.
4 : 5.52 {lHBF} - Handpasses to M Hibberd.
4 : 5.56 {lHBF} - Quick hands to E Langdon.
4 : 5.58 {lHBF} - Huge handpass to M Gawn. As good as a kick.
4 : 6.02 {lW} - A lookaway handpass to E Langdon.
4 : 6.06 {CHF} - He tries to find N Jetta with a chip pass.
4 : 6.1 {CHF} - No mark taken as N Jetta and J Battle wrestle for position.
4 : 6.12 {CHF} - N Jetta streaming down the ground.
4 : 6.16 {lFP} - He kicks towards A Tomlinson and D Butler.
4 : 6.2 {lFP} - A Tomlinson takes that parallel to the ground..
4 : 6.25 {lFP} - The ball is now with A Tomlinson.
4 : 6.26 {lFP} - A Tomlinson walks into goal.
4 : 6.31 {lFP} - Straight through the centre.
St Kilda Saints : 9.11.65
Melbourne Demons : 14.8.92

4 : 6.35 {C} - J Viney is outbodied in the ruck contest.
4 : 6.41 {C} - J Steele breaks a tackle and is off.
4 : 6.45 {C} - But he's run too far.
4 : 6.49 {C} - J Harmes looks downfield.
4 : 6.54 {rHFF} - Kicks with his non-preferred side.
4 : 6.55 {rHFF} - That's poor kicking and the mark is swallowed up by H Clark.
4 : 7 {lHBF} - H Clark to send the ball forward.
4 : 7.04 {lHBF} - Handballs to L Dunstan.
4 : 7.08 {lHBF} - Finds D Hannebery with a handball.
4 : 7.12 {rHBF} - Almost a throw to Z Jones.
4 : 7.14 {lBP} - He involves C Wilkie in the play.
4 : 7.18 {FB} - A wild kick laterally towards D Howard.
4 : 7.22 {FB} - D Howard and T McDonald both holding each other. No mark.
4 : 7.26 {FB} - D Howard has a paddock.
4 : 7.28 {FB} - He takes the opportunity to bounce.
4 : 7.33 {FB} - A slick handpass goes to S Ross.
4 : 7.37 {FB} - Long handpass to the running L Dunstan.
4 : 7.41 {rBP} - D Butler runs past and takes the handpass.
4 : 7.43 {rBP} - A Tomlinson applies the tackle on D Butler.
4 : 7.47 {lFP} - A Tomlinson takes off.
4 : 8.01 {lFP} - A Tomlinson eye's the goals and has a shot.
4 : 8.06 {lFP} - This will be - and is - a goal to A Tomlinson.
St Kilda Saints : 9.11.65
Melbourne Demons : 15.8.98

4 : 8.1 {C} - The ball is bounced and S Ross gets the tap.
4 : 8.2 {lW} - D Roberton does some crumbing and is away.
4 : 8.22 {CHF} - He rewards the T Membery lead.
4 : 8.22 {CHF} - Here's a chance for an opportunist rover.
4 : 8.24 {CHB} - With the ball is J Lever.
4 : 8.28 {CHB} - Quick hands to J Viney.
4 : 8.28 {CHB} - J Viney sells the dummy and helps himself to a bounce.
4 : 8.28 {CHB} - Someone call an ambulance for J Lever. T Membery lined him up and did the job well.
4 : 8.33 {lHFF} - J Billings sizes the options in front of him.
4 : 8.34 {lHFF} - J Billings goes for a long goal.
4 : 8.47 {lHFF} - Tremendous solo effort from J Billings results in a goal.
St Kilda Saints : 10.11.71
Melbourne Demons : 15.8.98

4 : 8.49 {C} - Bashed out of the ruck duel by M Gawn.
4 : 8.53 {lW} - C Salem breaks free and has found some space.
4 : 8.55 {lW} - Quick hands to M Gawn under pressure.
4 : 8.57 {lW} - Gives the ball to C Salem.
4 : 8.59 {lW} - He gets a handpass to M Gawn.
4 : 9.03 {C} - He kicks sideways towards J Harmes.
4 : 9.07 {C} - J Steele must wash his hands in superglue. Astonishing mark.
4 : 9.13 {C} - A bit of space for J Steele to utilise.
4 : 9.16 {lHFF} - His kick covers more height than distance.
4 : 9.18 {lHFF} - All up but nobody can take the mark.
4 : 9.22 {lHFF} - J Billings dances around M Brown.
4 : 9.34 {lHFF} - J Billings bounces the ball.
4 : 9.38 {lHFF} - Great bump by M Brown. J Billings has not moved.
4 : 9.4 {lHBF} - M Hibberd with all the time in the world.
4 : 9.4 {lHBF} - An underground handpass to M Gawn.
4 : 9.4 {lHBF} - M Gawn sells the dummy and helps himself to a bounce.
4 : 9.45 {lHBF} - R Marshall drags M Hibberd down beautifully.
4 : 9.46 {lHFF} - J Billings with a little space.
4 : 9.51 {lHFF} - M Brown nearly has his head ripped off.
4 : 9.55 {rHBF} - M Brown slowing down the play.
4 : 9.59 {C} - He kicks long and low.
4 : 10.03 {C} - J Harmes sticks out a sticky duke and it sticks.
4 : 10.07 {C} - Now J Harmes has the ball. What can he do with it?.
4 : 10.09 {lHFF} - Gets hands off within the nick of time.
4 : 10.13 {lHFF} - Where did Z Jones come from? Great tackle.
4 : 10.15 {rHBF} - Z Jones signals for his teammates to present.
4 : 10.19 {rHBF} - A poor handpass but L Dunstan is up to the challenge.
4 : 10.23 {rHBF} - He handpasses to S Ross.
4 : 10.28 {lHBF} - Gets hands off within the nick of time.
4 : 10.3 {lHBF} - Almost a throw to S Ross.
4 : 10.34 {lHBF} - Quick hands to L Dunstan.
4 : 10.4 {lHBF} - E Langdon sews L Dunstan up in a fantastic tackle.
4 : 10.42 {lHFF} - J Melksham with the ball now.
4 : 10.44 - <<< B Long is coming on to replace Z Jones >>>
4 : 10.52 {lHFF} - J Melksham sizes the options in front of him.
4 : 10.56 {lHFF} - He takes the opportunity to bounce.
4 : 11.01 {lHFF} - J Melksham seems to like his chances ....
4 : 11.03 {lHFF} - He likes it. He likes it a lot.
St Kilda Saints : 10.11.71
Melbourne Demons : 16.8.104

4 : 11.07 {C} - The ruck contest is won by M Gawn.
4 : 11.15 {C} - J Harmes breaks a tackle and is off.
4 : 11.17 {C} - Great tackle by J Steele.
4 : 11.21 {lW} - D Roberton takes them on.
4 : 11.25 {lW} - D Roberton didn't see that tackle coming from N Jones.
4 : 11.3 {rW} - N Jones wants to get on with proceedings.
4 : 11.31 {CHF} - N Jetta receives his handpass.
4 : 11.36 {rHFF} - He involves A Vandenberg in the play.
4 : 11.4 {rHFF} - Long handpass to the running J Viney.
4 : 11.44 {FF} - He kicks towards T McDonald and D Howard.
4 : 11.46 {FF} - Great saving mark taken by D Howard.
4 : 11.5 {FB} - D Howard signals for his teammates to present.
4 : 11.54 {rHBF} - Searching pass in the direction of B Long.
4 : 11.58 {rHBF} - Oh a turnover. The kick is marked by J Melksham.
4 : 12.07 {rHFF} - A Vandenberg takes them on.
4 : 12.07 {CHF} - That came off the outside of the boot.
4 : 12.08 {CHF} - J Battle drops an absolute sitter.
4 : 12.13 {CHF} - N Jetta with all the time in the world.
4 : 12.17 {CHF} - N Jetta bounces the ball.
4 : 12.19 {C} - A slick handpass goes to J Harmes.
4 : 12.23 {C} - Handballs over the top to E Langdon.
4 : 12.27 {C} - That looks pretty close ....
4 : 12.31 {C} - What a statement by E Langdon.
St Kilda Saints : 10.11.71
Melbourne Demons : 17.8.110

4 : 12.33 {C} - Superb ruckwork from M Gawn.
4 : 12.41 {lW} - C Salem streaming down the ground.
4 : 12.46 {rW} - Quick hands to N Jones under pressure.
4 : 12.48 {C} - A wild kick laterally towards J Harmes.
4 : 12.52 {C} - J Steele claims the mark but its play on.
4 : 12.56 {C} - J Harmes threads his way through traffic.
4 : 13 {lHFF} - J Melksham calls for it.
4 : 13.02 {lHFF} - Oooohhhh you beauty! What a mark to J Melksham.
4 : 13.06 {lHFF} - J Melksham slowing down the play.
4 : 13.1 {lHFF} - Handpass to space. E Langdon runs onto it.
4 : 13.15 {CHF} - N Jetta on the end of this.
4 : 13.17 {lHFF} - He gets a handpass to J Melksham.
4 : 13.21 {lHFF} - J Melksham bounces the ball.
4 : 13.25 {rHFF} - Almost a throw to A Vandenberg.
4 : 13.29 {rHFF} - A Vandenberg backs himself for a shot on goal.
4 : 13.33 {rHFF} - They'll be talking about that goal tonight.
St Kilda Saints : 10.11.71
Melbourne Demons : 18.8.116
 

(Log in to remove this ad.)

4 : 13.35 {C} - M Gawn wins the hitout.
4 : 13.43 {rW} - Running with the ball is N Jones.
4 : 13.48 {rW} - Fires out the handpass to E Langdon.
4 : 13.5 {rW} - Crunching tackle by L Dunstan.
4 : 13.53 {C} - J Steele looks downfield.
4 : 13.58 {C} - This could be goal of the match.
4 : 14.02 {C} - Fades away to the left. One behind to the score..
St Kilda Saints : 10.12.72
Melbourne Demons : 18.8.116

4 : 14.08 {FB} - C Petracca wants to get on with proceedings.
4 : 14.12 {FB} - He gets a handpass to E Langdon.
4 : 14.16 {FB} - L Dunstan makes sure that the kick goes nowhere.
4 : 14.19 {FF} - M King takes off.
4 : 14.22 {FF} - M King sells the dummy and has a shot.
4 : 14.26 {FF} - Just shaves the post - one behind to M King.
St Kilda Saints : 10.13.73
Melbourne Demons : 18.8.116

4 : 14.33 {FB} - J Lockhart slowing down the play.
4 : 14.39 {lHBF} - He gets boot to ball immediately.
4 : 14.41 {lHBF} - M Hibberd appeals for the mark but play on's the call.
4 : 14.45 {rHFF} - R Marshall to send the ball forward.
4 : 14.52 {rHFF} - Long handpass to the running L Dunstan.
4 : 14.52 {CHF} - He tries to find T Membery with a chip pass.
4 : 14.55 {CHF} - J Lever did enough to prevent a mark being taken.
4 : 15 {CHB} - J Lever signals for his teammates to present.
4 : 15.04 {rW} - Throws it onto his boot.
4 : 15.1 {rW} - Over the head of N Jones.
4 : 15.1 {rW} - N Jones slowing down the play.
4 : 15.16 {CHF} - He kicks long and low.
4 : 15.18 {CHF} - N Jetta takes the mark.
4 : 15.21 {CHF} - N Jetta has it. What can he do with it?.
4 : 15.24 {FF} - Gets hands off within the nick of time.
4 : 15.28 {FF} - M Gawn screws it round his body.
4 : 15.33 {FF} - Fantastic goal from M Gawn.
St Kilda Saints : 10.13.73
Melbourne Demons : 19.8.122

4 : 15.35 {C} - S Ross too strong at the bounce.
4 : 15.43 {lW} - S Ross sizes the options in front of him.
4 : 15.47 - <<< J Carsile is coming on to replace H Clark >>>
4 : 15.53 {lW} - S Ross with all the time in the world.
4 : 15.57 {rHFF} - He sends the ball to R Marshall.
4 : 16.01 {rHFF} - R Marshall takes the mark.
4 : 16.06 {rHFF} - Nobody's checking R Marshall.
4 : 16.08 {CHF} - A lookaway handpass to T Membery.
4 : 16.12 {CHF} - T Membery sells the dummy and helps himself to a bounce.
4 : 16.16 {FF} - He takes another.
4 : 16.2 {FF} - Where did S May come from? Great tackle.
4 : 16.22 {FB} - S May wants to get on with proceedings.
4 : 16.27 {FB} - He takes the opportunity to bounce.
4 : 16.3 {lBP} - A slick handpass goes to C Petracca.
4 : 16.45 {FB} - Finds S May with a handball.
4 : 16.49 {lHBF} - That kick is a real floater.
4 : 16.51 {lHBF} - R Marshall upset the marking attempt by M Hibberd.
4 : 16.51 {lHBF} - M Hibberd wants to get on with proceedings.
4 : 16.51 {C} - He gets boot to ball immediately.
4 : 16.53 {C} - Terrible kick falls into the hands of J Steele.
4 : 16.55 {C} - J Steele has possession.
4 : 16.59 {C} - J Steele has a bounce.
4 : 17.03 {rW} - A slick handpass goes to B Hill.
4 : 17.06 {rW} - L Dunstan receives his handpass.
4 : 17.1 {rW} - L Dunstan bounces the ball.
4 : 17.13 {rHFF} - L Dunstan's taken another bounce.
4 : 17.17 {lHFF} - That came off the outside of the boot.
4 : 17.2 {lHFF} - No mark taken as J Billings and M Brown wrestle for position.
4 : 17.24 {rHBF} - M Brown with some space now.
4 : 17.28 {lHBF} - A lookaway handpass to M Hibberd.
4 : 17.32 {C} - He looks for J Harmes.
4 : 17.36 {C} - J Steele upset the marking attempt by J Harmes.
4 : 17.38 {C} - Quality gather by J Harmes.
4 : 17.42 {C} - Draws a man and then with hands to E Langdon.
4 : 17.46 {C} - A quick handpass to J Harmes.
4 : 17.53 {lW} - Hands it off to C Salem.
4 : 17.59 {lW} - That's a fantasic tackle by B Hill.
4 : 18.01 {rW} - B Hill slowing down the play.
4 : 18.03 {rW} - That's a fantasic tackle by C Salem.
4 : 18.05 {lW} - C Salem wants to get on with proceedings.
4 : 18.07 {lW} - A lookaway handpass to M Gawn.
4 : 18.12 {lHFF} - Finds E Langdon with a handball.
4 : 18.15 {lHFF} - At least fifty-five metres out.
4 : 18.19 {lHFF} - You won't see too many better than that. Champagne football.
St Kilda Saints : 10.13.73
Melbourne Demons : 20.8.128

4 : 18.22 {C} - S Ross wins the tapout.
4 : 18.3 {C} - J Steele through heavy traffic.
4 : 18.34 {C} - J Steele fifty-five out - backs himself.
4 : 18.38 {C} - And a little dance from J Steele as the ball sails through.
St Kilda Saints : 11.13.79
Melbourne Demons : 20.8.128

4 : 18.4 {C} - S Ross too strong at the bounce.
4 : 18.48 {rW} - B Hill looking for a lead.
4 : 18.52 - <<< L Jackson is coming on to replace E Langdon >>>
4 : 18.59 {rW} - A bit of space for B Hill to utilise.
4 : 19.07 {C} - Quick hands to J Steele.
4 : 19.07 {C} - J Steele takes a bounce and nearly fumbles it.
4 : 19.09 {C} - J Steele is crunched in a tackle by J Harmes.
4 : 19.13 {C} - J Harmes weaves through the congestion.
4 : 19.17 {C} - J Harmes takes a bounce and nearly fumbles it.
4 : 19.21 {lW} - Kick goes sideways.
4 : 19.23 {lW} - B Hill takes one of the best marks you'll ever see.
4 : 19.28 {C} - J Steele has a paddock.
4 : 19.36 {C} - Great tackle by J Harmes.
4 : 19.4 {C} - J Harmes assessing what lies ahead of him.
4 : 19.44 {C} - An underground handpass to L Jackson.
4 : 19.5 {rHFF} - He gets his kick away.
4 : 19.5 {rHFF} - A Vandenberg too strong for J Carsile.
4 : 19.52 {rHFF} - A Vandenberg has it. What can he do with it?.
4 : 19.57 {rHFF} - Heavy knock behind play and it looks like someone's coming off.
4 : 19.57 - <<< A Vandenberg is trading places with C Petracca >>>
4 : 20.05 {rHFF} - C Petracca has it. What can he do with it?.
4 : 20.11 {rHFF} - A long looping handpass to J Viney.
4 : 20.13 {rHFF} - J Viney has wild shot at goal.
4 : 20.17 {rHFF} - It's a goal.
St Kilda Saints : 11.13.79
Melbourne Demons : 21.8.134

4 : 20.19 {C} - M Gawn wins the tapout.
4 : 20.25 {lW} - C Salem signals for his teammates to present.
4 : 20.3 {CHF} - N Jetta and J Battle jostle for position.
4 : 20.34 {CHF} - J Battle must wash his hands in superglue. Astonishing mark.
4 : 20.37 {CHB} - J Battle wants to get on with proceedings.
4 : 20.4 {CHB} - L Dunstan on the end of this.
4 : 20.44 {CHB} - Long handpass to the running S Ross.
4 : 20.48 {lHBF} - Sees J Carsile out of the corner of his eye.
4 : 20.52 {lHBF} - C Petracca upset the marking attempt by J Carsile.
4 : 20.54 {rHFF} - C Petracca weaves through the congestion.
4 : 21.07 {rHFF} - Huge bump by J Carsile on C Petracca.
4 : 21.07 {lHBF} - J Carsile with a moment to look downfield.
4 : 21.1 {C} - J Steele receives his handpass.
4 : 21.1 {C} - Monster shot at goal from J Steele.
4 : 21.13 {C} - It's going to result in a goal. Goal to J Steele.
St Kilda Saints : 12.13.85
Melbourne Demons : 21.8.134

4 : 21.17 {C} - The ball is bounced to the clear advantage of S Ross.
4 : 21.25 {rW} - L Dunstan breaks free and has found some space.
4 : 21.27 - <<< E Langdon is coming on to replace C Oliver >>>
4 : 21.36 {rW} - Running with the ball is L Dunstan.
4 : 21.39 - <<< C Oliver is coming on to replace E Langdon >>>
4 : 21.46 {rW} - L Dunstan dances around L Jackson.
4 : 21.5 {rW} - A slick handpass goes to S Ross.
4 : 21.53 {rW} - S Ross has time to take a bounce.
4 : 21.56 {rHFF} - S Ross touches the ball to the ground.
4 : 22 {rHFF} - S Ross is still looking for options and takes another.
4 : 22.04 {rFP} - Another bounce taken by S Ross.
4 : 22.08 {rFP} - A quick snap from S Ross.
4 : 22.1 {rFP} - That's a handy goal at this stage.
St Kilda Saints : 13.13.91
Melbourne Demons : 21.8.134

4 : 22.15 {C} - Long tap from M Gawn.
4 : 22.23 {rW} - A bit of space for N Jones to utilise.
4 : 22.29 {rW} - He has a bounce.
4 : 22.29 {rHFF} - N Jones touches the ball to the ground.
4 : 22.33 {rHFF} - Quick hands to L Jackson under pressure.
4 : 22.37 {rHFF} - L Dunstan might be in trouble with the tribunal after that tackle on L Jackson. Play on is the call.
4 : 22.42 {lHBF} - J Carsile looking for a lead.
4 : 22.43 {rW} - A hospital kick.
4 : 22.47 {rW} - That's a great mark.
4 : 22.52 {rW} - Now B Hill has the ball. What can he do with it?.
4 : 23.04 {lW} - A lookaway handpass to D Roberton.
4 : 23.1 {lW} - Handpass to space. L Dunstan runs onto it.
4 : 23.16 {rHFF} - R Marshall presents.
4 : 23.16 {rHFF} - The ball drops short of R Marshall.
4 : 23.16 {rHFF} - R Marshall has possession.
4 : 23.18 {lFP} - He handpasses to J Gresham.
4 : 23.18 {lFP} - J Gresham has a shot at goal.
4 : 23.22 {lFP} - Across the face : one behind.
St Kilda Saints : 13.14.92
Melbourne Demons : 21.8.134

4 : 23.27 {FB} - A Vandenberg to send the ball forward.
4 : 23.31 {FB} - J Lonie drags A Vandenberg down beautifully.
4 : 23.35 {rFP} - J Lonie to send the ball forward.
4 : 23.39 {rFP} - J Lonie wants a goal.
4 : 23.41 {rFP} - Great goal by J Lonie.
St Kilda Saints : 14.14.98
Melbourne Demons : 21.8.134

4 : 23.45 {C} - M Gawn wins the hitout.
4 : 23.53 {C} - The bounce favours J Steele and he is off and running.
4 : 23.57 {C} - Gets hands off within the nick of time.
4 : 24.06 {lW} - Gets a handpass away to D Roberton.
4 : 24.12 {lW} - Crunching tackle by N Jones.
4 : 24.2 {rW} - N Jones with a moment to look downfield.
4 : 24.37 {rW} - N Jones bounces the ball.
4 : 24.37 {lHFF} - A bit of a miskick.
4 : 24.37 {lHFF} - At the back is J Melksham who will take the mark.
4 : 24.37 {lHFF} - J Melksham looking for a lead.
4 : 24.41 {rHFF} - Draws a man and then with hands to C Petracca.
4 : 24.41 {rHFF} - Hands it off to J Viney.
4 : 24.43 {rHFF} - J Viney sells the dummy and helps himself to a bounce.
4 : 24.43 {rHFF} - A long looping handpass to C Petracca.
4 : 24.45 {rHFF} - He involves M Gawn in the play.
4 : 24.47 {rHFF} - Handpasses to C Petracca.
4 : 24.47 {lHFF} - He beckons for a lead.
4 : 24.51 {lHFF} - B Long did enough to prevent a mark being taken.
4 : 24.55 {lHFF} - J Melksham has possession.
=====================================
SIREN SOUNDS FOR THE END OF QUARTER 4
St Kilda Saints : 14.14.98
Melbourne Demons : 21.8.134
=====================================


Match Over!
 
AFTER-MATCH SUMMARY :
Rich (BB code):
STK SENIORS Vs MEL SENIORS
STK               3    5        6    8        8    11       14   14   98       
MEL               2    1        6    5        11   7        21   8    134      
STK        HO  K  M  H  T  FF FA G  B   Dt  MEL         HO  K  M  H  T  FF FA G  B   Dt
D Butler    0  3  4  4  0  0  1  0  0   26  J Lockhart   0  4  1  4  0  0  0  0  0   23
D Howard    0  5  4  11 0  0  0  0  0   49  S May        0  5  1  8  1  0  1  0  0   35
C Wilkie    0  2  0  3  0  0  0  0  0   12  A Vandenbe   0  9  3  7  1  0  1  2  2   65
B Long      0  2  0  1  1  0  0  0  0   12  M Brown      0  3  4  5  2  2  0  0  0   41
J Battle    0  8  5  7  0  2  0  0  0   55  J Lever      0  8  5  9  1  1  2  0  0   56
J Carsile   0  7  3  4  2  1  0  0  1   48  M Hibberd    0  8  3  12 3  0  3  0  0   60
B Hill      0  12 8  11 2  1  2  2  0   97  N Jones      0  9  2  7  1  0  1  0  0   48
J Steele    0  15 6  14 2  0  1  2  3  111  J Harmes     0  7  2  7  1  0  1  1  1   49
D Roberton  0  1  0  2  0  0  0  0  0    7  C Salem      0  6  2  9  1  1  2  0  0   41
R Marshall  0  11 1  7  4  3  0  0  2   71  C Petracca   0  10 8  18 1  4  2  1  1   99
T Membery   0  4  1  5  1  0  0  2  0   41  N Jetta      0  12 6  7  1  0  2  1  1   73
J Billings  0  8  5  7  2  0  2  1  2   63  J Melksham   0  7  3  8  0  0  1  1  0   49
J Lonie     0  2  0  0  1  0  2  1  1   11  C Oliver     0  13 6  6  0  0  0  2  0   81
M King      0  5  0  0  1  0  1  3  2   36  T McDonald   0  6  1  0  1  0  0  5  1   56
J Gresham   0  3  0  1  0  0  0  2  1   24  A Tomlinso   0  10 4  1  0  0  0  2  0   56
S Ross      12 13 0  8  3  2  0  1  1   88  M Gawn       16 9  0  19 4  2  1  2  0  108
L Dunstan   0  13 0  19 5  6  2  0  1   98  L Jackson    0  3  3  3  1  0  0  0  0   28
D Hanneber  0  6  6  15 9  2  1  0  0  101  J Viney      0  8  0  11 9  2  2  1  1   85
Z Jones     0  7  2  8  2  1  0  0  0   52  K Pickett    0  0  0  0  0  0  0  0  0    0
H Clark     0  6  6  11 1  3  1  0  0   62  E Langdon    0  12 0  21 9  1  2  3  1  128

Rich (BB code):
            STK   MEL
Hitouts   : 12   16 
Kicks     : 133  149 
Marks     : 51   54 
Handballs : 138  162 
Tackles   : 36   37 
Frees For : 21   13 
Frees Ag. : 13   21 
Smothers  : 1    0 
Ironouts  : 11   12 
Inside50  : 17   24 
Goals     : 14   21 
Behinds   : 14   8

GOAL BY GOAL :
Rich (BB code):
First Quarter :
3.38 - Behind to R Marshall (STK) - STK by 1 point(s).
4.15 - Goal to M King (STK) - STK by 7 point(s).
5.25 - Goal to C Petracca (MEL) - STK by 1 point(s).
6.41 - Goal to B Hill (STK) - STK by 7 point(s).
7.49 - Behind to J Viney (MEL) - STK by 6 point(s).
9.36 - Goal to T McDonald (MEL) - scores level.
11.44 - Rushed behind to STK - STK by 1 point(s).
13.06 - Behind to M King (STK) - STK by 2 point(s).
16.2 - Behind to J Billings (STK) - STK by 3 point(s).
16.43 - Goal to J Gresham (STK) - STK by 9 point(s).
22.16 - Behind to S Ross (STK) - STK by 10 point(s).

Second Quarter :
2.42 - Behind to J Steele (STK) - STK by 11 point(s).
3.05 - Goal to M King (STK) - STK by 17 point(s).
3.44 - Goal to C Oliver (MEL) - STK by 11 point(s).
6.29 - Goal to T McDonald (MEL) - STK by 5 point(s).
8.38 - Goal to J Gresham (STK) - STK by 11 point(s).
11.25 - Rushed behind to MEL - STK by 10 point(s).
12.17 - Goal to B Hill (STK) - STK by 16 point(s).
14.16 - Behind to E Langdon (MEL) - STK by 15 point(s).
14.55 - Goal to T McDonald (MEL) - STK by 9 point(s).
16.53 - Goal to E Langdon (MEL) - STK by 3 point(s).
20.21 - Rushed behind to MEL - STK by 2 point(s).
21.04 - Behind to N Jetta (MEL) - STK by 1 point(s).
23.21 - Rushed behind to STK - STK by 2 point(s).
24.41 - Behind to R Marshall (STK) - STK by 3 point(s).

Third Quarter :
1.36 - Rushed behind to MEL - STK by 2 point(s).
2.38 - Behind to A Vandenberg (MEL) - STK by 1 point(s).
7.02 - Goal to T McDonald (MEL) - MEL by 5 point(s).
8.3 - Goal to M Gawn (MEL) - MEL by 11 point(s).
9.46 - Rushed behind to STK - MEL by 10 point(s).
10.48 - Behind to J Billings (STK) - MEL by 9 point(s).
15.24 - Behind to J Carsile (STK) - MEL by 8 point(s).
17.01 - Goal to J Harmes (MEL) - MEL by 14 point(s).
18.45 - Goal to A Vandenberg (MEL) - MEL by 20 point(s).
19.5 - Goal to T McDonald (MEL) - MEL by 26 point(s).
23.21 - Goal to T Membery (STK) - MEL by 20 point(s).
24.53 - Goal to T Membery (STK) - MEL by 14 point(s).

Final Quarter :
.43 - Goal to N Jetta (MEL) - MEL by 20 point(s).
2.17 - Rushed behind to MEL - MEL by 21 point(s).
3.3 - Goal to C Oliver (MEL) - MEL by 27 point(s).
5.04 - Goal to M King (STK) - MEL by 21 point(s).
6.35 - Goal to A Tomlinson (MEL) - MEL by 27 point(s).
8.1 - Goal to A Tomlinson (MEL) - MEL by 33 point(s).
8.49 - Goal to J Billings (STK) - MEL by 27 point(s).
11.07 - Goal to J Melksham (MEL) - MEL by 33 point(s).
12.33 - Goal to E Langdon (MEL) - MEL by 39 point(s).
13.35 - Goal to A Vandenberg (MEL) - MEL by 45 point(s).
14.04 - Behind to J Steele (STK) - MEL by 44 point(s).
14.31 - Behind to M King (STK) - MEL by 43 point(s).
15.35 - Goal to M Gawn (MEL) - MEL by 49 point(s).
18.22 - Goal to E Langdon (MEL) - MEL by 55 point(s).
18.4 - Goal to J Steele (STK) - MEL by 49 point(s).
20.19 - Goal to J Viney (MEL) - MEL by 55 point(s).
21.17 - Goal to J Steele (STK) - MEL by 49 point(s).
22.15 - Goal to S Ross (STK) - MEL by 43 point(s).
23.25 - Behind to J Gresham (STK) - MEL by 42 point(s).
23.45 - Goal to J Lonie (STK) - MEL by 36 point(s).

TIME ON GROUND :
Rich (BB code):
STK
D Roberton           0 (On) .32 (Off) 78.48 (On) Total : 22%
D Howard             0 (On) Total : 100%
C Wilkie             0 (On) Total : 100%
Z Jones              0 (On) 85.44 (Off) Total : 85%
J Battle             0 (On) Total : 100%
H Clark              0 (On) 90.47 (Off) Total : 90%
B Hill               0 (On) Total : 100%
J Steele             0 (On) Total : 100%
D Hannebery          0 (On) 54.37 (Off) 55.19 (On) Total : 99%
D Butler             0 (On) 21.04 (Off) 44.17 (On) Total : 77%
T Membery            0 (On) Total : 100%
J Billings           0 (On) Total : 100%
J Lonie              0 (On) Total : 100%
M King               0 (On) Total : 100%
J Gresham            0 (On) Total : 100%
S Ross               0 (On) Total : 100%
L Dunstan            0 (On) Total : 100%
R Marshall           0 (On) 55.19 (Off) 56.08 (On) Total : 99%
B Long               0 (Off) 21.04 (On) 56.08 (Off) 85.44 (On) Total : 49%
J Carsile            0 (Off) .32 (On) 44.17 (Off) 54.37 (On) 78.48 (Off) 90.47 (On) Total : 76%

MEL
N Jetta              0 (On) 15.16 (Off) 15.47 (On) Total : 99%
S May                0 (On) Total : 100%
C Salem              0 (On) 25.43 (Off) 28.15 (On) Total : 97%
N Jones              0 (On) 52.11 (Off) 61.46 (On) Total : 90%
J Lever              0 (On) Total : 100%
M Hibberd            0 (On) Total : 100%
E Langdon            0 (On) 93.52 (Off) 96.27 (On) 96.39 (Off) Total : 93%
C Oliver             0 (On) 96.27 (Off) 96.39 (On) Total : 99%
A Tomlinson          0 (On) 28.15 (Off) 35.38 (On) Total : 92%
A Vandenberg         0 (On) Total : 100%
L Jackson            0 (On) 15.47 (Off) 25.43 (On) 61.56 (Off) 93.52 (On) Total : 58%
J Melksham           0 (On) Total : 100%
J Harmes             0 (On) Total : 100%
T McDonald           0 (On) Total : 100%
M Brown              0 (On) 35.38 (Off) 52.11 (On) Total : 83%
M Gawn               0 (On) Total : 100%
C Petracca           0 (On) 61.46 (Off) 61.56 (On) Total : 99%
J Viney              0 (On) Total : 100%
K Pickett            0 (Off) 51.59 (On) 59.59 (Off) Total : 7%
J Lockhart           0 (Off) 15.16 (On) 51.59 (Off) 59.59 (On) Total : 76%

Total :  3600               Average :  89.99999

MATCH-UPS :
  • In a comparatively small-fry arm wrestle, it could be argued that A Tomlinson had the better game against B Hill - although there was very little in it. - 26m from 1 to 27.
  • Spending most of the game pushing and shoving each other, D Butler beat A Tomlinson today - but not by much. - 31m from 51 to 82.
  • In what was a very slow day for both, J Carsile won the bout with A Tomlinson. - 0m from 43 to 43.
  • In an epic battle, A Vandenberg either broke even with H Clark or vaguely bested him - it was hard to tell. - 86m from 2 to 88.
  • Neither having much reason to brag, J Lonie and A Vandenberg were hard to separate - though J Lonie was slightly more effective. - 0m from 98 to 98.
  • Bordering on a training run, B Hill gave C Salem a bath. - 70m from 28 to 98.
  • While overall a quiet day for both players, J Melksham massacred B Long. - 14m from 86 to 100.
  • Despite neither player having much impact, M Hibberd won the bout with B Long. - 29m from 21 to 50.
  • While overall a quiet day for both players, C Oliver was way too good for C Wilkie. - 4m from 78 to 82.
  • Toe to toe throughout, J Steele did very well against C Oliver. - 62m from 0 to 62.
  • While not all all one-way, D Hannebery was slightly more polished than C Petracca. - 49m from 1 to 50.
  • While both players struggled to make an impact, C Petracca did very well against J Carsile. - 44m from 55 to 99.
  • While overall a quiet day for both players, C Petracca massacred J Lonie. - 26m from 65 to 91.
  • Neither having much reason to brag, C Petracca was slightly more polished than L Dunstan. - 0m from 0 to 0.
  • While overall a quiet day for both players, C Salem was way too good for J Lonie. - 13m from 11 to 24.
  • Spending most of the game pushing and shoving each other, C Wilkie beat J Harmes today - but not by much. - 60m from 7 to 67.
  • In a comparatively small-fry arm wrestle, M Hibberd did well against D Butler. - 15m from 0 to 15.
  • In an epic battle, J Viney and D Hannebery were hard to separate - though J Viney was slightly more effective. - 43m from 56 to 99.
  • In what became a bit of a clinic, T McDonald was way too good for D Howard. - 80m from 7 to 87.
  • While overall a quiet day for both players, N Jones gave D Roberton a lesson. - 20m from 79 to 99.
  • In what became a bit of a clinic, E Langdon gave L Dunstan a lesson. - 92m from 1 to 93.
  • Neither having much reason to brag, L Jackson and J Battle were hard to separate - though L Jackson was slightly more effective. - 9m from 2 to 11.
  • Toe to toe throughout, N Jetta and J Battle were evenly matched. - 78m from 17 to 95.
  • In a solid performance, M Brown had J Billings's measure. - 35m from 57 to 92.
  • Regardless that this wasn't a huge game for either player, J Billings exposed N Jones's frailties. - 43m from 6 to 49.
  • Neither getting, near the ball much, J Carsile did a demolition job on M Brown. - 9m from 2 to 11.
  • While overall a quiet day for both players, I'm not sure that what J Carsile did to N Jones should be entirely legal. - 14m from 62 to 76.
  • While worlds weren't set on fire, J Lockhart massacred J Gresham. - 82m from 16 to 98.
  • Neither having much reason to brag, N Jetta was slightly more polished than J Gresham. - 10m from 3 to 13.
  • In quite a tussle, J Steele came out tops over the brave J Harmes. - 29m from 70 to 99.
  • Toe to toe throughout, J Lever did well against T Membery. - 88m from 3 to 91.
  • Neither having much reason to brag, J Lonie and L Jackson were hard to separate - though J Lonie was slightly more effective. - 12m from 49 to 61.
  • In a bit of an exhibition, Z Jones gave J Melksham a hiding. - 77m from 8 to 85.
  • While not all all one-way, J Viney had the better of R Marshall. - 51m from 1 to 52.
  • While both players struggled to make an impact, L Dunstan was slightly more polished than L Jackson. - 5m from 94 to 99.
  • In a resume-material performance, M Gawn had S Ross's measure. - 100m from 0 to 100.
  • While both players struggled to make an impact, M Hibberd had the better of R Marshall. - 41m from 57 to 98.
  • While both players struggled to make an impact, it could be argued that S May had the better game against M King - although there was very little in it. - 95m from 3 to 98.
 
Back
Top