Navigation
Install the app
How to install the app on iOS
Follow along with the video below to see how to install our site as a web app on your home screen.
Note: This feature may not be available in some browsers.
More options


You are using an out of date browser. It may not display this or other websites correctly.
You should upgrade or use an alternative browser.
You should upgrade or use an alternative browser.
Painting miniatures, terrain and scenery.
- Thread starter Chief
- Start date
- Tagged users None
NTRabbit
Brownlow Medallist
I usually just use it straight. Then if it makes the mini too dark over all, you can paint green back over the large raised areas, and just leave the nuln oil shadow in the recesses.
Chief
~ Shmalpha ~
- Thread starter
- Admin
- #53
haha - I put the troll under the mag lamp I bought and got a bit of a shock at the number of tiny spots that I missed. The wash might flow in there.
Guy at GW Palmdale (Bris) is quite helpful. Also my comic shop sells P3 paints that are as expensive as the GW paints at $6 a pot.
Guy at GW Palmdale (Bris) is quite helpful. Also my comic shop sells P3 paints that are as expensive as the GW paints at $6 a pot.
Last edited:
Chief
~ Shmalpha ~
- Thread starter
- Admin
- #54

Bad picture, but there he is. His brother waiting in line. Good enough for a game board.
The wash is not even, I tried to fix it up with more green, but the shade doesn't match... all the beginner mistakes, I imagine. One big issue is the head has lots more detail than the rest of the skin, and more wash accumulated, which made the head look darker than the rest of it, which meant I tried to dry brush more green, but the dry brush is much flatter and the wash is glossy... it ended up looking crappy up close.
Basing was interesting - some polystyrene for the broken bricks at the back, stones from some old fish tank gravel I had under the house, and sand from the kids sandpit. It is mostly very light gray because the figure is so dark. I tried a bit of moss or lichen around the bricks but it isn't bright enough.
Time to get some spray sealant and move on to the next one.
Last edited:
Chief
~ Shmalpha ~
- Thread starter
- Admin
- #55

Finally finished off these evil creatures: Legend of Drizzt drakes.
Tried to give them unique environments. The idea for the lava sands on the red one I got from the YouToobs. Mine looks a bit dodgier though.
The bases probably need a bit more of a tidy around the edges, and maybe one last light dry brush, but I am calling it a day and moving on to new figures.
Last edited:
Chief
~ Shmalpha ~
- Thread starter
- Admin
- #56
I'm pretty meh about the Legend of Drizzt goblin cutters.
I tried to speed things up to get them done over a couple of days, but they are a bit muddy. The heads are like 5mm across and correcting a couple of goofs meant too much paint covering the detail.
Still need a couple of tidy ups where I have coloured outside the lines, but again they are good enough for the game board. No basing this time. I will try to get some flock for the next base I do, try it out.
Chief
~ Shmalpha ~
- Thread starter
- Admin
- #57
Watching TV and played with a corrugated iron fence thing I saw on a site (germy.co.uk). 5mm 3mm foam core base, corrugated cardboard and paddle pop sticks for the posts and railings behind. Bit o' glue and sand for bitumen.
Main object was to practice making rust (red, yellow and a tiny touch of blue, FYI) and gunmetal (silver with a dab of black).
I have ordered some futuristic minis + skirmish rules that were on sale so a bit of this type of stuff for the battlefield will be nice.

(Base not quite finished plus a few spots of cardboard to cover. Might make some bullet holes too. Oh the possibilities! 40mm high, the rust could stand out a bit more from a foot or two away, might add more.)
I'm also thinking about working up to building a full miniature zombie apocalypse fortified compound because ... reasons? So this type of stuff will fit right in.
Last edited:
Beerfish
Fat Side Winger
- Jan 20, 2008
- 60,679
- 101,480
- AFL Club
- Essendon
- Other Teams
- Nic Martin
- Moderator
- #58
Looks really good.
Chief
~ Shmalpha ~
- Thread starter
- Admin
- #59
The boy and I started cutting up some foam core to build the keep from Hoard of the Dragon Queen for the game group.
My thought was to use printed textures, glue them to the foam core. Easy.
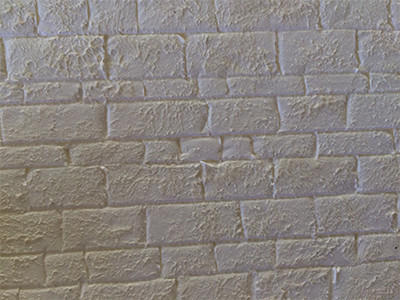
My son - now a bit intrigued by this modelling lark so there will be more school holiday photos going up in this thread - has suggested we score all of the brickwork in and paint it. But the thing does have about 40 inches of walls so that's a lot of scoring. Anyone know any other easy-ish methods to get a passable brickwork texture onto foam core?
Wait... there's always an instructional video featuring a creepy old guy:
Just tried out scoring bricks into a small bit of foamcore - it isn't too hard. Good repetitive work for our household's excess child labour.
Castle gate:

Stippled with filler (which then melts away when painted ):
):
My thought was to use printed textures, glue them to the foam core. Easy.
My son - now a bit intrigued by this modelling lark so there will be more school holiday photos going up in this thread - has suggested we score all of the brickwork in and paint it. But the thing does have about 40 inches of walls so that's a lot of scoring. Anyone know any other easy-ish methods to get a passable brickwork texture onto foam core?
Wait... there's always an instructional video featuring a creepy old guy:
Just tried out scoring bricks into a small bit of foamcore - it isn't too hard. Good repetitive work for our household's excess child labour.
Castle gate:

Stippled with filler (which then melts away when painted
):
Last edited:
Chief
~ Shmalpha ~
- Thread starter
- Admin
- #60
30 pages into this thread: http://www.dakkadakka.com/dakkaforum/posts/list/0/444971.page
Mad building skillz.
Mad building skillz.
Beerfish
Fat Side Winger
- Jan 20, 2008
- 60,679
- 101,480
- AFL Club
- Essendon
- Other Teams
- Nic Martin
- Moderator
- #61
This would look good with a light grey and then some kind of dry wash in browns and greens for your ancient mossy growth and dirt and stuff.Stippled with filler (which then melts away when painted
Chief
~ Shmalpha ~
- Thread starter
- Admin
- #62
The black has gone on, but as it needed to be watery to get into the cracks the filler flattened out. Next time I'll do the watery crack-filling then stipple, then go over in straight black again. Or find black foamcoreThis would look good with a light grey and then some kind of dry wash in browns and greens for your ancient mossy growth and dirt and stuff.
I'll try out the greens and browns on my test piece, I've been trying to think of ways to make it more interesting than just black, grey dry brush, light grey highlights.

Chief
~ Shmalpha ~
- Thread starter
- Admin
- #64
BTW if you ever want to flog off old basing pads...I used greenstuff, then cheaper but nearly identical milliput, and cheaper again but ultimately not as good air drying clay, pressed into Basius basing pads. The Mark II pads are due out in May. They're pretty neat, especially if you're otherwise going to buy lots of resin bases.
This month I'm going to be using some different techniques though, you'll have to wait and see!
I was about 150m from Orcs Nest in London but we were out of time and energy (British Museum is brutal on the feet) so missed out on grabbing some in July.
Chief
~ Shmalpha ~
- Thread starter
- Admin
- #65
Ordered dumb amounts of minis from www.em4miniatures.com - about 300 of their unpainted cheapie orcs and dwarves at about 45c each. Will be good to practice different colours, washes, maybe a dip or two, modding, give some to the kids to wreck.
Cool, I foolishly went in for this - https://www.kickstarter.com/projects/1513061270/reaper-miniatures-bones-3-the-search-for-mr-bones
Ugh, got swept up in the moment.
Ugh, got swept up in the moment.
Chief
~ Shmalpha ~
- Thread starter
- Admin
- #67
I looked at that to buy post-Kickstarter. Nah.Cool, I foolishly went in for this - https://www.kickstarter.com/projects/1513061270/reaper-miniatures-bones-3-the-search-for-mr-bones
Ugh, got swept up in the moment.
In other news...
The scratch built Greenest Keep from Hoard of the Dragon Queen went pretty well:

Worked on the table... though no action happens there
Our bard went and tried to chat up the keep's chef.

Stairs are a bugger...
Last edited:
NTRabbit
Brownlow Medallist
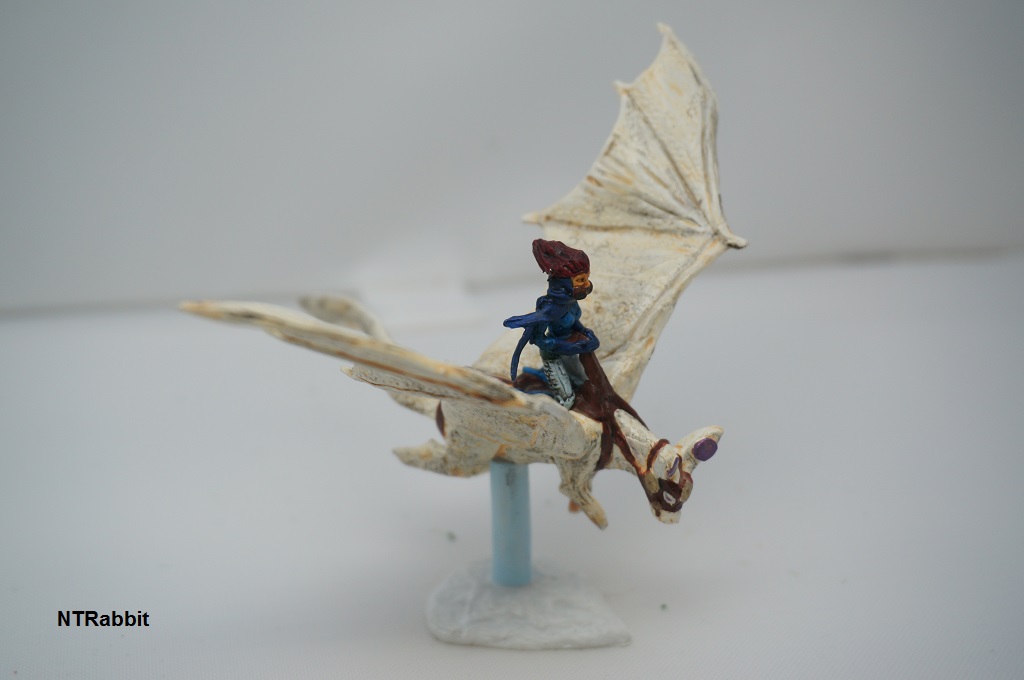
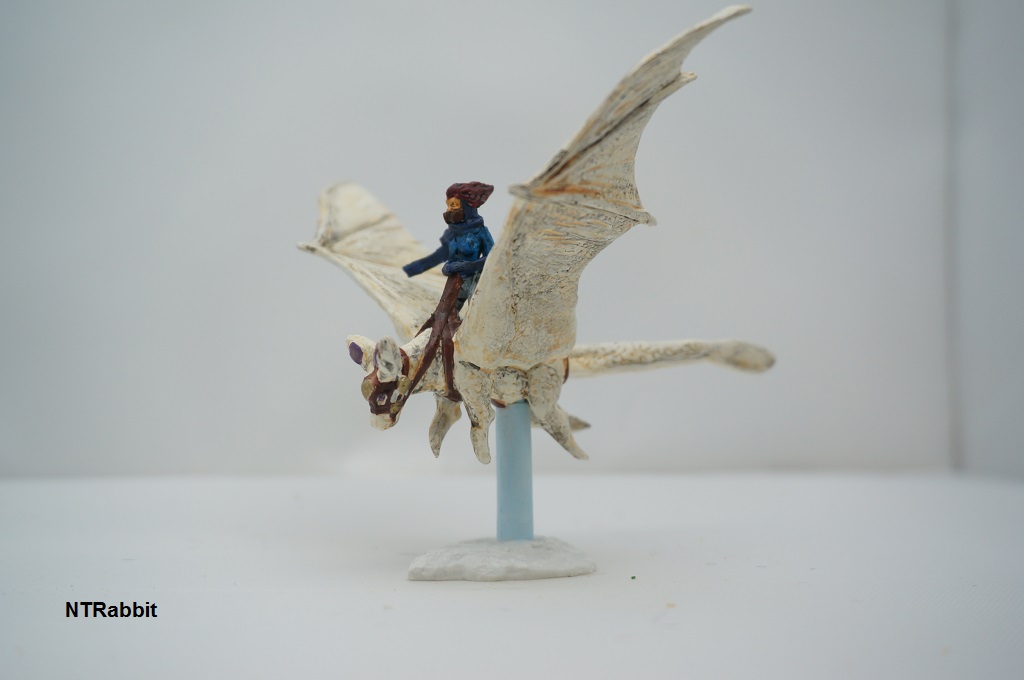
Nothing foolish about Bones! So many Bones!
I painted a Bones last month, also some terrain from Acheson Creations
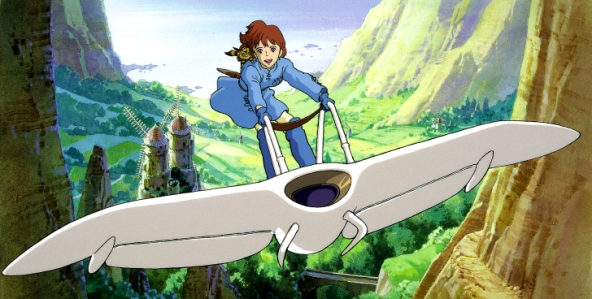
Claiming the challenge and Anime is TV too! with my Numenera Raster, painted up to look like
Nausicaa of the Valley of the Wind :3:
I painted a Bones last month, also some terrain from Acheson Creations
Claiming the challenge and Anime is TV too! with my Numenera Raster, painted up to look like
Nausicaa of the Valley of the Wind :3:
NTRabbit
Brownlow Medallist
You posted while I was fixing my image tags in review, I was as surprised as you were
Should see the ruined tower the other guy in the comp I'm in painted I like the way your wood stuff turned out, looks cool.
Should see the ruined tower the other guy in the comp I'm in painted
I like the way your wood stuff turned out, looks cool.Chief
~ Shmalpha ~
- Thread starter
- Admin
- #71
NTRabbit
I learned a fair but about foam core. The main walls were made without removing the paper layer, while I removed the paper when doing the tower.
The tower wasn't stippled with filler as I had to get it done for the game tonight, so I can see the benefit of using the filler in getting a stone surface.
Excuse the bad cutting between the battlements...

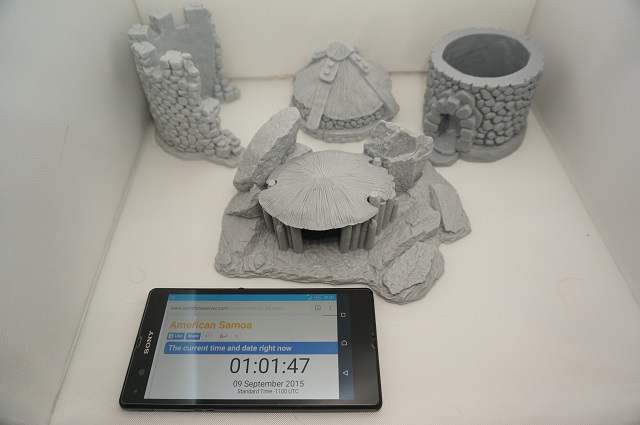
Thatched hut. Roughly cut up, can't find my black spray paint so sprayed the pot-scrubber stuff with the only thing I had: a red-brown primer.
Rough thing, but I practiced a couple of techniques on it. Still to finish it off.
(Bricks are empty eraser holder on a Palomino pencil pressed into the foam.)
I learned a fair but about foam core. The main walls were made without removing the paper layer, while I removed the paper when doing the tower.
The tower wasn't stippled with filler as I had to get it done for the game tonight, so I can see the benefit of using the filler in getting a stone surface.
Excuse the bad cutting between the battlements...

Thatched hut. Roughly cut up, can't find my black spray paint so sprayed the pot-scrubber stuff with the only thing I had: a red-brown primer.
Rough thing, but I practiced a couple of techniques on it. Still to finish it off.

(Bricks are empty eraser holder on a Palomino pencil pressed into the foam.)
Last edited:
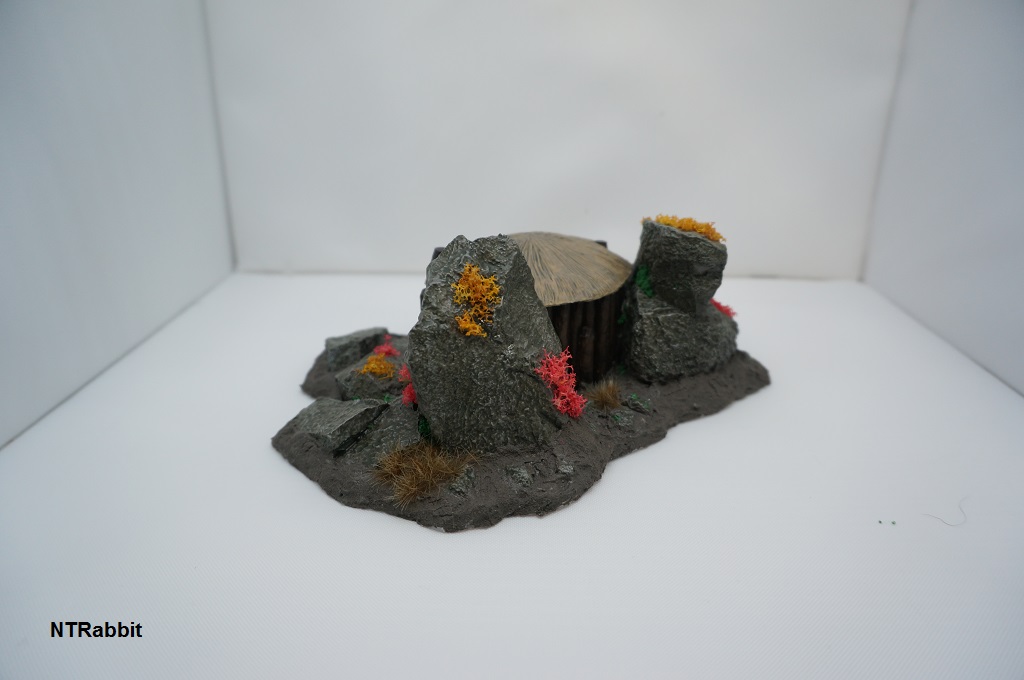
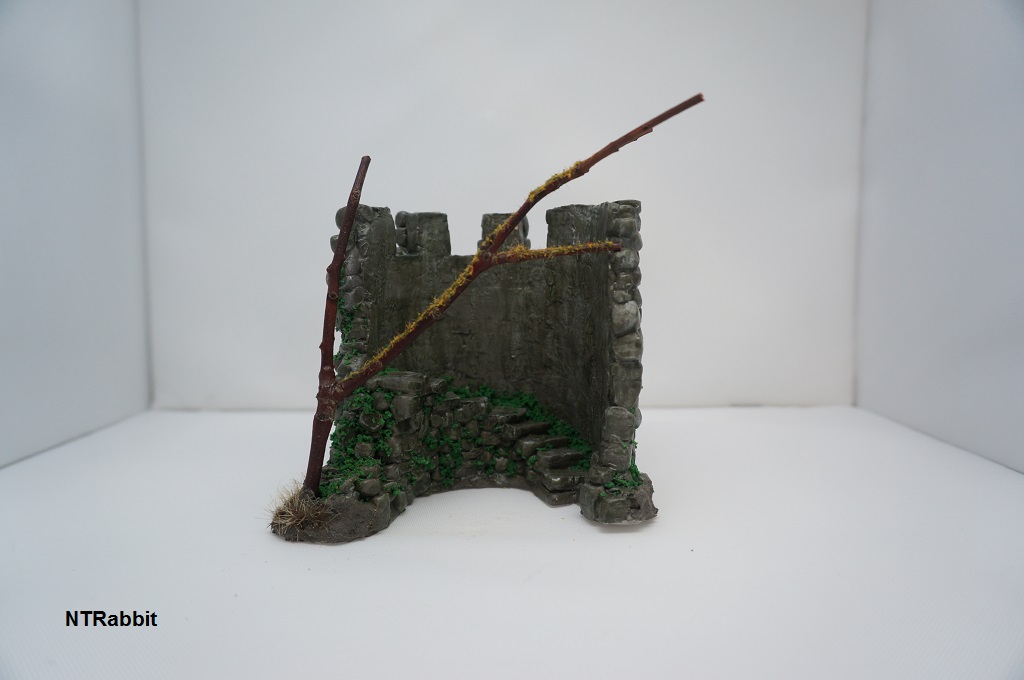
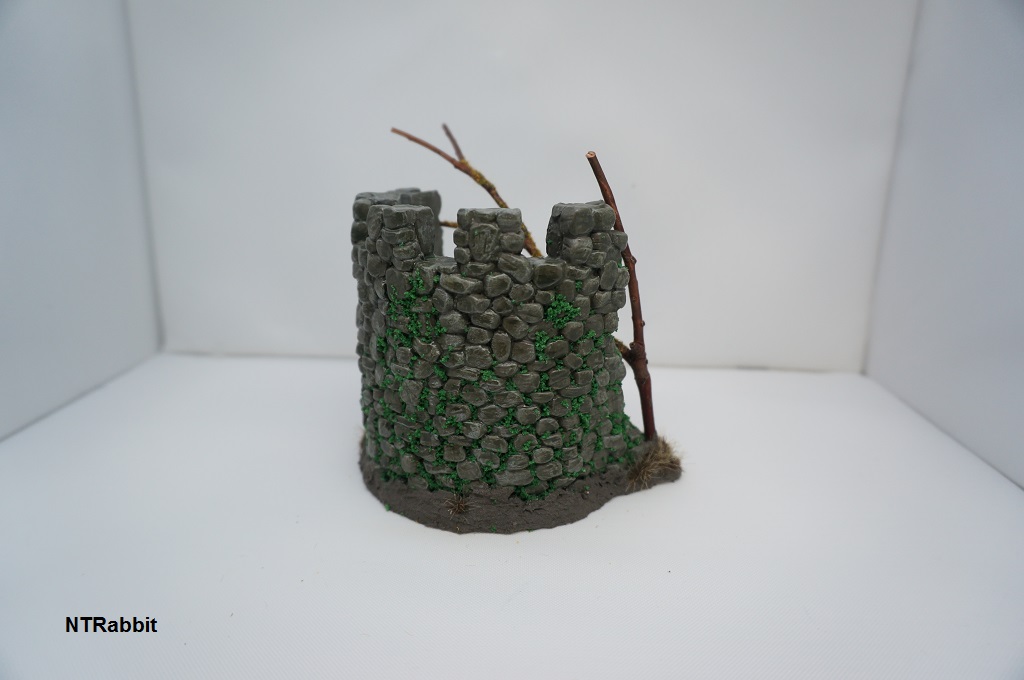
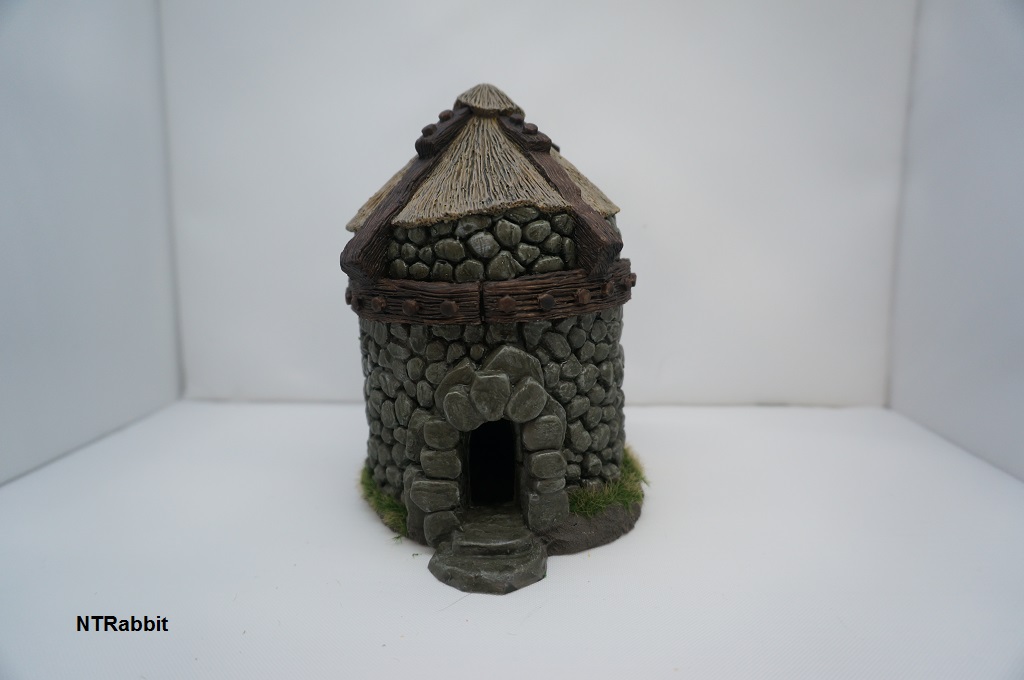
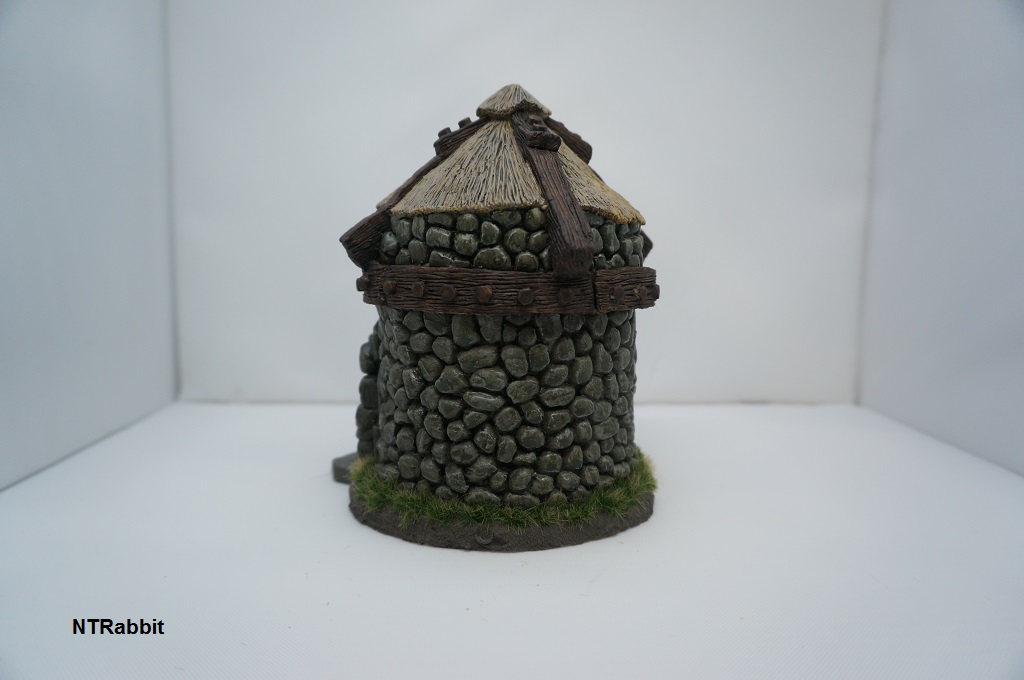
NTRabbit
Brownlow Medallist
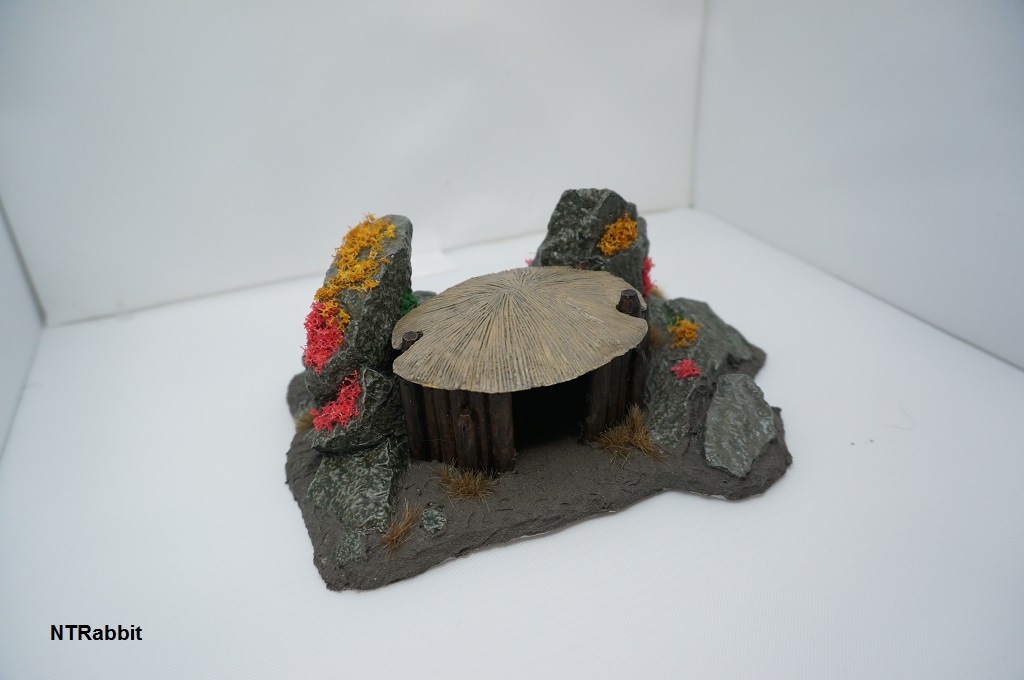
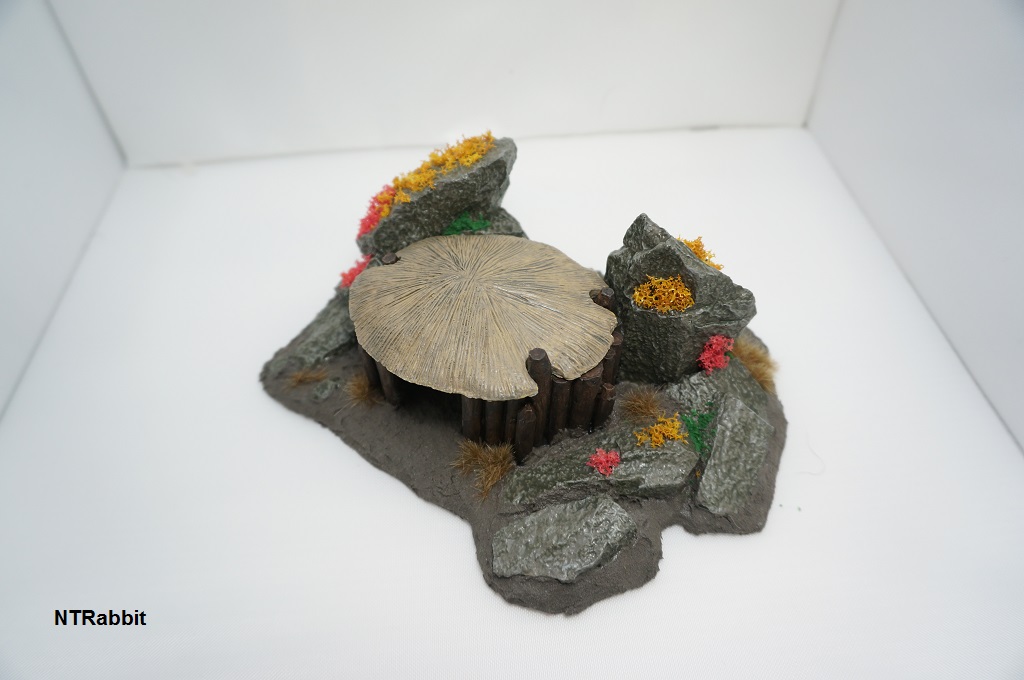
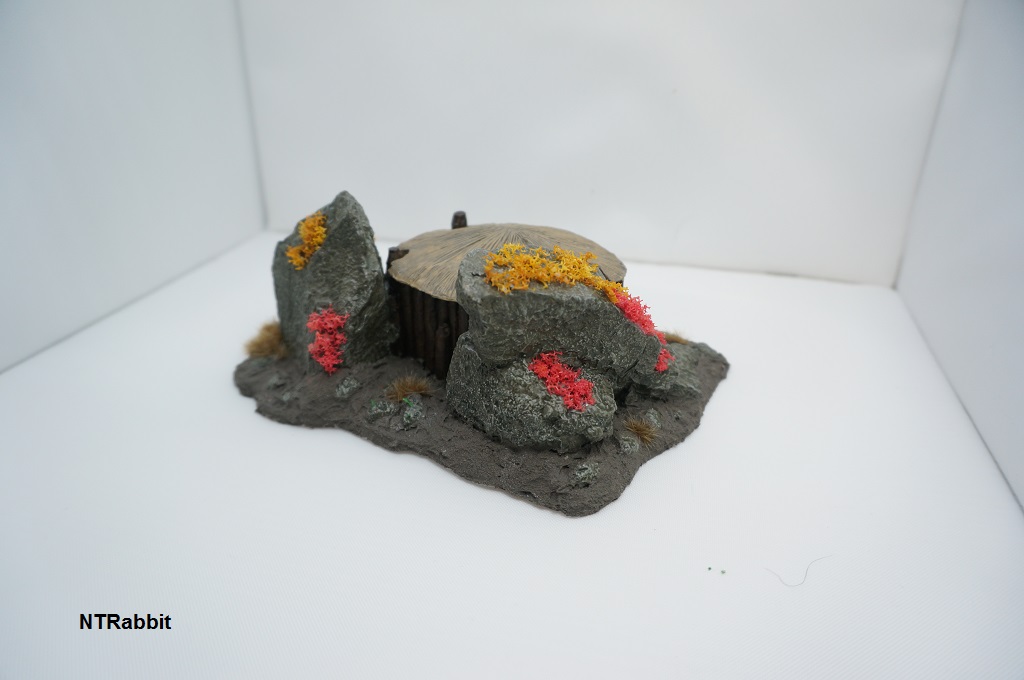
Yeah mine was a little easier on account of being cast in resin that way. Nice dry brushing on the stipple though, that and a good wash (I used Secret Weapon Stone) really helps to give that genuine rock look 
Before shots on mine
Before shots on mine
Chief
~ Shmalpha ~
- Thread starter
- Admin
- #73
Cheat!Yeah mine was a little easier on account of being cast in resin that way. Nice dry brushing on the stipple though, that and a good wash (I used Secret Weapon Stone) really helps to give that genuine rock look
The amount of washes I had to do to get into the gaps....
I just used kids poster paints
Did you know you can leave that stuff on your pallet OVERNIGHT and carry on using it the next day? Magic.
Last edited:


