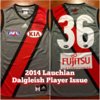
Discussion What Footy Jumpers/Sports Uniforms Do You Own?

Remove this Banner Ad

Hey all looking to move 3 jumpers. Having trouble up loading pics at the mo


Jumper 1

Rodger james slow down match worn Guernsey


Jumper 2

2005 player issue home troy chaplin


Jumper 3

Marlon motlop one off before bib was brought in. The one designed by the child
 

Log in to remove this ad.

Picked up 3 Mero Pukkah Sports guernseys for Xmas.

1 x Bears Cerise
1 x Tigers no back sash
1 x Bears vee

So i gained another Mero guernsey which is a Suns 2012 one, and apparently i am getting a Tigers and a GWS one for Xmas.

I bought a few old wooly's off of Gumtree, one Donald, one Yarrawonga, another Kilsyth and a Weeribee W.
 
Hey man did you use matte board for the whole thing? I could only find black or white foam core for the backing
Hey mate,
Yeah i used matt board for the backing.
I basically stuck foam core to the back of the mat board, then pushed the pins through the mat board into the foam core, obviously on a downward angle in order to hold the weight/so they dont stick out the back.
I just use the foam core if i'm after a black or white background then you dont have to bother with the extra mat.
 
So i gained another Mero guernsey which is a Suns 2012 one, and apparently i am getting a Tigers and a GWS one for Xmas.

I bought a few old wooly's off of Gumtree, one Donald, one Yarrawonga, another Kilsyth and a Weeribee W.

Any pics of the Mero guernseys? I've never seen them before
 
The poster frames I found at the reject shop seemed back to front to me, the depth was in the back rather than the front, can they be modified or do you normally get them from reject shop and did they probs just not have the ones needed today?
Hey mate,
Yeah i used matt board for the backing.
I basically stuck foam core to the back of the mat board, then pushed the pins through the mat board into the foam core, obviously on a downward angle in order to hold the weight/so they dont stick out the back.
I just use the foam core if i'm after a black or white background then you dont have to bother with the extra mat.[/QUO
 
Yeah the depth is in the back.
So i use the little black clips to hold the front matt board to the glass, then i make the rear board sit on the outside of the frame slightly and staple it down.
I like it that way so the jumper doesnt press against the glass. As i have heard that a jumper against class can ruin the colour over time
 

(Log in to remove this ad.)

i can't remember if i went through this process or not. Eza316 post just jogged by brain.
i frame my jumpers at home, it took me a few goes to get it how i like it, and i tried different techniques.
now while they are not professionally done, they look pretty good on the wall.
i'm more of a hands on person so describing is not my strong point.

i started out building a recess from board, getting felt covering from spotlight and L brackets from bunnings etc and mounting myself, while getting the matt board cut at a place in ellenbrook, which ended up taking too much effort. i soon started researching more and trying different techniques, to which the below was born.

if anyone is north of the river this guy is great http://www.metroframing.com.au/
he has a whole lot of mat board, you can tell him the design and he will cut it up on his computer etc, also has the foam board and plaques, prices are great too.

Materials:
1) 60x90cm (neat size, really up to the person) Poster frame from the Reject Shop - $25 from memory
2) Mat/Mounting Board from jacksons - https://jacksons.com.au/product/11407 - $12 each
3) 1-2 Foam Core Boards from Jacksons (depending on size) - $16 each - https://jacksons.com.au/product/11381
4) Plaque, i go to Trophy Choice O'Connor - ~$15

so without the below extras you can essentially get a basic one completed for around $70-$80

other things needed: (not included in my cost because i basically had them anyway)
framing/good masking tape
staple gun
dress pins
frame hanging kit from bunnings ~$20
mat board cutter - the guys at metro framing happily cut for you, charges $2 per cut, so like $6 for three openings. if you do alot of these you can buy online. i bought a 40" one that the mrs uses also for framing photos so it was worth the investment. from memory ~$250 on ebay. similar to this, i cant find my one http://www.ebay.com.au/itm/Logan-40...586472?hash=item1c4f10d128:g:joAAAOSwCQNWeutg


without the ability of photos right now these are the basic steps.

- first i draw my design on the back of the matboard, remembering that it is mirrored when turned over. the mat board is 60x90cm, i use a 5cm border for the main jumper opening. there are different ways to place the pictures etc. i have done a mock up on A4 paper. i use the red section as a whole, without borders.
you can put a bottom border if you want to keep both photos on the same level etc.
cut board, place photos and plaque.
Untitled.jpg

- next step is to cut the foam board inside the jumper, in the shape of a human chest, slightly bigger than the jumper so that it stretched over the cut out. and pin the jumper to the foam board. best to pin on the back/inside or the necklines/arm holes or inside the jumper so the pins don't show. this takes out creases etc and keeps the jumper tight.

- for a white background i use another piece of foam board, cut approx 62x92cm to sit on the back of the frame, then pin the jumper to the background piece.

- then from there i open the frame (box frame for a 3D effect), place the finished mat board in the frame, using the tabs to hold it against the glass.
lay flat, place the foam core with the jumper pinned to it on the back and staple to the frame.
you can use the tape to cover the ended of the foam, if you look at any professionally framed item, they use the tape to basically seal off the back and clean it up.

- then use the bunnings mounting kit, which is basically some triangle shaped hooks and wire, and you're done.


my first attempt with the hand build/felt backing
IMG_6738.JPG


Done with a white foam core background
IMG_6736.JPG

and one done with a mat board background to which i put foam core behind so the pins had something to go into.
looks good on Brad Hill's Mum's wall.
FullSizeRender.jpg
 
i can't remember if i went through this process or not. Eza316 post just jogged by brain.
i frame my jumpers at home, it took me a few goes to get it how i like it, and i tried different techniques.
now while they are not professionally done, they look pretty good on the wall.
i'm more of a hands on person so describing is not my strong point.

i started out building a recess from board, getting felt covering from spotlight and L brackets from bunnings etc and mounting myself, while getting the matt board cut at a place in ellenbrook, which ended up taking too much effort. i soon started researching more and trying different techniques, to which the below was born.

if anyone is north of the river this guy is great http://www.metroframing.com.au/
he has a whole lot of mat board, you can tell him the design and he will cut it up on his computer etc, also has the foam board and plaques, prices are great too.

Materials:
1) 60x90cm (neat size, really up to the person) Poster frame from the Reject Shop - $25 from memory
2) Mat/Mounting Board from jacksons - https://jacksons.com.au/product/11407 - $12 each
3) 1-2 Foam Core Boards from Jacksons (depending on size) - $16 each - https://jacksons.com.au/product/11381
4) Plaque, i go to Trophy Choice O'Connor - ~$15

so without the below extras you can essentially get a basic one completed for around $70-$80

other things needed: (not included in my cost because i basically had them anyway)
framing/good masking tape
staple gun
dress pins
frame hanging kit from bunnings ~$20
mat board cutter - the guys at metro framing happily cut for you, charges $2 per cut, so like $6 for three openings. if you do alot of these you can buy online. i bought a 40" one that the mrs uses also for framing photos so it was worth the investment. from memory ~$250 on ebay. similar to this, i cant find my one http://www.ebay.com.au/itm/Logan-40...586472?hash=item1c4f10d128:g:joAAAOSwCQNWeutg


without the ability of photos right now these are the basic steps.

- first i draw my design on the back of the matboard, remembering that it is mirrored when turned over. the mat board is 60x90cm, i use a 5cm border for the main jumper opening. there are different ways to place the pictures etc. i have done a mock up on A4 paper. i use the red section as a whole, without borders.
you can put a bottom border if you want to keep both photos on the same level etc.
cut board, place photos and plaque.
View attachment 203143

- next step is to cut the foam board inside the jumper, in the shape of a human chest, slightly bigger than the jumper so that it stretched over the cut out. and pin the jumper to the foam board. best to pin on the back/inside or the necklines/arm holes or inside the jumper so the pins don't show. this takes out creases etc and keeps the jumper tight.

- for a white background i use another piece of foam board, cut approx 62x92cm to sit on the back of the frame, then pin the jumper to the background piece.

- then from there i open the frame (box frame for a 3D effect), place the finished mat board in the frame, using the tabs to hold it against the glass.
lay flat, place the foam core with the jumper pinned to it on the back and staple to the frame.
you can use the tape to cover the ended of the foam, if you look at any professionally framed item, they use the tape to basically seal off the back and clean it up.

- then use the bunnings mounting kit, which is basically some triangle shaped hooks and wire, and you're done.


my first attempt with the hand build/felt backing
View attachment 203144


Done with a white foam core background
View attachment 203146

and one done with a mat board background to which i put foam core behind so the pins had something to go into.
looks good on Brad Hill's Mum's wall.
View attachment 203147
Amazing man! Thank you so much for the time and effort to do this! I'll be giving it a crack straight after Chrissy, I've got all the stuff now just gotta do it Thanks again man I'm sure I'll have more questions for ya haha
 
No worries man, next time i do one i'll take photos as i go. Happy to answer any questions, with a bit of trial and error you'll probably come up with your own easier way to do it
 
i can't remember if i went through this process or not. Eza316 post just jogged by brain.
i frame my jumpers at home, it took me a few goes to get it how i like it, and i tried different techniques.
now while they are not professionally done, they look pretty good on the wall.
i'm more of a hands on person so describing is not my strong point.

i started out building a recess from board, getting felt covering from spotlight and L brackets from bunnings etc and mounting myself, while getting the matt board cut at a place in ellenbrook, which ended up taking too much effort. i soon started researching more and trying different techniques, to which the below was born.

if anyone is north of the river this guy is great http://www.metroframing.com.au/
he has a whole lot of mat board, you can tell him the design and he will cut it up on his computer etc, also has the foam board and plaques, prices are great too.

Materials:
1) 60x90cm (neat size, really up to the person) Poster frame from the Reject Shop - $25 from memory
2) Mat/Mounting Board from jacksons - https://jacksons.com.au/product/11407 - $12 each
3) 1-2 Foam Core Boards from Jacksons (depending on size) - $16 each - https://jacksons.com.au/product/11381
4) Plaque, i go to Trophy Choice O'Connor - ~$15

so without the below extras you can essentially get a basic one completed for around $70-$80

other things needed: (not included in my cost because i basically had them anyway)
framing/good masking tape
staple gun
dress pins
frame hanging kit from bunnings ~$20
mat board cutter - the guys at metro framing happily cut for you, charges $2 per cut, so like $6 for three openings. if you do alot of these you can buy online. i bought a 40" one that the mrs uses also for framing photos so it was worth the investment. from memory ~$250 on ebay. similar to this, i cant find my one http://www.ebay.com.au/itm/Logan-40...586472?hash=item1c4f10d128:g:joAAAOSwCQNWeutg


without the ability of photos right now these are the basic steps.

- first i draw my design on the back of the matboard, remembering that it is mirrored when turned over. the mat board is 60x90cm, i use a 5cm border for the main jumper opening. there are different ways to place the pictures etc. i have done a mock up on A4 paper. i use the red section as a whole, without borders.
you can put a bottom border if you want to keep both photos on the same level etc.
cut board, place photos and plaque.
View attachment 203143

- next step is to cut the foam board inside the jumper, in the shape of a human chest, slightly bigger than the jumper so that it stretched over the cut out. and pin the jumper to the foam board. best to pin on the back/inside or the necklines/arm holes or inside the jumper so the pins don't show. this takes out creases etc and keeps the jumper tight.

- for a white background i use another piece of foam board, cut approx 62x92cm to sit on the back of the frame, then pin the jumper to the background piece.

- then from there i open the frame (box frame for a 3D effect), place the finished mat board in the frame, using the tabs to hold it against the glass.
lay flat, place the foam core with the jumper pinned to it on the back and staple to the frame.
you can use the tape to cover the ended of the foam, if you look at any professionally framed item, they use the tape to basically seal off the back and clean it up.

- then use the bunnings mounting kit, which is basically some triangle shaped hooks and wire, and you're done.


my first attempt with the hand build/felt backing
View attachment 203144


Done with a white foam core background
View attachment 203146

and one done with a mat board background to which i put foam core behind so the pins had something to go into.
looks good on Brad Hill's Mum's wall.
View attachment 203147
Props to you mate, must be very time consuming and challenging.
 

Remove this Banner Ad

Back
Top