Tutorial Adobe Illustrator tutorial

Remove this Banner Ad

I came across that last night and followed the instructions. When you look in the Font folder, which is a story in itself, the font is there along with others I have installed.

I'll delete the font and try again tonight. Thanks for your replies.
 

Log in to remove this ad.

View attachment 47906

Trying to make the width of my object a whole number, but every time i change it, it just snaps back to being .087px or the likes. Any remedy?
Is it set to change shapes Height and Width uniformly? It might be changing one, and the other automatically follows.
Here's a test you can try. Make a new shape, and see if it does the same thing.
A rectangle, anything really; just try making a new shape, but set the Height and Width as whole numbers.
If it lets you, then it's something to do with the shape you made.
If not, then it's your Illustrator settings.
 
Ok...so I have a path made, based on the tips courtesy of our friend BloodyRipper, but is there a way to add or move it to a new layer?
Go to Windows and click on Layers to bring up the Layers tab (if it's not already on your screen)
At the bottom of that box is '1 Layer' and 4 little icons.
Put your mouse over them to show what they do, one of them is Create New Layer.
Click it and you'll have a new layer.

If you want to move the path to this layer, grab it and drag it to the new Layer.
 
View attachment 49632

...what is this and how do i get rid of it
Youve turned perspective grid on.

Ive found this online:
Menu:
View > Perspective Grid > Hide Grid

Mac Keyboard Command:

Shift + Command + i

Windows Keyboard Command:

CTRL + Shift + i
 
I don't know if this is the right place for this, but I also don't know if it deserves its own thread.

This is a branding company, and these are custom logos they've made for schools in the US
http://brandempowerment.com/schools/branding-and-logo-design/
It's a concept I tried to get going a few years back with local footy clubs and to cut a long story short, gave up on the idea.
However, these guys have done it in the US.

The interesting thing to me is, this is the link to the vector versions of all their designs
http://www.brandempowerment.com/brandbooks/
Not only the logos, but sometimes also the fonts they've utilised for the schools.
(You can of course, get some of the fonts out through an online pdf extractor like this one: http://www.extractpdf.com/ )
Download the pdf, open it in Illustrator and they're all there.

So Merry Christmas, use responsibly, but it's a pretty good resource.
 
Last edited:

(Log in to remove this ad.)

Do any of you ladies or gentlemen in here use illustrator for your fine pieces of work?
Why? What are you offering?
Help with Indigenous Round jumpers?
Don't mind if you do.
 
Why? What are you offering?
Help with Indigenous Round jumpers?
Don't mind if you do.
well ive mastered paint.net and could do anything on it with my eyes shut, but have recently found out about Vector and thought why the F didnt i just start out with it. so i dont think i can help with the Indigenous Round jumpers since im just starting out
 
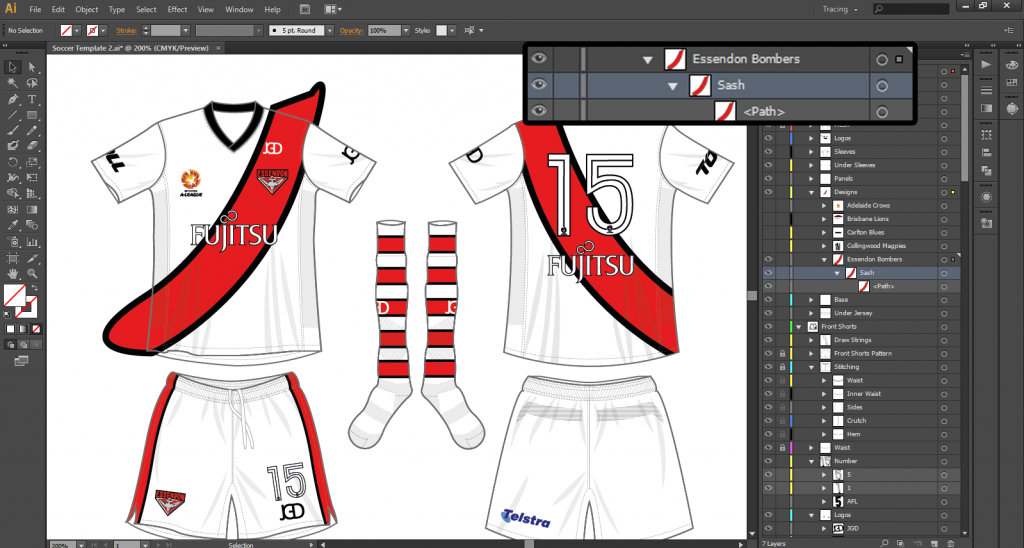
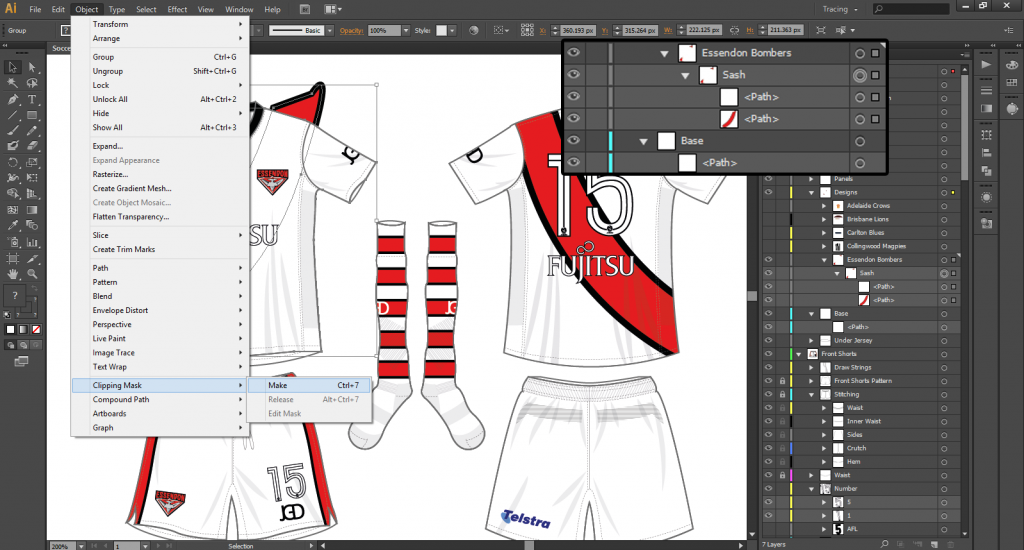
Hey guys, I've been asked a few times how to make clipping masks in Adobe Illustrator, so here's step-by-step tutorial:

AI CLIPPING MASK TUTORIAL
1. So you need to refine a design into the jersey/jumper. Your design will currently be visible in and outside of the jersey, and we want it in the jersey itself.
1_zpse0448b45.png


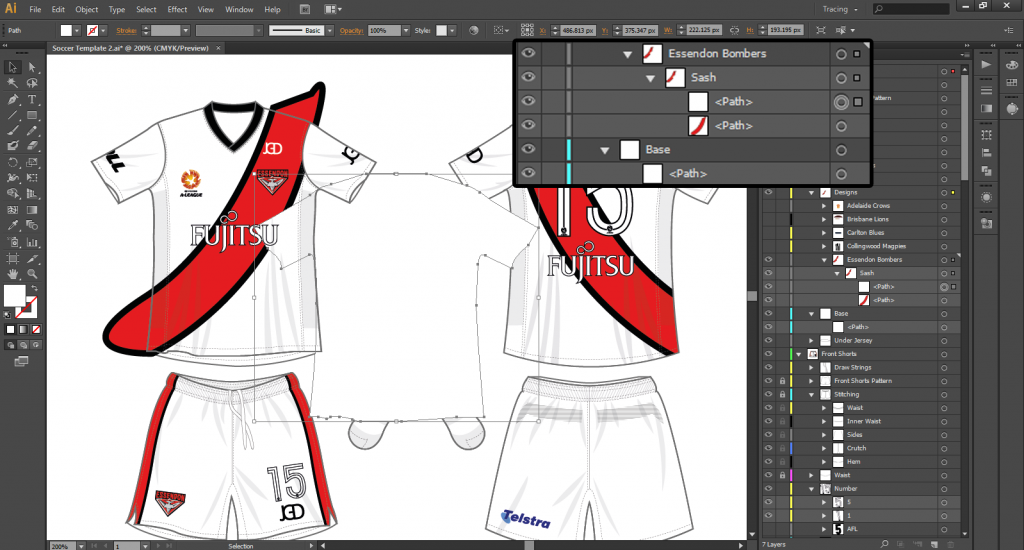
2. Firstly select and copy the base. Then paste it into the same layer as the path of the sash/design.
2_zps1ad70e54.png


3. Note how I have all of my folders organised and named appropriately. Organisation is key, especially if you intend to use the same template multiple times because the layers can become really messy! The base of the jersey is now in the middle of the artboard and in the correct folder. Ensure the copy of the base is on top of the design in it's own layer.
3_zps3cc2c016.png


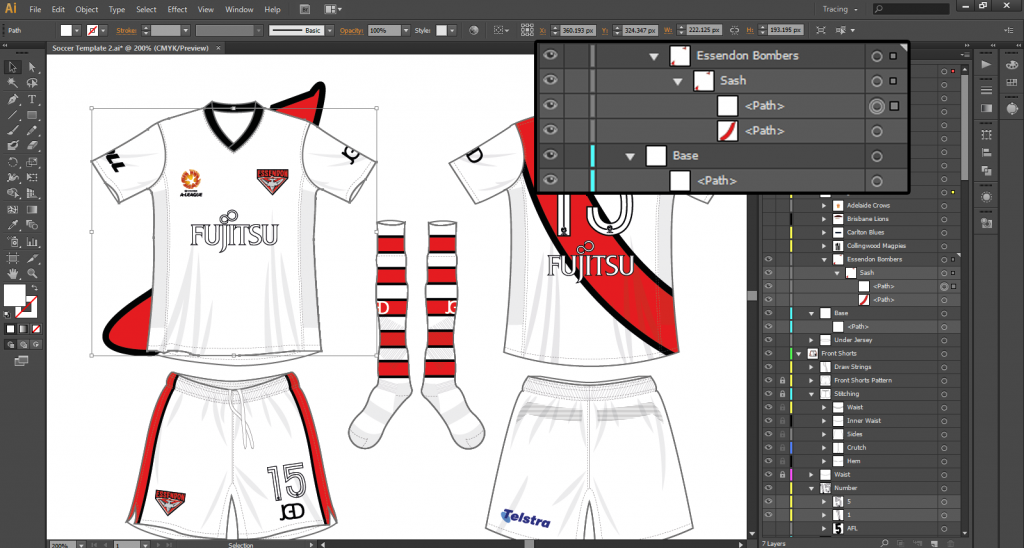
4. Re-position the copy of the base of the jersey on top of the normal base in it's exact position. I would definitely suggest turning smart guides on because it can really help lining up the jersey correctly.
4_zps481f574f.png


5. Select the base of the jersey (the one now on top of the sash), hold shift and then select the sash. My base of the jersey is formatted with a white fill, therefore you cannot see the sash inside the jersey, but you can outside of it. It isn't necessary having a fill, and if you do, don't worry it won't change anything.
5_zps29079ba7.png


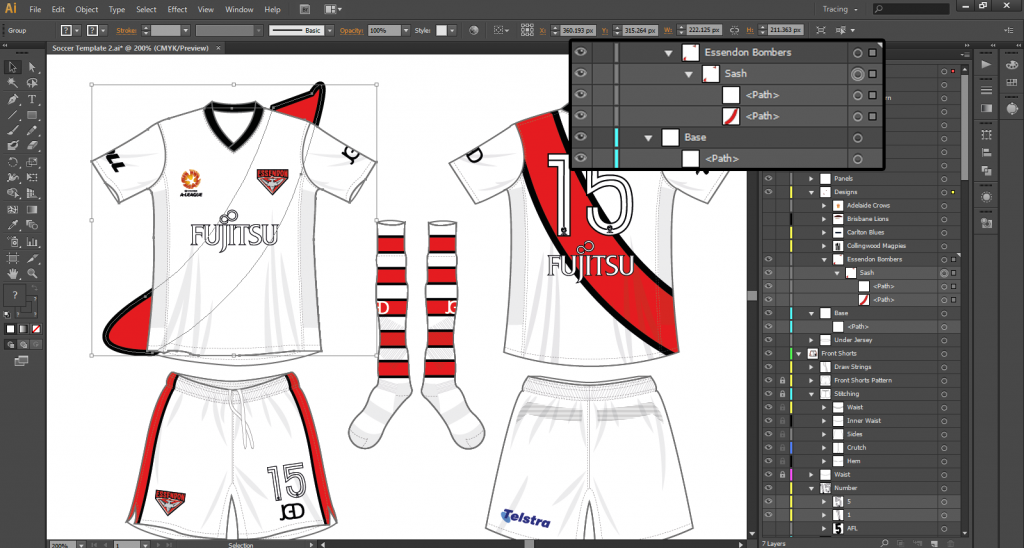
6. With both paths in their own group, selected in their correct order, go up to the top menu > Object > Clipping Mask > Make, or the keyboard shortcut for this is CTRL+7 on windows.
6_zps73397cbc.png


7. The clipping mask has now been created! Check that it has in the layers, the copy of the base of the jersey should now be labelled "Clipping Path" in layers.
7_zps5a5cec37.png


Eat and enjoy.

If there are any questions, feel free to ask!

Sources: Mero , YouTube, various other websites

Cheers,

GG
 
whatthefont.com is able to recognise what font it is. (FF Din)
Once you find what font it is, download that font, http://search.4shared.com/postDownload/2wjVXIyO/FF_DIN_FONT_FAMILY.html then type it over the text.
Get the spacing right, as it won't always line up exactly.
To move letters across, select the Text tool, and go to the letters you want to move.
Press Alt and the Arrow for the direction you want to move it.(Left or Right Arrow)
This is called Kerning.
What I'd do is get the S in the right place, then work on the t, then the e and so on.
Too easy, thanks Mero :thumbsu:
 
For viscom we had a whole semester on fonts and characters, so what I found was, if you find a font which is slightly like the font you desire, to the left of where it says the font it will say "Character". Click in character and play around with the kerning, spacing, sizing, formatting etc. Like Mero said, just work letter by letter, I try to go for the most distinctive letter first and then work on from there until I get what I desire.

Andonis1997
Sweet, thanks :)
 

Remove this Banner Ad

Back
Top