That's really interesting. What are you're thoughts getting Will Phillips back in to the CBA's? I know there are a lot on here that question his endurance, and ability to accumulate big bags of possessions. BUT something I really noticed in the pre-season scratch matches, he was superb at wearing his opponent like a glove until there was some degree of certainty which way the clearance would fall. He'd then either tackle, or win the contested ball himself and distribute by hand. Now I'm not saying he is the answer, but on the first handful of AFL games this season our midfield did seem to function better with him playing. Powell for one was a big beneficiary, basically playing behind the ball to recieve and kick. His stats are well down since WP went out of the team.If I don't take a scientific lens to our current plight, I will go insane.
So, for anyone interested, I'm going to spend some time, if and when I get some time, breaking down some of our stoppage work with a few key select bits, maybe three to five each week. It'll be three this week because it hurts my eyes. Mostly centre bounces, because they are far easier to track on the various apps, but perhaps some stoppages when I get a chance.
Versus Carlton summary
This was a really horrid game to watch with a midfield focus. We have a few blokes who pick and choose when to play the role they need to play at the stoppage. And our selfless blokes are doing what they think is the team thing, but lacking the nous about when to pull the trigger. This is partly created by watching the selfish stuff previously mentioned - you've seen us not hold stoppage structure, so presume we'll lose the contest and then just roll defensively. But it's a poor habit to get into when you or your player can still influence the contest.
We just can't get the mix right and I'm not sure we have the cattle to do so. The coaches' work is cut out for them.
Centre bounce 1
I'm going to send you over to Rick18 s latest The Shinboner blog post. It concerns Harry Sheezel's effort at the centre bounce which led to Carlton's first goal. Rick's work focuses rightly on what happens after the clearance and the lack of follow up work.
The only additions I'll make are to the actual stoppage work itself. They dismantled our setup in an instant.
Point 1: Image 1: the kid needs a lot of time to work on his craft. You can't let a monster like Cripps get underneath and behind you.
Point 2: Image 2: Powell needs to hold here. Or he needs to speak. He gets sucked in way too easily, and if you look at Cerra here, you'll see that Carlton actually had two exits, as Cerra could have rolled up to support Cripps and Hewett. Cripps chose the right one, but the other option was on too. If you look at Xerri's face, Powell's bee to honey approach also causes indecision for him - he's watching Cerra - not his job. Does he need to close down Cerra or go with TDK? No right option.
View attachment 2288035
View attachment 2288036
Centre Bounce 2 - from my post in the autopsy thread
Green is what should have been done - if we win the tap, Harry is there. If Cripps gets it before Harry, he has to go backward where Parker can harass and they have to exit through the back of the stoppage. If their set play works but our sweeper stays where he should be, they run into a wall or have to dump kick. Harry did his part here.
Red is absolutely what your sweeper should not be doing. And is what he did here.
Blue is what happened. With no sweeper there to stop him, he burns straight through with the pill and hits an inside 50.
The shit thing is the opposition did this as a set play - meaning they KNEW our sweeper would try to get a cheap clearance instead of playing their role. We know this because it is an incredibly high risk low reward move for you to send your own sweeper straight through the middle of the setup, and because Cripps laid a block on Parker once he clued on.
This self-centred play from our mids needs to be stopped or we will go nowhere.
When this stuff happens it affects future stoppages - Harry then 50/50s his run as the hit-to player, just in case LDU abandons his role in that stoppage again. Parker then has to stick like glue to their sweeper next time, because he can't rely on coverage at the front of the stoppage.
This is basic. Really basic stuff. And it kills you as a footy side.
View attachment 2288040
View attachment 2288037
Centre Bounce 3 - Poor Wing Work
Now to balance out the previous one, I'll show one where LDU holds his line as the sweeper and it forces Carlton back. If I were to be critical I'd say he could hold a touch more central, but overall he did well, as the temptation to rush in to support Jy would've been strong. In this play, the ball went to our hit to (Jy - Image 1). We turned it over in the contest after X clotheslines Jy, and the Blues went to exit out the front, but had to double back because they ran into LDU playing the sweeper role properly. This is exactly what you want to do - if they win the ball, turn it into a shitfight. Jy hunted one player (image 2), George the next.
But.
Darcy Tucker, probably trying to be selfless, decides to run defensively once he thinks we're cooked (Image 3, which is actually sequentially before Image 2). Except he pulls that trigger way too early, as he would be unable to get there in time to help even if his decision paid off.
His man then sees this and holds. He then comes in to support the stoppage and wins the ball after George ran the Blues mid down (Image 4). Their other wing (not sure who was ours) then rolls up and gets the clearance. You can see the 'oh shit' turn with Tucker in image 4.
View attachment 2288047
View attachment 2288049
View attachment 2288051
View attachment 2288053
Navigation
Install the app
How to install the app on iOS
Follow along with the video below to see how to install our site as a web app on your home screen.
Note: This feature may not be available in some browsers.
More options
-
Mobile App Discontinued
Due to a number of factors, support for the current BigFooty mobile app has been discontinued. Your BigFooty login will no longer work on the Tapatalk or the BigFooty App - which is based on Tapatalk.
Apologies for any inconvenience. We will try to find a replacement.
You are using an out of date browser. It may not display this or other websites correctly.
You should upgrade or use an alternative browser.
You should upgrade or use an alternative browser.
Themanbun's Midfield Minute
- Thread starter Themanbun
- Start date
- Tagged users None
🥰 Love BigFooty? Join now for free.
- Apr 19, 2019
- 13,664
- 45,741
- AFL Club
- North Melbourne
- Thread starter
- #77
That's really interesting. What are you're thoughts getting Will Phillips back in to the CBA's? I know there are a lot on here that question his endurance, and ability to accumulate big bags of possessions. BUT something I really noticed in the pre-season scratch matches, he was superb at wearing his opponent like a glove until there was some degree of certainty which way the clearance would fall. He'd then either tackle, or win the contested ball himself and distribute by hand. Now I'm not saying he is the answer, but on the first handful of AFL games this season our midfield did seem to function with him playing.
I watched his centre bounces closely in the games he played and, as much as I love the way he goes about it and genuinely hope he can make a fist of it, I don't think he improves us there.
He does some inconsistently decent work as sweeper when the opposition get it, but also does some odd stuff that is very ineffectual and takes himself right out of the play while his opponent gets the jump on transition. Struggles to create as a hit-to. Then gets torched like the rest of them when it gets outside.
If he doesn't have a release handball, like Powell and LDU he's prone to the dump kick as well.
I don't think we have a genuinely good sweeper on our entire list.
muttley45
Premium Platinum
I heard Kingy say that to be a successful centre bounce midfield these days, you need 2 Bulls and a Dancer, bit of truth to that i reckon.
I watched his centre bounces closely in the games he played and, as much as I love the way he goes about it and genuinely hope he can make a fist of it, I don't think he improves us there.
He does some inconsistently decent work as sweeper when the opposition get it, but also does some odd stuff that is very ineffectual and takes himself right out of the play while his opponent gets the jump on transition. Struggles to create as a hit-to. Then gets torched like the rest of them when it gets outside.
If he doesn't have a release handball, like Powell and LDU he's prone to the dump kick as well.
I don't think we have a genuinely good sweeper on our entire list.
Who's our "best" option for sweeper you'd say?
Log in to remove this Banner Ad
I heard Kingy say that to be a successful centre bounce midfield these days, you need 2 Bulls and a Dancer, bit of truth to that i reckon.
We've got a bull with GW and a dancer with LDU.
muttley45
Premium Platinum
Chuck Zurhaar in there and the set is completeWe've got a bull with GW and a dancer with LDU.
- Apr 19, 2019
- 13,664
- 45,741
- AFL Club
- North Melbourne
- Thread starter
- #82
Who's our "best" option for sweeper you'd say?
Jy or Parker I think.
kanga kanga kanga
2014 SF Goldy
- Apr 21, 2024
- 1,773
- 4,657
- AFL Club
- North Melbourne
in a few years it will be urquhartJy or Parker I think.
- Apr 19, 2019
- 13,664
- 45,741
- AFL Club
- North Melbourne
- Thread starter
- #84
Round 7 vs Port Adelaide
This was a far more enjoyable game to review. I've focused on three centre bounces and one stoppage, all at critical junctures in the game. There are some improvements for sure, which I'll point out, but we also need to continue to get everyone on the same page, and that includes the wings, half forwards and half backs.
We've still got a lot of work to do, but I did notice an immediate improvement in our spacing in the contests.
Centre Bounce 1 - Good sweeping, but we don't gel - NM to left of screen
Last week I spoke about how our sweepers were deficient in staying to the task. This week was a lot better, resulting in more pressure on the Port clearances. However, it's let down later in the chain where we end up losing it in a bad way.
We actually win the hit-out and gather here and pressure really well, but lose the clearance in a poor way due to factors outside of our midfielders' control. So there's some props here which is why I showed this one.
Image 1 - The setup
We have Jy as the sweeper, which IMO is his best role. We have Wardlaw as the hit-to, right in Xerri's zone, and LDU at the front of the stoppage. Jy is setting up really far back to the right of screen which seems a conscious effort to track the contest and not get sucked in. Our wingers are sitting defensive side of their opponents.
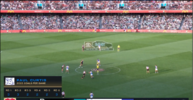
Image 2 - Possible Exits
This is a really good image here. Wardlaw receives the hit-out as planned. Ideally LDU gets the receive from Wardlaw here, and then Stephens starts to spread offensively and laterally, but Port are onto it and they shut LDU down.
Jy's role here is really critical. Even though it looks like we will win the clearance, he still holds this defensive space really well as a sweeper, just in case. And that becomes critical to how we pressure them. It means that even if it's turned over, Port can only exit via the back of the setup to the left of screen.
McKercher is also smart here going body on body - he knows that winger will likely wrap around if and when Port exit out the back of the setup.
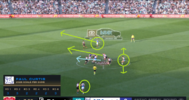
Image 3 -Turnover
Wardlaw gets pressure here and handballs over his head and behind him. Unfortunately LDU ran through the stoppage and so we had no representation out the back (well, the front of the stoppage but to Wardlaw's back), meaning it went straight to Port. JHF receives the ball, but with Jy holding his ground and tracking the contest, he has no options in his immediate field of vision.
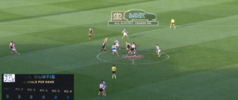
Image 4 - Sweeper shutdown
Our pressure is really good here, and JHF gives to the first option. Jy is still off to the right of screen, preventing Port from exiting the front of the stoppage. Wardlaw provides the heat at the contest and Port are under the hammer here.
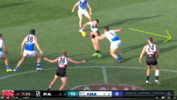
Image 5 - Port forced backwards again
Faced with Wardlaw and LDU's pressure and Jy's position as sweeper our to the right in line with the ball, Port are forced to go backward yet again. This is exactly what you want to do when you are losing a clearance. Turn it into a shitfight and make them earn it.
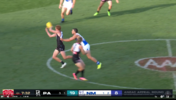
Image 6 - Half forwards not on the same page - Rozee exits
Unfortunately it breaks down not due to our midfielders, but due to a lack of body from our half-forwards. Rozee off the half back times his moment just right and steams through the middle. This is really good work from Rozee and some disappointing work from Tucker who is trailing him. I'm a big fan of half forwards and half backs training CBAs with the midfield for this reason.
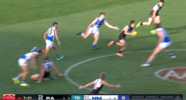
Centre Bounce 2 - front running costs us
This one is a little different. We lose our shape through front running and it bites us, at a critical point in time as well. This is despite what is a clear defensive emphasis on the setup due to Port's momentum. Very disappointing.
Image 1 - the setup
There's 4 minutes to go in the first quarter and Port are starting to get a run on. We set up defensively, with a sweeper, and two lateral hit-tos rather than a front-side blocker.
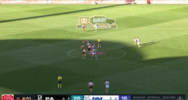
Image 2 - structure lost
Unfortunately this defensive emphasis almost overcorrects and causes us to lose shape. Jy, LDU and Parker end up almost holding hands here. Two of those blokes are adding nothing to that contest.
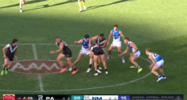
Image 3 - the start of it unravelling
Despite losing shape, we manage to force a spill of the ball which comes out to Colby. Unfortunately LDU puts the gas on running forward way too early as you can see in this frame, especially given McKercher is a left hander. Colby hasn't yet gathered the ball cleanly. Jy is holding out to the right of screen after previously getting sucked into the contest. Parker also starts drifting forward a touch early.
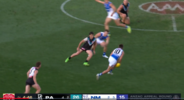
Image 4
Now we have lost all shape around the contest in a bad way. Colby has Butters on his hammer and no support. Meanwhile Port have set up really well for if they win the ball here. I spoke last week about working in triangles and Port did this really well here yet again. LDU and Parker are both off to the left of screen, having front run way too early.
This my friends is how we go from a defensive setup at a centre bounce to a complete front running capitulation when it actually plays out. Small choices that have big effects.
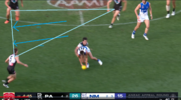
Image 5 - we try, but the damage is done
Simpkin also gives up the corridor, but that's a result of him having to provide a release option to Colby once the other two North players took themselves out of the contest. Credit to both LDU and Parker, they realise their mistakes and crack in here to try to influence. They storm back in from the left of screen when Butters strips Colby, but as you can see the shape has already broken down while Port maintain theirs.
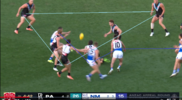
Image 6
As expected, Port's strong structure allows them a really clean exit through the corridor here.

Centre Bounce 3 - Good work for nil reward
This one is a little different, in that we mostly did nothing wrong and it all went to a really neat plan, but the efforts of Horne-Francis thwart what should have been a really good exit and force a stoppage.
Image 1 - the setup
This is actually a really neat set play to watch unfold. Wardlaw adopts a defensive posture appearing to tag Butters, but is actually the hit-to. LDU appears to be the hit-to but runs a decoy run.
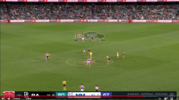
Image 2
Xerri's hit zone is circled here. LDU drags his man to the opposite side of the contest, and then Wardlaw goes on a run through the space. Cool set up and props to the boys here.
Image 3
We then set up really well. Parker peels off Horne-Francies as an option and Stephens is also a possible but unlikely receive. Nice triangle.
Image 4 - enter Horne-Francis
He kills us here and IMO there's not much we could do better. He locks onto George and wraps him up in a flash before he can cleanly dispose of it. You can see our shape works here though, as the ball spills to Parker and Stephens is an option to then receive from Parker.
Image 5 - Horne-Francis again
Not much to say here. The ball spills to Parker and the bloke follows up with a second effort to wrap him up, prevent a release to Stephens, and force a stoppage.
Stoppage - NM going to right of screen - ruck work is pivotal, not everyone's on the same page
This stoppage occurs immediately after that centre bounce. We went from a great centre bounce effort, to a poor stoppage effort immediately after. Port had a clear exit out the front and were ready to damage us badly, but were fumbly and we managed to nullify it. But we just need to bring the mental energy consistently.
Image 1 - The setup
Both sides have an defensive weighting at the stoppage here. It's very clear - we want the ball to spill to the left of screen and have Colby steam back and down through the corridor to deliver inside 50 (bottom left triangle). Port want to push it boundary side and exit that way (top right triangle) out the back.
Stephens is sitting defensively as a skinny side winger. The circle in Port's triangle is typically roughly where you would see our skinny side winger setup if it were offensively weighted.
Port have more space to work with, we have the more dangerous space. It makes sense given the scores and stage of the game.
The rule of this stoppage is simple - if we get first hands on it, it MUST go to left of screen and out the bottom.
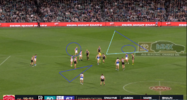
Image 2
Unfortunately it all falls apart when Xerri grabs the ball out of the ruck. He was awesome this game, but not the best effort here. He's wrapped up as he grabs it out of the ruck, but unfortunately fights to put the ball exactly where we don't want it with that set up. He puts it offensive side (right of screen), giving Port the run onto it (left of screen), instead of defensive side, where we had weighted our numbers at the stoppage.
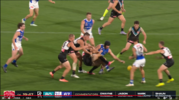
Image 3 - Port exit the stoppage
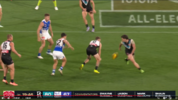
As you see here, the ball tracks right and Port were out. But they missed the handball and we forced another stoppage.
This was a far more enjoyable game to review. I've focused on three centre bounces and one stoppage, all at critical junctures in the game. There are some improvements for sure, which I'll point out, but we also need to continue to get everyone on the same page, and that includes the wings, half forwards and half backs.
We've still got a lot of work to do, but I did notice an immediate improvement in our spacing in the contests.
Centre Bounce 1 - Good sweeping, but we don't gel - NM to left of screen
Last week I spoke about how our sweepers were deficient in staying to the task. This week was a lot better, resulting in more pressure on the Port clearances. However, it's let down later in the chain where we end up losing it in a bad way.
We actually win the hit-out and gather here and pressure really well, but lose the clearance in a poor way due to factors outside of our midfielders' control. So there's some props here which is why I showed this one.
Image 1 - The setup
We have Jy as the sweeper, which IMO is his best role. We have Wardlaw as the hit-to, right in Xerri's zone, and LDU at the front of the stoppage. Jy is setting up really far back to the right of screen which seems a conscious effort to track the contest and not get sucked in. Our wingers are sitting defensive side of their opponents.

Image 2 - Possible Exits
This is a really good image here. Wardlaw receives the hit-out as planned. Ideally LDU gets the receive from Wardlaw here, and then Stephens starts to spread offensively and laterally, but Port are onto it and they shut LDU down.
Jy's role here is really critical. Even though it looks like we will win the clearance, he still holds this defensive space really well as a sweeper, just in case. And that becomes critical to how we pressure them. It means that even if it's turned over, Port can only exit via the back of the setup to the left of screen.
McKercher is also smart here going body on body - he knows that winger will likely wrap around if and when Port exit out the back of the setup.

Image 3 -Turnover
Wardlaw gets pressure here and handballs over his head and behind him. Unfortunately LDU ran through the stoppage and so we had no representation out the back (well, the front of the stoppage but to Wardlaw's back), meaning it went straight to Port. JHF receives the ball, but with Jy holding his ground and tracking the contest, he has no options in his immediate field of vision.

Image 4 - Sweeper shutdown
Our pressure is really good here, and JHF gives to the first option. Jy is still off to the right of screen, preventing Port from exiting the front of the stoppage. Wardlaw provides the heat at the contest and Port are under the hammer here.

Image 5 - Port forced backwards again
Faced with Wardlaw and LDU's pressure and Jy's position as sweeper our to the right in line with the ball, Port are forced to go backward yet again. This is exactly what you want to do when you are losing a clearance. Turn it into a shitfight and make them earn it.

Image 6 - Half forwards not on the same page - Rozee exits
Unfortunately it breaks down not due to our midfielders, but due to a lack of body from our half-forwards. Rozee off the half back times his moment just right and steams through the middle. This is really good work from Rozee and some disappointing work from Tucker who is trailing him. I'm a big fan of half forwards and half backs training CBAs with the midfield for this reason.

Centre Bounce 2 - front running costs us
This one is a little different. We lose our shape through front running and it bites us, at a critical point in time as well. This is despite what is a clear defensive emphasis on the setup due to Port's momentum. Very disappointing.
Image 1 - the setup
There's 4 minutes to go in the first quarter and Port are starting to get a run on. We set up defensively, with a sweeper, and two lateral hit-tos rather than a front-side blocker.

Image 2 - structure lost
Unfortunately this defensive emphasis almost overcorrects and causes us to lose shape. Jy, LDU and Parker end up almost holding hands here. Two of those blokes are adding nothing to that contest.

Image 3 - the start of it unravelling
Despite losing shape, we manage to force a spill of the ball which comes out to Colby. Unfortunately LDU puts the gas on running forward way too early as you can see in this frame, especially given McKercher is a left hander. Colby hasn't yet gathered the ball cleanly. Jy is holding out to the right of screen after previously getting sucked into the contest. Parker also starts drifting forward a touch early.

Image 4
Now we have lost all shape around the contest in a bad way. Colby has Butters on his hammer and no support. Meanwhile Port have set up really well for if they win the ball here. I spoke last week about working in triangles and Port did this really well here yet again. LDU and Parker are both off to the left of screen, having front run way too early.
This my friends is how we go from a defensive setup at a centre bounce to a complete front running capitulation when it actually plays out. Small choices that have big effects.

Image 5 - we try, but the damage is done
Simpkin also gives up the corridor, but that's a result of him having to provide a release option to Colby once the other two North players took themselves out of the contest. Credit to both LDU and Parker, they realise their mistakes and crack in here to try to influence. They storm back in from the left of screen when Butters strips Colby, but as you can see the shape has already broken down while Port maintain theirs.

Image 6
As expected, Port's strong structure allows them a really clean exit through the corridor here.

Centre Bounce 3 - Good work for nil reward
This one is a little different, in that we mostly did nothing wrong and it all went to a really neat plan, but the efforts of Horne-Francis thwart what should have been a really good exit and force a stoppage.
Image 1 - the setup
This is actually a really neat set play to watch unfold. Wardlaw adopts a defensive posture appearing to tag Butters, but is actually the hit-to. LDU appears to be the hit-to but runs a decoy run.

Image 2
Xerri's hit zone is circled here. LDU drags his man to the opposite side of the contest, and then Wardlaw goes on a run through the space. Cool set up and props to the boys here.

Image 3
We then set up really well. Parker peels off Horne-Francies as an option and Stephens is also a possible but unlikely receive. Nice triangle.

Image 4 - enter Horne-Francis
He kills us here and IMO there's not much we could do better. He locks onto George and wraps him up in a flash before he can cleanly dispose of it. You can see our shape works here though, as the ball spills to Parker and Stephens is an option to then receive from Parker.

Image 5 - Horne-Francis again
Not much to say here. The ball spills to Parker and the bloke follows up with a second effort to wrap him up, prevent a release to Stephens, and force a stoppage.

Stoppage - NM going to right of screen - ruck work is pivotal, not everyone's on the same page
This stoppage occurs immediately after that centre bounce. We went from a great centre bounce effort, to a poor stoppage effort immediately after. Port had a clear exit out the front and were ready to damage us badly, but were fumbly and we managed to nullify it. But we just need to bring the mental energy consistently.
Image 1 - The setup
Both sides have an defensive weighting at the stoppage here. It's very clear - we want the ball to spill to the left of screen and have Colby steam back and down through the corridor to deliver inside 50 (bottom left triangle). Port want to push it boundary side and exit that way (top right triangle) out the back.
Stephens is sitting defensively as a skinny side winger. The circle in Port's triangle is typically roughly where you would see our skinny side winger setup if it were offensively weighted.
Port have more space to work with, we have the more dangerous space. It makes sense given the scores and stage of the game.
The rule of this stoppage is simple - if we get first hands on it, it MUST go to left of screen and out the bottom.

Image 2
Unfortunately it all falls apart when Xerri grabs the ball out of the ruck. He was awesome this game, but not the best effort here. He's wrapped up as he grabs it out of the ruck, but unfortunately fights to put the ball exactly where we don't want it with that set up. He puts it offensive side (right of screen), giving Port the run onto it (left of screen), instead of defensive side, where we had weighted our numbers at the stoppage.

Image 3 - Port exit the stoppage
As you see here, the ball tracks right and Port were out. But they missed the handball and we forced another stoppage.

Last edited:
- Jun 7, 2019
- 7,214
- 27,177
- AFL Club
- North Melbourne
Very good, well doneRound 7 vs Port Adelaide
This was a far more enjoyable game to review. I've focused on three centre bounces and one stoppage, all at critical junctures in the game. There are some improvements for sure, which I'll point out, but we also need to continue to get everyone on the same page, and that includes the wings, half forwards and half backs.
We've still got a lot of work to do, but I did notice an immediate improvement in our spacing in the contests.
Centre Bounce 1 - Good sweeping, but we don't gel - NM to left of screen
Last week I spoke about how our sweepers were deficient in staying to the task. This week was a lot better, resulting in more pressure on the Port clearances. However, it's let down later in the chain where we end up losing it in a bad way.
We actually win the hit-out and gather here and pressure really well, but lose the clearance in a poor way due to factors outside of our midfielders' control. So there's some props here which is why I showed this one.
Image 1 - The setup
We have Jy as the sweeper, which IMO is his best role. We have Wardlaw as the hit-to, right in Xerri's zone, and LDU at the front of the stoppage. Jy is setting up really far back to the right of screen which seems a conscious effort to track the contest and not get sucked in. Our wingers are sitting defensive side of their opponents.
View attachment 2296645
Image 2 - Possible Exits
This is a really good image here. Wardlaw receives the hit-out as planned. Ideally LDU gets the receive from Wardlaw here, and then Stephens starts to spread offensively and laterally, but Port are onto it and they shut LDU down.
Jy's role here is really critical. Even though it looks like we will win the clearance, he still holds this defensive space really well as a sweeper, just in case. And that becomes critical to how we pressure them. It means that even if it's turned over, Port can only exit via the back of the setup to the left of screen.
McKercher is also smart here going body on body - he knows that winger will likely wrap around if and when Port exit out the back of the setup.
View attachment 2296646
Image 3 -Turnover
Wardlaw gets pressure here and handballs over his head and behind him. Unfortunately LDU ran through the stoppage and so we had no representation out the back (well, the front of the stoppage but to Wardlaw's back), meaning it went straight to Port. JHF receives the ball, but with Jy holding his ground and tracking the contest, he has no options in his immediate field of vision.
View attachment 2296652
Image 4 - Sweeper shutdown
Our pressure is really good here, and JHF gives to the first option. Jy is still off to the right of screen, preventing Port from exiting the front of the stoppage. Wardlaw provides the heat at the contest and Port are under the hammer here.
View attachment 2296658
Image 5 - Port forced backwards again
Faced with Wardlaw and LDU's pressure and Jy's position as sweeper our to the right in line with the ball, Port are forced to go backward yet again. This is exactly what you want to do when you are losing a clearance. Turn it into a shitfight and make them earn it.
View attachment 2296663
Image 6 - Half forwards not on the same page - Rozee exits
Unfortunately it breaks down not due to our midfielders, but due to a lack of body from our half-forwards. Rozee off the half back times his moment just right and steams through the middle. This is really good work from Rozee and some disappointing work from Tucker who is trailing him. I'm a big fan of half forwards and half backs training CBAs with the midfield for this reason.
View attachment 2296668
Centre Bounce 2 - front running costs us
This one is a little different. We lose our shape through front running and it bites us, at a critical point in time as well. This is despite what is a clear defensive emphasis on the setup due to Port's momentum. Very disappointing.
Image 1 - the setup
There's 4 minutes to go in the first quarter and Port are starting to get a run on. We set up defensively, with a sweeper, and two lateral hit-tos rather than a front-side blocker.
View attachment 2296669
Image 2 - structure lost
Unfortunately this defensive emphasis almost overcorrects and causes us to lose shape. Jy, LDU and Parker end up almost holding hands here. Two of those blokes are adding nothing to that contest.
View attachment 2296671
Image 3 - the start of it unravelling
Despite losing shape, we manage to force a spill of the ball which comes out to Colby. Unfortunately LDU puts the gas on running forward way too early as you can see in this frame, especially given McKercher is a left hander. Colby hasn't yet gathered the ball cleanly. Jy is holding out to the right of screen after previously getting sucked into the contest. Parker also starts drifting forward a touch early.
View attachment 2296672
Image 4
Now we have lost all shape around the contest in a bad way. Colby has Butters on his hammer and no support. Meanwhile Port have set up really well for if they win the ball here. I spoke last week about working in triangles and Port did this really well here yet again. LDU and Parker are both off to the left of screen, having front run way too early.
This my friends is how we go from a defensive setup at a centre bounce to a complete front running capitulation when it actually plays out. Small choices that have big effects.
View attachment 2296675
Image 5 - we try, but the damage is done
Simpkin also gives up the corridor, but that's a result of him having to provide a release option to Colby once the other two North players took themselves out of the contest. Credit to both LDU and Parker, they realise their mistakes and crack in here to try to influence. They storm back in from the left of screen when Butters strips Colby, but as you can see the shape has already broken down while Port maintain theirs.
View attachment 2296679
Image 6
As expected, Port's strong structure allows them a really clean exit through the corridor here.
View attachment 2296684
Centre Bounce 3 - Good work for nil reward
This one is a little different, in that we mostly did nothing wrong and it all went to a really neat plan, but the efforts of Horne-Francis thwart what should have been a really good exit and force a stoppage.
Image 1 - the setup
This is actually a really neat set play to watch unfold. Wardlaw adopts a defensive posture appearing to tag Butters, but is actually the hit-to. LDU appears to be the hit-to but runs a decoy run.
View attachment 2296694
Image 2
Xerri's hit zone is circled here. LDU drags his man to the opposite side of the contest, and then Wardlaw goes on a run through the space. Cool set up and props to the boys here.
View attachment 2296705
Image 3
We then set up really well. Parker peels off Horne-Francies as an option and Stephens is also a possible but unlikely receive. Nice triangle.
View attachment 2296704
Image 4 - enter Horne-Francis
He kills us here and IMO there's not much we could do better. He locks onto George and wraps him up in a flash before he can cleanly dispose of it. You can see our shape works here though, as the ball spills to Parker and Stephens is an option to then receive from Parker.
View attachment 2296711
Image 5 - Horne-Francis again
Not much to say here. The ball spills to Parker and the bloke follows up with a second effort to wrap him up, prevent a release to Stephens, and force a stoppage.
View attachment 2296712
Stoppage - NM going to left of screen - ruck work is pivotal, not everyone's on the same page
This stoppage occurs immediately after that centre bounce. We went from a great centre bounce effort, to a poor stoppage effort immediately after. Port had a clear exit out the front and were ready to damage us badly, but were fumbly and we managed to nullify it. But we just need to bring the mental energy consistently.
Image 1 - The setup
Both sides have an offensive weighting at the stoppage here. It's very clear - we want the ball to spill to the left of screen and have Colby steam through the corridor to deliver inside 50 (bottom left triangle). Port want to push it boundary side and exit that way (top right triangle).
Stephens is sitting offensively as a skinny side winger, which is unusual and why I think it's an instruction as it's not the first time I've seen us weight a stoppage offensively like this (see Colby last week). The circle in Port's triangle is typically roughly where you would see our skinny side winger setup.
Port have more space to work with, we have the more dangerous space. It makes sense given the scores and stage of the game.
The rule of this stoppage is simple - if we get first hands on it, it MUST go to left of screen.
View attachment 2296713
Image 2
Unfortunately it all falls apart when Xerri grabs the ball out of the ruck. He was awesome this game, but not the best effort here. He's wrapped up as he grabs it out of the ruck, but unfortunately fights to put the ball exactly where we don't want it with that set up. He puts it defensive side (right of screen), giving Port the run onto it (left of screen), instead of offensive side, where we had weighted our numbers at the stoppage.
View attachment 2296717
Image 3 - Port exit the front of the stoppage
As you see here, the ball tracks right and Port were OUT. But they missed the handball and we forced another stoppage.
View attachment 2296721
Tucker was attacking side of Rozee almost all game, which is pretty ****ing stupid if your are meant to be tagging him lolRound 7 vs Port Adelaide
This was a far more enjoyable game to review. I've focused on three centre bounces and one stoppage, all at critical junctures in the game. There are some improvements for sure, which I'll point out, but we also need to continue to get everyone on the same page, and that includes the wings, half forwards and half backs.
We've still got a lot of work to do, but I did notice an immediate improvement in our spacing in the contests.
Centre Bounce 1 - Good sweeping, but we don't gel - NM to left of screen
Last week I spoke about how our sweepers were deficient in staying to the task. This week was a lot better, resulting in more pressure on the Port clearances. However, it's let down later in the chain where we end up losing it in a bad way.
We actually win the hit-out and gather here and pressure really well, but lose the clearance in a poor way due to factors outside of our midfielders' control. So there's some props here which is why I showed this one.
Image 1 - The setup
We have Jy as the sweeper, which IMO is his best role. We have Wardlaw as the hit-to, right in Xerri's zone, and LDU at the front of the stoppage. Jy is setting up really far back to the right of screen which seems a conscious effort to track the contest and not get sucked in. Our wingers are sitting defensive side of their opponents.
View attachment 2296645
Image 2 - Possible Exits
This is a really good image here. Wardlaw receives the hit-out as planned. Ideally LDU gets the receive from Wardlaw here, and then Stephens starts to spread offensively and laterally, but Port are onto it and they shut LDU down.
Jy's role here is really critical. Even though it looks like we will win the clearance, he still holds this defensive space really well as a sweeper, just in case. And that becomes critical to how we pressure them. It means that even if it's turned over, Port can only exit via the back of the setup to the left of screen.
McKercher is also smart here going body on body - he knows that winger will likely wrap around if and when Port exit out the back of the setup.
View attachment 2296646
Image 3 -Turnover
Wardlaw gets pressure here and handballs over his head and behind him. Unfortunately LDU ran through the stoppage and so we had no representation out the back (well, the front of the stoppage but to Wardlaw's back), meaning it went straight to Port. JHF receives the ball, but with Jy holding his ground and tracking the contest, he has no options in his immediate field of vision.
View attachment 2296652
Image 4 - Sweeper shutdown
Our pressure is really good here, and JHF gives to the first option. Jy is still off to the right of screen, preventing Port from exiting the front of the stoppage. Wardlaw provides the heat at the contest and Port are under the hammer here.
View attachment 2296658
Image 5 - Port forced backwards again
Faced with Wardlaw and LDU's pressure and Jy's position as sweeper our to the right in line with the ball, Port are forced to go backward yet again. This is exactly what you want to do when you are losing a clearance. Turn it into a shitfight and make them earn it.
View attachment 2296663
Image 6 - Half forwards not on the same page - Rozee exits
Unfortunately it breaks down not due to our midfielders, but due to a lack of body from our half-forwards. Rozee off the half back times his moment just right and steams through the middle. This is really good work from Rozee and some disappointing work from Tucker who is trailing him. I'm a big fan of half forwards and half backs training CBAs with the midfield for this reason.
View attachment 2296668
Centre Bounce 2 - front running costs us
This one is a little different. We lose our shape through front running and it bites us, at a critical point in time as well. This is despite what is a clear defensive emphasis on the setup due to Port's momentum. Very disappointing.
Image 1 - the setup
There's 4 minutes to go in the first quarter and Port are starting to get a run on. We set up defensively, with a sweeper, and two lateral hit-tos rather than a front-side blocker.
View attachment 2296669
Image 2 - structure lost
Unfortunately this defensive emphasis almost overcorrects and causes us to lose shape. Jy, LDU and Parker end up almost holding hands here. Two of those blokes are adding nothing to that contest.
View attachment 2296671
Image 3 - the start of it unravelling
Despite losing shape, we manage to force a spill of the ball which comes out to Colby. Unfortunately LDU puts the gas on running forward way too early as you can see in this frame, especially given McKercher is a left hander. Colby hasn't yet gathered the ball cleanly. Jy is holding out to the right of screen after previously getting sucked into the contest. Parker also starts drifting forward a touch early.
View attachment 2296672
Image 4
Now we have lost all shape around the contest in a bad way. Colby has Butters on his hammer and no support. Meanwhile Port have set up really well for if they win the ball here. I spoke last week about working in triangles and Port did this really well here yet again. LDU and Parker are both off to the left of screen, having front run way too early.
This my friends is how we go from a defensive setup at a centre bounce to a complete front running capitulation when it actually plays out. Small choices that have big effects.
View attachment 2296675
Image 5 - we try, but the damage is done
Simpkin also gives up the corridor, but that's a result of him having to provide a release option to Colby once the other two North players took themselves out of the contest. Credit to both LDU and Parker, they realise their mistakes and crack in here to try to influence. They storm back in from the left of screen when Butters strips Colby, but as you can see the shape has already broken down while Port maintain theirs.
View attachment 2296679
Image 6
As expected, Port's strong structure allows them a really clean exit through the corridor here.
View attachment 2296684
Centre Bounce 3 - Good work for nil reward
This one is a little different, in that we mostly did nothing wrong and it all went to a really neat plan, but the efforts of Horne-Francis thwart what should have been a really good exit and force a stoppage.
Image 1 - the setup
This is actually a really neat set play to watch unfold. Wardlaw adopts a defensive posture appearing to tag Butters, but is actually the hit-to. LDU appears to be the hit-to but runs a decoy run.
View attachment 2296694
Image 2
Xerri's hit zone is circled here. LDU drags his man to the opposite side of the contest, and then Wardlaw goes on a run through the space. Cool set up and props to the boys here.
View attachment 2296705
Image 3
We then set up really well. Parker peels off Horne-Francies as an option and Stephens is also a possible but unlikely receive. Nice triangle.
View attachment 2296704
Image 4 - enter Horne-Francis
He kills us here and IMO there's not much we could do better. He locks onto George and wraps him up in a flash before he can cleanly dispose of it. You can see our shape works here though, as the ball spills to Parker and Stephens is an option to then receive from Parker.
View attachment 2296711
Image 5 - Horne-Francis again
Not much to say here. The ball spills to Parker and the bloke follows up with a second effort to wrap him up, prevent a release to Stephens, and force a stoppage.
View attachment 2296712
Stoppage - NM going to left of screen - ruck work is pivotal, not everyone's on the same page
This stoppage occurs immediately after that centre bounce. We went from a great centre bounce effort, to a poor stoppage effort immediately after. Port had a clear exit out the front and were ready to damage us badly, but were fumbly and we managed to nullify it. But we just need to bring the mental energy consistently.
Image 1 - The setup
Both sides have an offensive weighting at the stoppage here. It's very clear - we want the ball to spill to the left of screen and have Colby steam through the corridor to deliver inside 50 (bottom left triangle). Port want to push it boundary side and exit that way (top right triangle).
Stephens is sitting offensively as a skinny side winger, which is unusual and why I think it's an instruction as it's not the first time I've seen us weight a stoppage offensively like this (see Colby last week). The circle in Port's triangle is typically roughly where you would see our skinny side winger setup.
Port have more space to work with, we have the more dangerous space. It makes sense given the scores and stage of the game.
The rule of this stoppage is simple - if we get first hands on it, it MUST go to left of screen.
View attachment 2296713
Image 2
Unfortunately it all falls apart when Xerri grabs the ball out of the ruck. He was awesome this game, but not the best effort here. He's wrapped up as he grabs it out of the ruck, but unfortunately fights to put the ball exactly where we don't want it with that set up. He puts it defensive side (right of screen), giving Port the run onto it (left of screen), instead of offensive side, where we had weighted our numbers at the stoppage.
View attachment 2296717
Image 3 - Port exit the front of the stoppage
As you see here, the ball tracks right and Port were OUT. But they missed the handball and we forced another stoppage.
View attachment 2296721
Time and again was giving Rozee 3m+ of space to work towards the stoppage effectively giving them a +1 and an easy out
tales129
Premium Platinum
We hedge our bets so often on the outside of a stoppage.Tucker was attacking side of Rozee almost all game, which is pretty ****ing stupid if your are meant to be tagging him lol
Time and again was giving Rozee 3m+ of space to work towards the stoppage effectively giving them a +1 and an easy out
Often against the oppos most dangerous players too!
Oh yeah, and that Rozee role is exactly the role Tommy Torpedo should be playing imo, instead we have an unreliable and defensively inept chip kicker in Daniel.
Rozee was front running all game because Tuckets was no where to be seen lol
20 kicks for 700m gained
7 marks - all uncontested
8 intercept possessions
3 clearances
Beggars belief Tuckets was playing a 'role'
20 kicks for 700m gained
7 marks - all uncontested
8 intercept possessions
3 clearances
Beggars belief Tuckets was playing a 'role'
Xerri needs to get a bit more creative with his tap work too. Is way to predictable.
Taking it out of the ruck in d50 is good tactics, as it's almost impossible to get done HTB but everywhere else it sucks and blows our stoppages up from the get go.
Taking it out of the ruck in d50 is good tactics, as it's almost impossible to get done HTB but everywhere else it sucks and blows our stoppages up from the get go.
Na. It works well from the centre bounce because of the 666 rule. X should do it in the middle whenever he gets the chance.Xerri needs to get a bit more creative with his tap work too. Is way to predictable.
Taking it out of the ruck in d50 is good tactics, as it's almost impossible to get done HTB but everywhere else it sucks and blows our stoppages up from the get go.
Doesn't he already take it out of the ruck more than anyone?Na. It works well from the centre bounce because of the 666 rule. X should do it in the middle whenever he gets the chance.
- Jun 7, 2019
- 7,214
- 27,177
- AFL Club
- North Melbourne
when they first lined up, I thought it was a good move in the coaches box, but Darcy just couldn't execute.Rozee was front running all game because Tuckets was no where to be seen lol
20 kicks for 700m gained
7 marks - all uncontested
8 intercept possessions
3 clearances
Beggars belief Tuckets was playing a 'role'
Very disappointing, and if it was good enough for Corr and Logue, the consequence should be the same
- Apr 19, 2019
- 13,664
- 45,741
- AFL Club
- North Melbourne
- Thread starter
- #94
when they first lined up, I thought it was a good move in the coaches box, but Darcy just couldn't execute.
Very disappointing, and if it was good enough for Corr and Logue, the consequence should be the same
Unfortunately, and I see it a lot, coaches often think aerobically fit = good tagger. But they just can't go with the quick boys when they explode with pace.
🥰 Love BigFooty? Join now for free.
TennisPlayerAndy
Game #6 Klay
- Apr 1, 2008
- 64,268
- 119,592
- AFL Club
- North Melbourne
- Other Teams
- Liverpool, Raiders, GSW, QPR, NYM
He’s basically a tractor trying to keep up with speedway cars.Unfortunately, and I see it a lot, coaches often think aerobically fit = good tagger. But they just can't go with the quick boys when they explode with pace.
No chance.
Yeah. X, Max and TDK all average 5 a game.Doesn't he already take it out of the ruck more than anyone?
- Apr 17, 2007
- 30,492
- 59,708
- AFL Club
- North Melbourne
- Other Teams
- hellas,liverpool,storm,au
Fair enough if you have no midfield but it’s where our blue chip assets are and are being made redundantXerri needs to get a bit more creative with his tap work too. Is way to predictable.
Taking it out of the ruck in d50 is good tactics, as it's almost impossible to get done HTB but everywhere else it sucks and blows our stoppages up from the get go.
When he does tap it - our mids are shocked
I suspect he won’t play this week.Rozee was front running all game because Tuckets was no where to be seen lol
20 kicks for 700m gained
7 marks - all uncontested
8 intercept possessions
3 clearances
Beggars belief Tuckets was playing a 'role'
- Apr 19, 2019
- 13,664
- 45,741
- AFL Club
- North Melbourne
- Thread starter
- #100
Themanbun is there a combination in there that works best together that you've seen, and conversely, is there a comin there that is generally a cluster****?
My favourite combo is Parker, Jy, Wardlaw, followed by Wardlaw, LDU and Parker.
Sheezel and Powell were really unaccountable in there. A combo of them two plus LDU was in trouble if we didn't win the clearance.


