- Banned
- #1
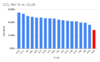
The following is a breakdown of the 21 centre bounces vs St Kilda.
Main focus question:
- who is at our centre bounces and how often?
Deeper dive question:
- what happens when certain players or combinations are at centre bounce?
I am not a statistician nor claim to be. This is very raw data and other stats would no doubt tell more of the story, but this is outside of the scope of this work. I have been descriptively short by design.
Anyway, without further ado make of the data what you will:
Summary:
Number of times at centre bounces:
ROB - 21
Keays - 18
Brouch - 14
Jones - 13
Mrouch - 12
Seedsman - 2
Bounce by bounce:
START OF Q1
Centre bounce 1
ROB
Mrouch
Jones
Keays
Result: Clear St Kilda win (Jones)
Centre bounce 2
ROB
Mrouch
Jones
Keays
Result: Clear St Kilda win (Jones)
Centre bounce 3
ROB
Mrouch
Jones
Keays
Result: Clear St Kilda win (Gresham)
Centre bounce 4
ROB
Mrouch
Brouch
Keays
Result: Initial dispute then clear St Kilda win (Jones)
START OF Q2
Centre bounce 5
ROB
Brouch
Jones
Keays
Result: Clear Adelaide win (Jones)
Centre bounce 6
ROB
Brouch
Jones
Keays
Result: St Kilda free kick leading to clear St Kilda win (Gresham)
Centre bounce 7
ROB
Brouch
Jones
Keays
Result: Free kick leading to clear Adelaide win (Keays)
Centre bounce 8
ROB
Mrouch
Jones
Seedsman
Result: Clear St Kilda win (Steele)
Centre bounce 9
ROB
Brouch
Jones
Keays
Result: Lengthy dispute before Adelaide win (Jones)
Centre bounce 10
ROB
Brouch
Mrouch
Jones
Result: Clear St Kilda win (Ross)
Centre bounce 11
ROB
Brouch
Mrouch
Keays
Result: Dispute leading to subsequent stoppage. General play on wing before eventually going Adelaide's way. (No clear result from initial centre bounce)
Centre bounce 12
ROB
Brouch
Mrouch
Keays
Result: Free kick leading to Clear Adelaide win (Keays)
START OF Q3
Centre bounce 13
ROB
Mrouch
Jones
Keays
Result: dispute leading to subsequent stoppage. St Kilda free kick (Geary).
Centre bounce 14
ROB
Brouch
Keays
Jones
Result: Clear St Kilda win (Jones)
START OF Q4
Centre bounce 15
ROB
Brouch
Keays
Jones
Result: Clear St Kilda win (Gresham)
Centre bounce 16
ROB
Brouch
Keays
Jones
Result: Free kick leading to clear Adelaide win (Brouch)
Centre bounce 17
ROB
Brouch
Mrouch
Jones
Result: initial St Kilda win but turned over and ball won by Adelaide decisively (Mackay)
Centre bounce 18
ROB
Mrouch
Jones
Keays
Result: Initial dispute leading to clear St Kilda win (Patton)
Centre bounce 19
ROB
Brouch
Mrouch
Keays
Result: Clear St Kilda win (Gresham)
Centre bounce 20
ROB
Brouch
Mrouch
Keays
Result: Dispute leading to minor Adelaide win (Keays)
Centre bounce 21
ROB
Jones
Keays
Seedsman
Result: Clear Adelaide win (Keays)
END OF MATCH
K bye
Last edited: