Gibbsy
Moderator
- Moderator
- #1
UPDATED VERSION - WITH LINKS TO FONT AND ALIASED SHIELD TEMPLATE
In this tutorial, I'm going to explain how to create a retro 80's VFL shield logo using Microsoft Paint.
The example logo we will create is one for the new Gold Coast Football Club, using the popular "Sharks" nickname.
-----------------------------------------
1. What you need
1.1 Shield template
I've edited a logo from Mero's brilliant FootyJumpers.com website, grabbed the shield outline and edited into an aliased (pixeled) image so it can be coloured and edited easily.
Get it here
1.2 "Marbold" logo font
With thanks to board member Omegaville, we now have the exact font used by all VFL clubs in the late 70's to early 90's.
Get it here
2. Colouring the logo
OK. So now you have the templates, open up Microsoft Paint on your computer.
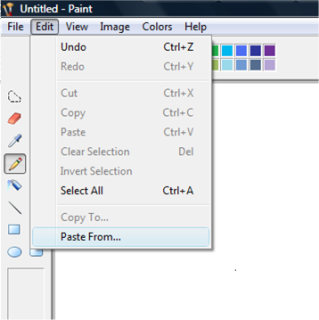
Go to Edit on the top menu, click that and go down to Paste From...
A dialog box will open up; you have to find where you saved the shield template on your computer - it's probably somewhere under your "My Pictures" folder.
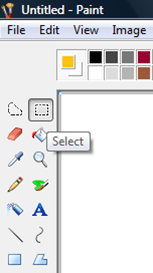
Once you've found that, it'll paste into your Paint area. Before you start filling the shield in, click on the Select button on the Paint toolbox and drag the shield into the middle of the screen - it's easier to work with.
Now you have to decide what colours you want the shield to be. You can change the top, middle, and bottom borders, and the space inside them.
I normally keep the large spaces white, but it's up to you if you want to fill it in or not.
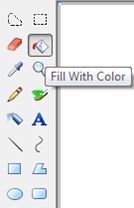
To fill in the shield, go to the Paint toolbox on the left and click on the fill bucket.
Now click on a light yellow colour in the colour pallette, as that's the colour we're using to colour the top border of the shield.

With the fill bucket, click on the top border on the shield and fill that in.

Continue to fill the rest of the shield borders in - a light blue colour for the middle border line, and red colour for the bottom border on the shield.
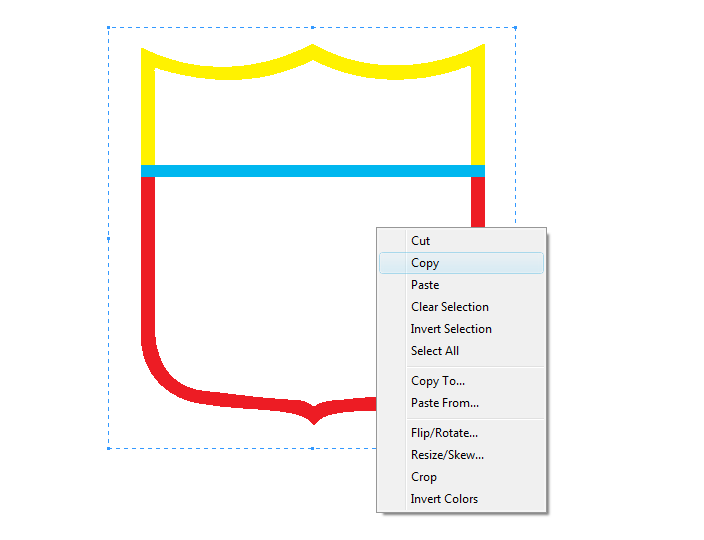
Your shield should now look something like this:

Once you have your shield coloured, go back to the Select tool which I showed earlier, click that, and drag the cursor over the shield. Once the shield is fully selected, right click the shield and click "Copy".
Now open up Microsoft PowerPoint. I find this is a good program to use for editing if you don't have Photoshop, etc.
Right-click and paste the shield into a new slide on PowerPoint.
3. Lettering
You can now quit your old Paint shield document, and open up a new Paint document for the lettering.
With the discovery of the font it is now a lot easier to create a professional-looking retro shield logo.
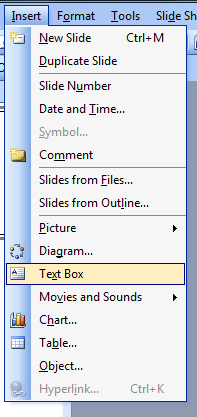
Go to the menu bar and select "Insert > Text Box."
Drag a text box around the area of the top part of the shield. Type your nickname for your team, and select "Marbold" from the font drop-down menu.
Note: if you don't see Marbold in the list then you haven't installed the font properly - just Google search "how to install font on windows" and you'll get millions of helpful results.
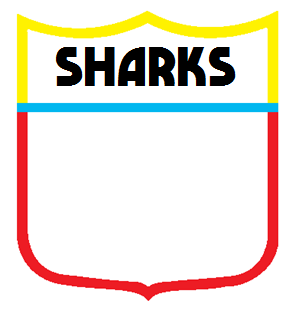
If your shield copied in to your slide the same size as mine then I find a good font size is 48 - not too big and leaves enough room for the full club name below it. Alter your font size if need be.
Your shield now probably looks something like this:
Now in keeping with the team colours, 0, 183, 239, select the "Sharks" text and change the font colour to a light blue, like we used in Paint. If you can't find the exact font colour, the RGB values are 0, 183, 239 (don't worry if you don't understand this).
3.1 Subtitle lettering
In all of the 80's shield logos, they had the team nickname as the main text with the full club name below it, in a smaller font. It looks nice and we'll continue with that tradition in this tutorial.
Select "Insert > Text Box" and this time create it just below your Sharks header. Make sure there is enough room for this subtitle (you may need to nudge the Sharks header up slightly).
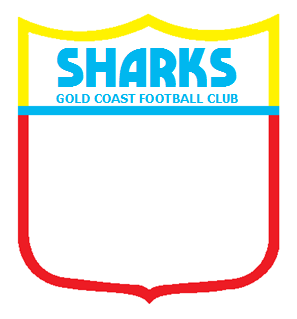
Type in "Gold Coast Football Club," set the font size at 12 pt (or whatever yours needs to be) and change the font colour to that same blue we used.
I'm not exactly sure on what the official subtitle font is, but the one I use is pretty close and looks nice.
It's called "Tahoma" and it's a standard font across all computers.
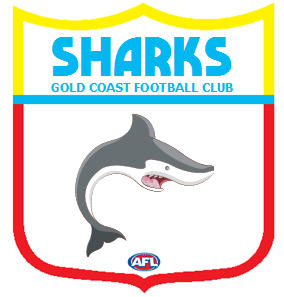
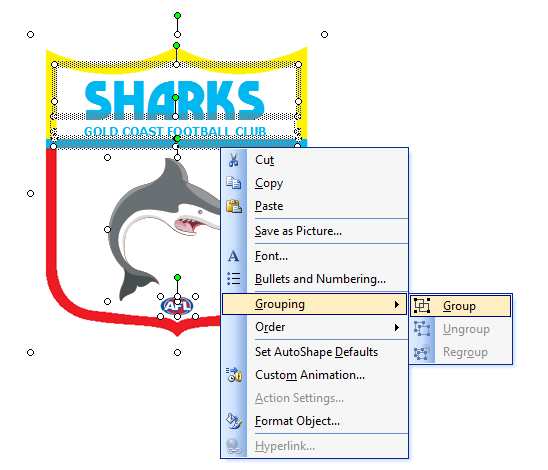
Once you've finished your lettering, your logo should look something like this:
READ NEXT POST FOR PART 2...
In this tutorial, I'm going to explain how to create a retro 80's VFL shield logo using Microsoft Paint.
The example logo we will create is one for the new Gold Coast Football Club, using the popular "Sharks" nickname.
-----------------------------------------
1. What you need
- Windows computer with MS Paint
- PowerPoint 2003 or later
- VFL shield template
- "Marbold" logo font
1.1 Shield template
I've edited a logo from Mero's brilliant FootyJumpers.com website, grabbed the shield outline and edited into an aliased (pixeled) image so it can be coloured and edited easily.
Get it here
1.2 "Marbold" logo font
With thanks to board member Omegaville, we now have the exact font used by all VFL clubs in the late 70's to early 90's.
Get it here
2. Colouring the logo
OK. So now you have the templates, open up Microsoft Paint on your computer.
Go to Edit on the top menu, click that and go down to Paste From...
A dialog box will open up; you have to find where you saved the shield template on your computer - it's probably somewhere under your "My Pictures" folder.
Once you've found that, it'll paste into your Paint area. Before you start filling the shield in, click on the Select button on the Paint toolbox and drag the shield into the middle of the screen - it's easier to work with.
Now you have to decide what colours you want the shield to be. You can change the top, middle, and bottom borders, and the space inside them.
I normally keep the large spaces white, but it's up to you if you want to fill it in or not.
To fill in the shield, go to the Paint toolbox on the left and click on the fill bucket.
Now click on a light yellow colour in the colour pallette, as that's the colour we're using to colour the top border of the shield.
With the fill bucket, click on the top border on the shield and fill that in.
Continue to fill the rest of the shield borders in - a light blue colour for the middle border line, and red colour for the bottom border on the shield.
Your shield should now look something like this:
Once you have your shield coloured, go back to the Select tool which I showed earlier, click that, and drag the cursor over the shield. Once the shield is fully selected, right click the shield and click "Copy".
Now open up Microsoft PowerPoint. I find this is a good program to use for editing if you don't have Photoshop, etc.
Right-click and paste the shield into a new slide on PowerPoint.
3. Lettering
You can now quit your old Paint shield document, and open up a new Paint document for the lettering.
With the discovery of the font it is now a lot easier to create a professional-looking retro shield logo.
Go to the menu bar and select "Insert > Text Box."
Drag a text box around the area of the top part of the shield. Type your nickname for your team, and select "Marbold" from the font drop-down menu.
Note: if you don't see Marbold in the list then you haven't installed the font properly - just Google search "how to install font on windows" and you'll get millions of helpful results.
If your shield copied in to your slide the same size as mine then I find a good font size is 48 - not too big and leaves enough room for the full club name below it. Alter your font size if need be.
Your shield now probably looks something like this:
Now in keeping with the team colours, 0, 183, 239, select the "Sharks" text and change the font colour to a light blue, like we used in Paint. If you can't find the exact font colour, the RGB values are 0, 183, 239 (don't worry if you don't understand this).
3.1 Subtitle lettering
In all of the 80's shield logos, they had the team nickname as the main text with the full club name below it, in a smaller font. It looks nice and we'll continue with that tradition in this tutorial.
Select "Insert > Text Box" and this time create it just below your Sharks header. Make sure there is enough room for this subtitle (you may need to nudge the Sharks header up slightly).
Type in "Gold Coast Football Club," set the font size at 12 pt (or whatever yours needs to be) and change the font colour to that same blue we used.
I'm not exactly sure on what the official subtitle font is, but the one I use is pretty close and looks nice.
It's called "Tahoma" and it's a standard font across all computers.
Once you've finished your lettering, your logo should look something like this:
READ NEXT POST FOR PART 2...


 Will Try this out when its done.