Analysis Season 2023 - Statistics and Analytics Thread

Remove this Banner Ad

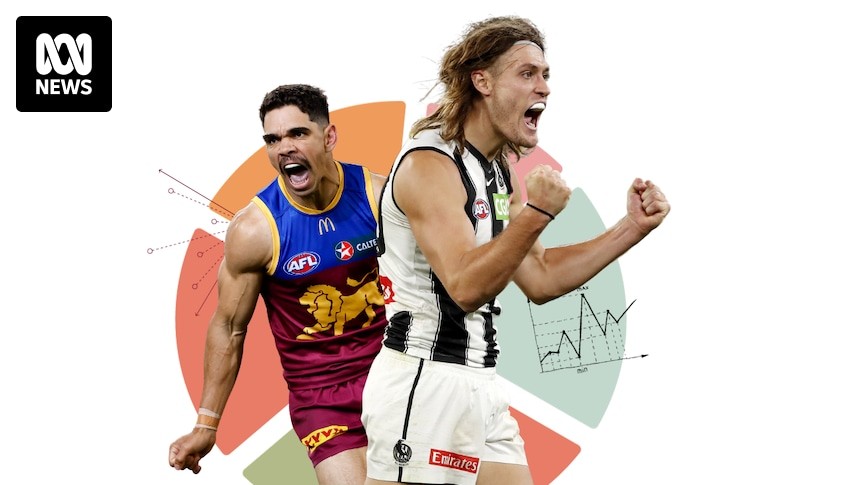
Fantastic grand final preview from the ABC guys:


For the past two years, Collingwood has confounded most opponents with its attacking and direct brand of footy, but Brisbane might have the clearest blueprint to beat the Pies of any side in the competition.

They currently hold a six-game winning streak against Collingwood, including two convincing victories this year.

The bedrock of Brisbane's game is built on attacking teams on the counter. No team scores more heavily from intercepts than the Lions and it starts up forward.

1695951230396.png


Take you apart​

Brisbane also has one of the most dangerous and well-balanced attacks in the league.

The Lions have long been one of the most efficient teams going inside 50, finishing 4th for points per inside 50.

The Lions have a defined group of focal tall and small forwards, and they share the load within their group.


1695951313444.png


Each week the roles that they play vary, between focal points and decoys. Fagan looks less at the individual contributions of each of his forwards, but more at how it contributes to the bigger picture. It makes them hard to plan to beat, and almost impossible to stop.

"When it comes to finals, it's a little easier for teams to pick you off if you're predictable going inside 50," Fagan told the ABC earlier this year.

"So the fact that we've got a good mix of targets is important to us. We've got to keep going with that — we don't want to become reliant on any one player."

Building in the middle​

All finals losses hurt, but blowouts sometimes show the signs of bigger issues at play.

In the back half of last season, Brisbane's talented midfield struggled to find the right balance between attack and defence, ball winners and line breakers.

1695951370600.png

This year, their ability to win clearances and limit opposition damage has improved significantly.

The recruitment of one of the league's better two-way midfielders in Josh Dunkley has helped their flexibility.

Father-son draftees Jaspa Fletcher and Will Ashcroft have helped their burst to the outside. This has allowed their other remaining pieces, like recently minted Brownlow medallist Lachie Neale and Hugh McCluggage, to settle into clearer roles suited to their strengths.

The last challenge​

Only the minor premiers stand in the way of Brisbane's fourth flag.

They've done it before against this side. If the Lions can execute their game plan, they know they can beat Collingwood.

Some question the ability of the Lions to win at the MCG, given their recent poor record at the ground.

In reality, the MCG on grand final day is a completely different task than any other day of the year. The last time the Lions played in front of a crowd of more than 90,000 was their 2002 Grand Final win over the Pies.

A new footballing empire might be rising in the north again, and maybe it'll be for good this time.
 
Some sleepy Sunday stats.

I wanted to have a look at long kicks down the line, from slow plays. I think it's a good measure for things like defensive intent, work rate in attack etc. I also don't think it is officially published, and if it is, I've never seen any of the numbers behind it.

I started with the Preliminary Final and hopefully I can bring myself to do the Grand Final because I think that will prove very illuminating. The whole process made me feel a bit for the assistant coaches who (I presume) have to go through and code up all the vision for their players. Even collecting this data, about essentially one facet of the game, was a bit of a procedure.

Obviously all of us probably have a good idea of what is a "long kick down the line". But when you go through this process you need a little bit more rigour around your definition, to account for grey areas which might (and did!) arise. So I guess my definition includes the following:

  • A free kick is awarded or a mark is taken.
  • The player prioritises gaining territory almost completely, over the goal of (a) maintaining possession or (b) scoring. (b) is important because it means I rule out kicks from 50-60m where the end result is a score.
  • The kick is more or less in a straight line to goal if at half back or ahead, or hug the boundary line anywhere on the field.
  • The player appears to have kicked his maximum distance (ie they haven't popped it up for someone to run onto it).
  • Kick ins are included where the player kicks long.
  • I probably have other criteria so this list may get edited in the future, but that is a good start for now.

I wanted to get a read on a number of things:

  • Location of kick - by zone
  • Location of drop - by zone:
    • LBP = Left back pocket: the area inside defensive 50 to the left of the left behind post
    • FB = Full back: the area inside defensive 50 between the behind posts
    • RBP = Right back pocket: the area inside defensive 50 to the right of the right behind post
    • LHB = Left half back: the area between defensive 50 and the back left corner of the centre square
    • CHB = Centre half back: the area between defensive 50 and the back edge of the centre square (this is only a tiny sliver of the ground so did not get used during the Preliminary Final)
    • RHB = Right half back: the area between defensive 50 and the back right corner of the centre square
    • LW = Left wing: the area to the left of the centre square
    • C = Centre: the centre square
    • RW = Right wing: the area to the right of the centre square
    • LHF = Left half forward: the area between forward 50 and the front left corner of the centre square
    • CHF = Centre half forward: the area between forward 50 and the front edge of the centre square (this is only a tiny sliver of the ground so did not get used during the Preliminary Final)
    • RHF = Right half forward: the area between forward 50 and the front right corner of the centre square
    • LFP = Left forward pocket: the area inside forward 50 to the left of the left behind post
    • FF = Full back: the area inside forward 50 between the behind posts
    • RFP = Right forward pocket: the area inside forward 50 to the right of the right behind post
  • Result of drop. As far as I could tell there are 8 possible outcomes when the ball comes down:
    • Wins:
      • Contested mark (maybe you can have an uncontested mark if everyone falls over or something but...)
      • Free kick
      • Recovered (where nobody marks it but the kicking team regains possession at ground level and is able to dispose)
    • Neutral:
      • Ball up
      • Throw in
    • Loss:
      • Turnover (where nobody marks it but the defending team regains possession at ground level and is able to dispose)
      • Free kick against
      • Intercept mark
  • Result of subsequent chain: for the wins and losses above, what happened to the chain of possession starting with that first disposal, either from the mark/free kick/ground ball get. This is not relevant for the neutral ball situations. Possible outcomes (as far as I could tell):
    • Ball up
    • Throw in
    • Turnover (where the team who gained possession after the long kick subsequently lost it, whether by intercept mark or on the ground)
    • Goal
    • Behind
    • Siren (time expires mid-chain)

My first discovery: certainly in this game, there were a LOT. Way more than I realised watching the game live. In fact, the sheer volume by Carlton, indicated to me that they don't really have a great ball movement plan in their game. To 3 quarter time they had received 12 free kicks and taken 51 marks. That's 63 opportunities to move the ball from a stop-play situation. From those 63 events they kicked long down the line 40 times. That's 63%! I was staggered. Then in the last quarter, when they had to get on with it, they took 29 marks and got 3 free kicks. From those 32 opportunities they kicked long only 6 times. A drop to 19%.

On our part, our biggest struggles came in the first quarter, when we had 19 opportunities and were forced long down the line 9 times. Contrast that with our 2nd quarter when we had 32 opportunities and moved it long down the line only 4 times. The game is almost getting to the stage now where the movement patterns of players can be choreographed, where the space created for one player is dictated by the movement of several other players before that. We did that really well in the 2nd quarter especially.

We also scored really well when Carlton went long down the line, although they did it so much I guess it was bound to happen. Interesting to note that we scored 6-3 (39) from these plays, while Carlton scored 3-4 (22). That was about the final margin, so you could argue that outside of the ball movement of the two teams, there was not much between them.

Because of the granularity of data I haven't really spent much time reviewing the rest of my findings, except to say both teams lost possession more often than they won it. Which I guess makes sense - if teams maintained possession more often in long down the line situations, teams would be less reluctant to use it as a last resort. I guess the results of the possession chains etc would be more useful to see longer term trends. I've provided my raw data below though in case anyone wants to analyse it and maybe find a trend I've missed.

Summary:

1697936778141.png

Raw data:

QuarterTime remainingTeam in possessionLocation of kickKickerLocation of dropResult of dropPlayer with first disposalResult of chain
119:28CarltonLBPNick NewmanLWRecoveredSam WalshGoal
117:31CarltonRBPMitch McGovernRWContested markHarry McKayTurnover
117:20CarltonRWHarry McKayFFTurnoverBrandon StarcevichTurnover
115:42BrisbaneLBPBrandon StarcevichLWIntercept markTom de KoningThrow in
115:33CarltonRWTom de KoningRFPThrow inN/AN/A
114:42BrisbaneFBHarris AndrewsLWTurnoverBlake AcresThrow in
114:00BrisbaneLBPKeidean ColemanLWTurnoverNick NewmanGoal
112:48CarltonRHFHarry McKayFFTurnoverHugh McCluggageTurnover
112:03CarltonRWSam WalshFFRecoveredJesse MotlopTurnover
111:40BrisbaneLBPJaspa FletcherLHBRecoveredJarrod BerryThrow in
111:25BrisbaneLWEric HipwoodLFPThrow inN/AN/A
111:06BrisbaneLWRyan LesterLFPIntercept markMarc PittonetTurnover
110:52CarltonRBPMarc PittonetRWIntercept markOscar McInerneyTurnover
110:42BrisbaneLWOscar McInerneyLFPRecoveredLincoln McCarthyTurnover
110:06CarltonLHBMatt CottrellLWTurnoverDeven RobertsonTurnover
109:44CarltonLHBMitch McGovernLWBall upN/AN/A
109:03BrisbaneRWJaspa FletcherRHFRecoveredJoe DaniherThrow in
105:27BrisbaneRHBDeven RobertsonRWTurnoverSam WalshThrow in
104:37CarltonFBAdam SaadRWContested markHarry McKayThrow in
104:23CarltonRWHarry McKayRHFRecoveredJack MartinThrow in
100:26CarltonRWCharlie CurnowRFPTurnoverHarris AndrewsThrow in
219:43CarltonLWMitch McGovernLFPRecoveredHarry McKayBehind
219:29BrisbaneRBPConor McKennaRWContested markJosh DunkleyTurnover
219:12BrisbaneRWLachie NealeRHFRecoveredEric HipwoodTurnover
218:42CarltonRBPGeorge HewettLWTurnoverJosh DunkleyBall up
217:28BrisbaneLHBKeidean ColemanLWIntercept markCaleb MarchbankTurnover
217:12CarltonRWCaleb MarchbankRHFFree kick againstDarcy GardinerGoal
214:15CarltonRWPatrick CrippsRHFContested markJack MartinTurnover
212:59CarltonLWBlake AcresLHFFree kickHarry McKayTurnover
211:05CarltonLWAdam SaadLHFTurnoverJaspa FletcherTurnover
210:20CarltonLWCaleb MarchbankLHFFree kickTom de KoningBehind
210:02BrisbaneRBPDarcy WilmotLHBFree kick againstTom de KoningTurnover
209:55CarltonLHFTom de KoningFFTurnoverDarcy GardinerBehind
209:19CarltonFBAdam SaadLWTurnoverJaspa FletcherTurnover
209:05CarltonCSam WalshFFBall upN/AN/A
207:46CarltonLBP?LWTurnoverDeven RobertsonTurnover
207:26CarltonLHBAdam CerraLWTurnoverHugh McCluggageTurnover
206:59CarltonLHBNick NewmanLWBall upN/AN/A
205:27CarltonRHBSam DochertyRWTurnoverJosh DunkleyGoal
203:48CarltonLHBAdam SaadLWThrow inN/AN/A
201:10CarltonLBPAdam SaadLHBRecoveredMitch McGovernTurnover
200:21CarltonFBMitch McGovernLHBThrow inN/AN/A
318:31CarltonRWSam WalshRFPFree kickCharlie CurnowTurnover
317:57BrisbaneLBPKeidean ColemanLWRecoveredZac BaileyGoal
316:42CarltonFBMitch McGovernRWContested markPatrick CrippsTurnover
316:06BrisbaneRWCharlie CameronRFPRecoveredCam RaynerBehind
315:49CarltonRBPMitch McGovernRHBContested markHarry McKayTurnover
315:33CarltonRHBHarry McKayRWTurnoverKeidean ColemanThrow in
314:13CarltonLBPAdam SaadLHBRecoveredJesse MotlopTurnover
313:15CarltonRBPJacob WeiteringRWIntercept markRyan LesterThrow in
313:05BrisbaneLWRyan LesterLFPThrow inN/AN/A
312:45CarltonRHBHarry McKayRWContested markCharlie CurnowBehind
312:39CarltonRWCharlie CurnowFFRecoveredMatt CottrellBehind
312:13BrisbaneLBPJarrod BerryLHBThrow inN/AN/A
309:55BrisbaneRHFDarcy WilmotFFThrow inN/AN/A
308:11BrisbaneRWZac BaileyFFIntercept markTom de KoningTurnover
307:46CarltonLBPCaleb MarchbankLWRecoveredCharlie CurnowTurnover
306:45BrisbaneLBPJarrod BerryLWIntercept markMitch McGovernTurnover
305:14BrisbaneRHBJaspa FletcherRWThrow inN/AN/A
304:20CarltonLHBPatrick CrippsLWBall upN/AN/A
303:37CarltonCMarc PittonetFFIntercept markKeidean ColemanTurnover
303:11BrisbaneRWJaspa FletcherRWTurnoverMarc PittonetTurnover
300:13BrisbaneLBPDayne ZorkoLWRecoveredCam RaynerSiren
417:31CarltonLBPJacob WeiteringLWIntercept markHarris AndrewsGoal
417:19BrisbaneCEric HipwoodFFContested markLincoln McCarthyGoal
415:58BrisbaneRHFLachie NealeRFPRecoveredLincoln McCarthyTurnover
414:00BrisbaneLWJoe DaniherLFPRecoveredEric HipwoodBehind
411:59BrisbaneLHBJarrod BerryLWThrow inN/AN/A
408:05CarltonRWJesse MotlopRFPThrow inN/AN/A
407:47CarltonRWJacob WeiteringRFPTurnoverJarrod BerryThrow in
406:23BrisbaneLBPRyan LesterLWTurnoverAdam CerraBall up
404:52BrisbaneLBPDarcy WilmotRWThrow inN/AN/A
404:09BrisbaneRWJoe DaniherRFPIntercept markCaleb MarchbankTurnover
403:50CarltonRBPJacob WeiteringRHBIntercept markKeidean ColemanGoal
402:17BrisbaneRBPConor McKennaRHBFree kick againstCaleb MarchbankTurnover
402:08CarltonRWCaleb MarchbankRFPTurnoverLachie NealeTurnover
401:34CarltonFBJordan BoydCBall upN/AN/A
400:57BrisbaneRWLachie NealeRFPIntercept markNick NewmanGoal
 

Log in to remove this ad.

This just caught my eye. I'm not saying, I'm just saying... 🤷


Can’t say I’m surprised.

To me it often felt like we stopped and or happy to concede a lot of late goals and it was on full display in all quarters in the GF.

Is it fitness or mental. Disappointing for supposedly one of the better teams in the comp.
 
Some sleepy Sunday stats.

I wanted to have a look at long kicks down the line, from slow plays. I think it's a good measure for things like defensive intent, work rate in attack etc. I also don't think it is officially published, and if it is, I've never seen any of the numbers behind it.

I started with the Preliminary Final and hopefully I can bring myself to do the Grand Final because I think that will prove very illuminating. The whole process made me feel a bit for the assistant coaches who (I presume) have to go through and code up all the vision for their players. Even collecting this data, about essentially one facet of the game, was a bit of a procedure.

Obviously all of us probably have a good idea of what is a "long kick down the line". But when you go through this process you need a little bit more rigour around your definition, to account for grey areas which might (and did!) arise. So I guess my definition includes the following:

  • A free kick is awarded or a mark is taken.
  • The player prioritises gaining territory almost completely, over the goal of (a) maintaining possession or (b) scoring. (b) is important because it means I rule out kicks from 50-60m where the end result is a score.
  • The kick is more or less in a straight line to goal if at half back or ahead, or hug the boundary line anywhere on the field.
  • The player appears to have kicked his maximum distance (ie they haven't popped it up for someone to run onto it).
  • Kick ins are included where the player kicks long.
  • I probably have other criteria so this list may get edited in the future, but that is a good start for now.

I wanted to get a read on a number of things:

  • Location of kick - by zone
  • Location of drop - by zone:
    • LBP = Left back pocket: the area inside defensive 50 to the left of the left behind post
    • FB = Full back: the area inside defensive 50 between the behind posts
    • RBP = Right back pocket: the area inside defensive 50 to the right of the right behind post
    • LHB = Left half back: the area between defensive 50 and the back left corner of the centre square
    • CHB = Centre half back: the area between defensive 50 and the back edge of the centre square (this is only a tiny sliver of the ground so did not get used during the Preliminary Final)
    • RHB = Right half back: the area between defensive 50 and the back right corner of the centre square
    • LW = Left wing: the area to the left of the centre square
    • C = Centre: the centre square
    • RW = Right wing: the area to the right of the centre square
    • LHF = Left half forward: the area between forward 50 and the front left corner of the centre square
    • CHF = Centre half forward: the area between forward 50 and the front edge of the centre square (this is only a tiny sliver of the ground so did not get used during the Preliminary Final)
    • RHF = Right half forward: the area between forward 50 and the front right corner of the centre square
    • LFP = Left forward pocket: the area inside forward 50 to the left of the left behind post
    • FF = Full back: the area inside forward 50 between the behind posts
    • RFP = Right forward pocket: the area inside forward 50 to the right of the right behind post
  • Result of drop. As far as I could tell there are 8 possible outcomes when the ball comes down:
    • Wins:
      • Contested mark (maybe you can have an uncontested mark if everyone falls over or something but...)
      • Free kick
      • Recovered (where nobody marks it but the kicking team regains possession at ground level and is able to dispose)
    • Neutral:
      • Ball up
      • Throw in
    • Loss:
      • Turnover (where nobody marks it but the defending team regains possession at ground level and is able to dispose)
      • Free kick against
      • Intercept mark
  • Result of subsequent chain: for the wins and losses above, what happened to the chain of possession starting with that first disposal, either from the mark/free kick/ground ball get. This is not relevant for the neutral ball situations. Possible outcomes (as far as I could tell):
    • Ball up
    • Throw in
    • Turnover (where the team who gained possession after the long kick subsequently lost it, whether by intercept mark or on the ground)
    • Goal
    • Behind
    • Siren (time expires mid-chain)

My first discovery: certainly in this game, there were a LOT. Way more than I realised watching the game live. In fact, the sheer volume by Carlton, indicated to me that they don't really have a great ball movement plan in their game. To 3 quarter time they had received 12 free kicks and taken 51 marks. That's 63 opportunities to move the ball from a stop-play situation. From those 63 events they kicked long down the line 40 times. That's 63%! I was staggered. Then in the last quarter, when they had to get on with it, they took 29 marks and got 3 free kicks. From those 32 opportunities they kicked long only 6 times. A drop to 19%.

On our part, our biggest struggles came in the first quarter, when we had 19 opportunities and were forced long down the line 9 times. Contrast that with our 2nd quarter when we had 32 opportunities and moved it long down the line only 4 times. The game is almost getting to the stage now where the movement patterns of players can be choreographed, where the space created for one player is dictated by the movement of several other players before that. We did that really well in the 2nd quarter especially.

We also scored really well when Carlton went long down the line, although they did it so much I guess it was bound to happen. Interesting to note that we scored 6-3 (39) from these plays, while Carlton scored 3-4 (22). That was about the final margin, so you could argue that outside of the ball movement of the two teams, there was not much between them.

Because of the granularity of data I haven't really spent much time reviewing the rest of my findings, except to say both teams lost possession more often than they won it. Which I guess makes sense - if teams maintained possession more often in long down the line situations, teams would be less reluctant to use it as a last resort. I guess the results of the possession chains etc would be more useful to see longer term trends. I've provided my raw data below though in case anyone wants to analyse it and maybe find a trend I've missed.

Summary:

View attachment 1837507

Raw data:

QuarterTime remainingTeam in possessionLocation of kickKickerLocation of dropResult of dropPlayer with first disposalResult of chain
119:28CarltonLBPNick NewmanLWRecoveredSam WalshGoal
117:31CarltonRBPMitch McGovernRWContested markHarry McKayTurnover
117:20CarltonRWHarry McKayFFTurnoverBrandon StarcevichTurnover
115:42BrisbaneLBPBrandon StarcevichLWIntercept markTom de KoningThrow in
115:33CarltonRWTom de KoningRFPThrow inN/AN/A
114:42BrisbaneFBHarris AndrewsLWTurnoverBlake AcresThrow in
114:00BrisbaneLBPKeidean ColemanLWTurnoverNick NewmanGoal
112:48CarltonRHFHarry McKayFFTurnoverHugh McCluggageTurnover
112:03CarltonRWSam WalshFFRecoveredJesse MotlopTurnover
111:40BrisbaneLBPJaspa FletcherLHBRecoveredJarrod BerryThrow in
111:25BrisbaneLWEric HipwoodLFPThrow inN/AN/A
111:06BrisbaneLWRyan LesterLFPIntercept markMarc PittonetTurnover
110:52CarltonRBPMarc PittonetRWIntercept markOscar McInerneyTurnover
110:42BrisbaneLWOscar McInerneyLFPRecoveredLincoln McCarthyTurnover
110:06CarltonLHBMatt CottrellLWTurnoverDeven RobertsonTurnover
109:44CarltonLHBMitch McGovernLWBall upN/AN/A
109:03BrisbaneRWJaspa FletcherRHFRecoveredJoe DaniherThrow in
105:27BrisbaneRHBDeven RobertsonRWTurnoverSam WalshThrow in
104:37CarltonFBAdam SaadRWContested markHarry McKayThrow in
104:23CarltonRWHarry McKayRHFRecoveredJack MartinThrow in
100:26CarltonRWCharlie CurnowRFPTurnoverHarris AndrewsThrow in
219:43CarltonLWMitch McGovernLFPRecoveredHarry McKayBehind
219:29BrisbaneRBPConor McKennaRWContested markJosh DunkleyTurnover
219:12BrisbaneRWLachie NealeRHFRecoveredEric HipwoodTurnover
218:42CarltonRBPGeorge HewettLWTurnoverJosh DunkleyBall up
217:28BrisbaneLHBKeidean ColemanLWIntercept markCaleb MarchbankTurnover
217:12CarltonRWCaleb MarchbankRHFFree kick againstDarcy GardinerGoal
214:15CarltonRWPatrick CrippsRHFContested markJack MartinTurnover
212:59CarltonLWBlake AcresLHFFree kickHarry McKayTurnover
211:05CarltonLWAdam SaadLHFTurnoverJaspa FletcherTurnover
210:20CarltonLWCaleb MarchbankLHFFree kickTom de KoningBehind
210:02BrisbaneRBPDarcy WilmotLHBFree kick againstTom de KoningTurnover
209:55CarltonLHFTom de KoningFFTurnoverDarcy GardinerBehind
209:19CarltonFBAdam SaadLWTurnoverJaspa FletcherTurnover
209:05CarltonCSam WalshFFBall upN/AN/A
207:46CarltonLBP?LWTurnoverDeven RobertsonTurnover
207:26CarltonLHBAdam CerraLWTurnoverHugh McCluggageTurnover
206:59CarltonLHBNick NewmanLWBall upN/AN/A
205:27CarltonRHBSam DochertyRWTurnoverJosh DunkleyGoal
203:48CarltonLHBAdam SaadLWThrow inN/AN/A
201:10CarltonLBPAdam SaadLHBRecoveredMitch McGovernTurnover
200:21CarltonFBMitch McGovernLHBThrow inN/AN/A
318:31CarltonRWSam WalshRFPFree kickCharlie CurnowTurnover
317:57BrisbaneLBPKeidean ColemanLWRecoveredZac BaileyGoal
316:42CarltonFBMitch McGovernRWContested markPatrick CrippsTurnover
316:06BrisbaneRWCharlie CameronRFPRecoveredCam RaynerBehind
315:49CarltonRBPMitch McGovernRHBContested markHarry McKayTurnover
315:33CarltonRHBHarry McKayRWTurnoverKeidean ColemanThrow in
314:13CarltonLBPAdam SaadLHBRecoveredJesse MotlopTurnover
313:15CarltonRBPJacob WeiteringRWIntercept markRyan LesterThrow in
313:05BrisbaneLWRyan LesterLFPThrow inN/AN/A
312:45CarltonRHBHarry McKayRWContested markCharlie CurnowBehind
312:39CarltonRWCharlie CurnowFFRecoveredMatt CottrellBehind
312:13BrisbaneLBPJarrod BerryLHBThrow inN/AN/A
309:55BrisbaneRHFDarcy WilmotFFThrow inN/AN/A
308:11BrisbaneRWZac BaileyFFIntercept markTom de KoningTurnover
307:46CarltonLBPCaleb MarchbankLWRecoveredCharlie CurnowTurnover
306:45BrisbaneLBPJarrod BerryLWIntercept markMitch McGovernTurnover
305:14BrisbaneRHBJaspa FletcherRWThrow inN/AN/A
304:20CarltonLHBPatrick CrippsLWBall upN/AN/A
303:37CarltonCMarc PittonetFFIntercept markKeidean ColemanTurnover
303:11BrisbaneRWJaspa FletcherRWTurnoverMarc PittonetTurnover
300:13BrisbaneLBPDayne ZorkoLWRecoveredCam RaynerSiren
417:31CarltonLBPJacob WeiteringLWIntercept markHarris AndrewsGoal
417:19BrisbaneCEric HipwoodFFContested markLincoln McCarthyGoal
415:58BrisbaneRHFLachie NealeRFPRecoveredLincoln McCarthyTurnover
414:00BrisbaneLWJoe DaniherLFPRecoveredEric HipwoodBehind
411:59BrisbaneLHBJarrod BerryLWThrow inN/AN/A
408:05CarltonRWJesse MotlopRFPThrow inN/AN/A
407:47CarltonRWJacob WeiteringRFPTurnoverJarrod BerryThrow in
406:23BrisbaneLBPRyan LesterLWTurnoverAdam CerraBall up
404:52BrisbaneLBPDarcy WilmotRWThrow inN/AN/A
404:09BrisbaneRWJoe DaniherRFPIntercept markCaleb MarchbankTurnover
403:50CarltonRBPJacob WeiteringRHBIntercept markKeidean ColemanGoal
402:17BrisbaneRBPConor McKennaRHBFree kick againstCaleb MarchbankTurnover
402:08CarltonRWCaleb MarchbankRFPTurnoverLachie NealeTurnover
401:34CarltonFBJordan BoydCBall upN/AN/A
400:57BrisbaneRWLachie NealeRFPIntercept markNick NewmanGoal
Old news now but I did go back and review long kicks down the line in the Grand Final, with a bit of expanded analysis:

1709117797090.png

Surprisingly, the number of long kicks down the line were similar, at 30 to 31, and 25% of the time to 24%. I thought we had done it much more than Collingwood throughout the game, but interestingly, Collingwood did it 10 times in the last quarter, when they held the lead for most of it.

To me the most telling stat is the bottom line: Net turnover %. This is the % of the time each team turned the ball over when they DID NOT go long down the line. Collingwood turned it over just 12% of the time: We simply could not get the ball off them. On the other hand, we turned it over 18% of the time - 50% more often.

By contrast, the turnover rate from long kicks down the line was 37% and 32% - much higher, and explains teams' reluctance to do so, using it these days mainly as a last resort.

Also, total scoring from long kicks down the line were 21-14 in favour of Collingwood. Like the Prelim Final, this was about the final margin as well.


I also did the Qualifying Final vs Port. What immediately jumps off the page to me is how relatively few there were, particularly by Port. This probably equates with our recollection of what was a pretty free flowing game:
1709118401799.png

We can see from this that long kicks down the line resulted in turnovers 60% of the time for us and 55% of the time for Port - much higher than in the Grand Final. But on the other hand Port turned it over more often (20% of the time) from other phases of play.

I found it interesting that Port went long down the line far less often than we did, but still ended the game with more turnovers, and obviously an 8 goal defeat. To me this indicates that recording only the number of long kicks down the line is limited in value, whereas value can be gleaned from learning what happens after that kick, which is what I've attempted to uncover here.

Instructively, scoring from long kicks down the line (by both teams) favoured us 26-7, contributing 40% of the final margin from only 8% of the game's total disposals.


My final observation is that across our 3 finals, we went long down the line 30, 32 and 31 times. We were nothing if not consistent!


I have the raw data from both these games if anyone would like access to it, but have kept them out of this post to try to keep it a bit shorter. I'll endeavour to do this for our games in 2024, time permitting!
 
Looking at our quarters won and clearly we have a second half issue.

To date we are 45 goals (1Q = 27 and 2Q = 18) to our oppositions 33 (1Q = 19 and 2Q = 14) with a win loss of quarters being W9 / L5.

Compare that to the second half:

To date we are 27 goals (3Q = 9 and 4Q = 18) to our oppositions 48 (3Q = 26 and 4Q = 22) with a win loss of quarters being W3 / L9 / D2.

Fitness or something else?
 

Remove this Banner Ad

Back
Top